Guide developed and supervised by: Fibiko (Steam) Contributors: RjBoss08 (Switch), Spectator (Steam), HugePollution/Doc (Xbox), Zyos_Zett (Steam), Thorn Maiden (Steam)
Last Update: Somewhere in Season 15
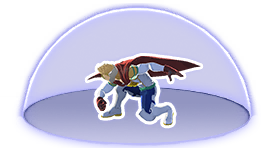
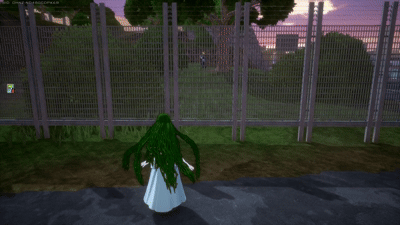
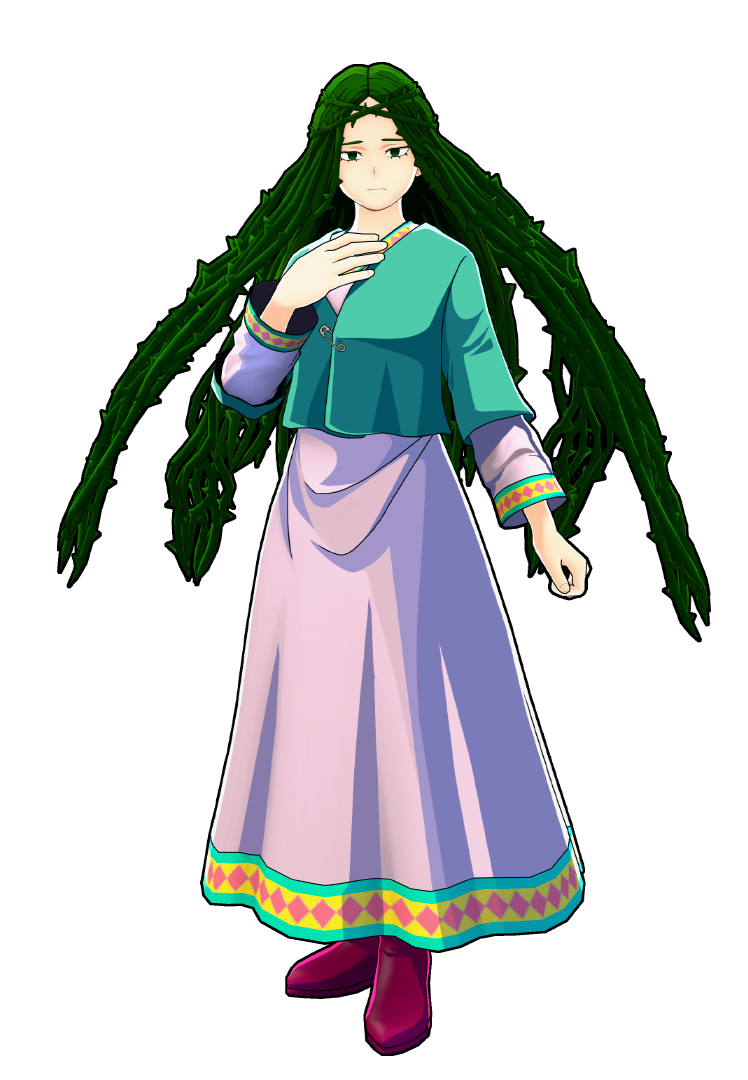
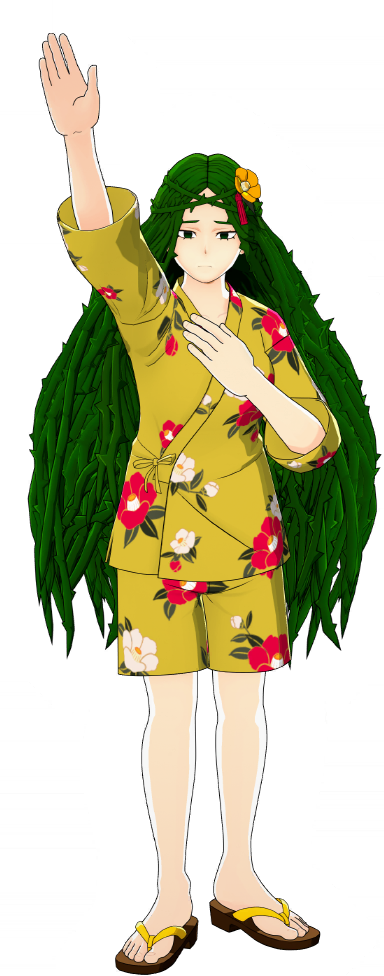
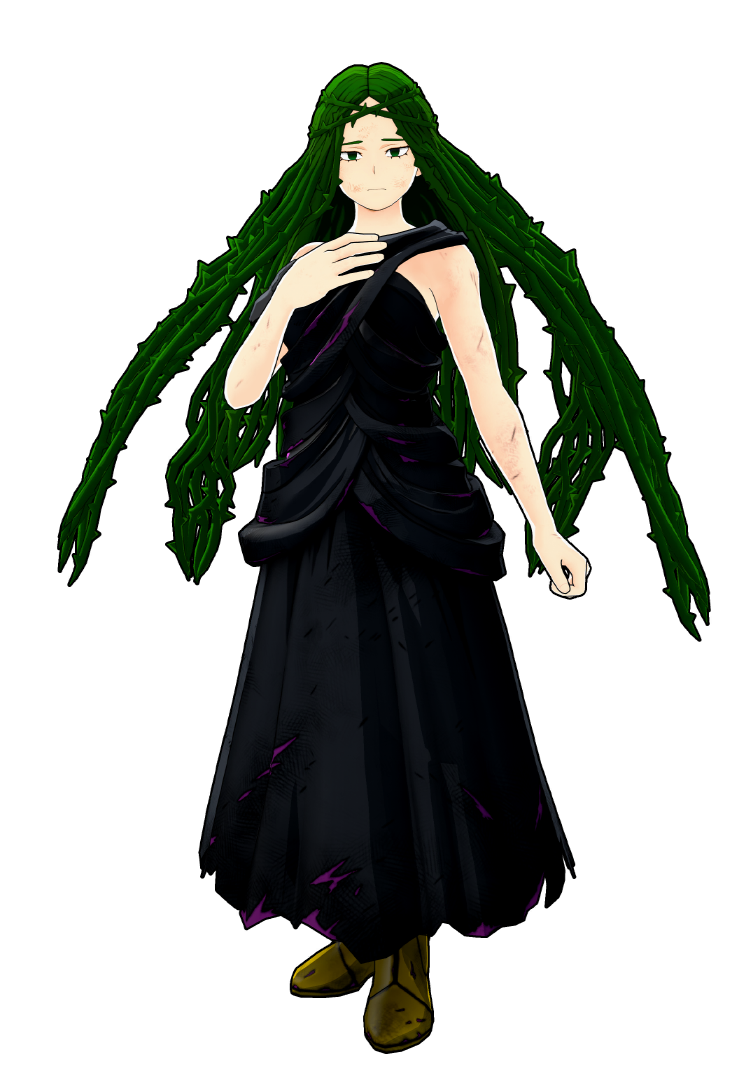
Ibara is a support-class character with a unique twist: she usually operates like a heavy sniper. Your objective is to keep enemies away from you and your team using your Alpha ability, hold key positions on the map, and turn the tide of battle with instant revives.
As a key member of your team, and a non-mobility character, you will often be targeted by enemies, but with your large HP pool and high close-range Beta damage, you have every chance to stand your ground against even the strongest characters in the game.
Best Map: Chaos City
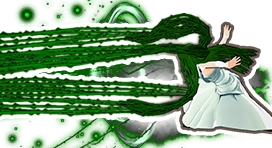
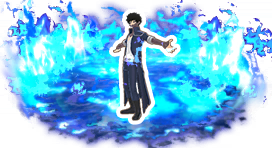
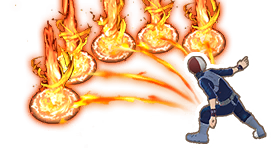
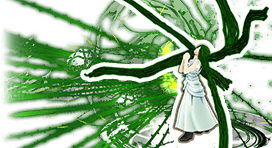
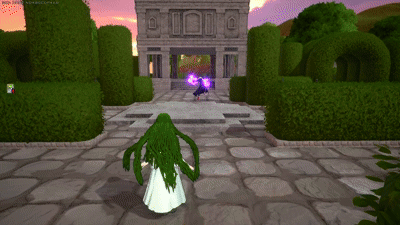
Alpha Skill - Purification
Ibara's Alpha skill is a truly unique and powerful long-range attack. This ability features two firing modes: un-aimed and aimed.
The attack's uniqueness lies in the short-lived residual effect it leaves behind. Any enemy who steps or flies into it takes the full damage of the Alpha ability.
Un-aimed Mode
In un-aimed mode, Ibara will spread her vines across a wide area with okay range, however, this version is significantly less likely to hit enemies, partly due to the gaps between each of her vines, and it's highly discourage to use this version of alpha against aerial targets, as the spread doesn't help much. This version is excellent for controlling chokepoints like doors and stairways, denying areas in rooms, or exposing enemies hiding in smoke or bushes, so for these situations un-aimed mode should be used.
Aimed Mode
Most of the time, your focus should be on the aimed mode rather un-aimed. In this mode, Ibara will fire a concentrated vine shot that deals high damage and has much longer range than her un-aimed version, and is also both ideal to hit air targets and a significantly more reliable version. Furthermore, two ticks of the alpha ability are guaranteed to knock enemies back, allowing you to maintain a safe distance, prevent an enemy from escaping, or shake a threat off your teammate.
If you catch an enemy mid-air with aimed alpha and hit on health (or guardbreak), if you're fast enough and they recover slow you can land a well placed follow-up alpha.
Barrier Piercing
A crucial feature of Ibara's Alpha is its ability to pierce through enemies and many of their defensive mechanisms. This allows it to damage multiple opponents in a line, even if they are protected by shields. Below there is a list of skills that Ibara's Alpha can pierce through.
It's important to remember that some defensive mechanisms are considered terrain and cannot be pierced by Ibara's Alpha. These include all of Cementoss's structures, Shoto Todoroki's ice walls and icicles, Momo's shield in deployed state, and Full Bullet’s Gamma. When colliding with these obstacles, Ibara's Alpha will attempt to move around them or over them, following the same rules as with any map geometry.
Mastering your Alpha: Feel The Flow
Ibara's Alpha is a finicky yet fascinating ability with incredibly diverse interactions with map terrain. Unleash your imagination and head into training mode. Start shooting at everything you see and observe the Alpha's behavior. It is far from intuitive, especially for a new player. Below are examples of some of the most common interactions.
Trajectory Thinking
A vital step towards fully mastering Ibara's Alpha is to start thinking in terms of its trajectory. Recall how you play other characters. Most often, a character's Alpha skill is a projectile resembling a sphere—a single point that must directly connect with an enemy's hitbox.
With Ibara's Alpha, however, you are not firing a point, but an entire line that persists in the air for a short time. Simply put, you don't need to aim directly at the enemy's model. It's often enough to shoot at their feet, and the Alpha will extend to reach them. If an enemy is climbing a wall, you can shoot at its base. If they are flying through the air, you can create a barrier in their path that they will fly into.
Accept the Randomness
Ibara's Alpha can be random. This is barely visible in aimed mode but you can clearly see it in un-aimed mode. Randomness causes unintended behavior that is simply beyond your control. Sometimes it favours you, sometimes it doesn’t.
Value your ammo
Even at level 9, Ibara only has 4 Alpha charges. At level 1, she has a mere 2. Every shot is a chance to deal up to 160 damage (depending on your level) and knock an enemy back. Every miss leaves you vulnerable and allows enemies to close the distance.
The cost of any mistake on a low-mobility character is incredibly high. Treat every miss as a significant mechanical error. Dedicate yourself to training your accuracy and constantly improving. Most importantly, avoid situations where you spend all your Alpha charges in the heat of battle and are left with none.
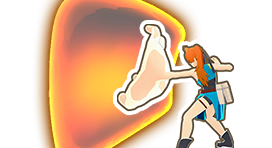
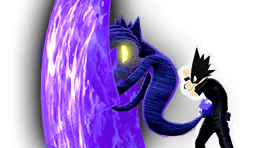
Beta Skill - Via Dolorosa
Ibara's Beta skill lets loose a wide blast of vines, knocking down any opponent that gets in its range. This ability has tracking, but sometimes its behavior can be unpredictable at extra close range.
The blast from the Beta consists of three zones. The central zone of the blast goes the farthest and deals up to 60 damage. The vines from the central zone can also bounce off surfaces. Another two areas are located to the left and to the right of your character. They don’t bounce and have shorter range, but deal slightly more damage. If your enemy is close enough, all three zones will add up, resulting in very high damage. Note that hitting an enemy with at least two zones is required to inflict a hard knockdown. However, enemies with Super Armor will only be knocked if they are hit by all three zones simultaneously.
This move grants Super Armor, significantly reducing the chance you'll be interrupted during its animation. This allows you to effectively trade damage with opponents. A well-timed Beta will knock your enemy down while you remain standing, creating a huge advantage to catch their wake up.
This is a great counter in most melee engagements, stopping aggressors that try to flank and catching anyone that tries to flee. This ability is especially effective in choked areas. Keep in mind that your Beta is also an excellent wake up catching tool. Its lingering hitbox and devastating damage melts impatient players who don’t take full advantage of their i-frames, which is typical for a certain list of high-mobility characters.
Gamma Skill - Crucifixion
Crucifixion is a grab that deals damage directly to the target's HP, bypassing their GP. Its main weakness is its extremely short range, making it difficult to land. Upon a successful grab, Ibara deals 7 ticks of HP damage for a decent amount of damage. On the eighth tick, she throws the enemy away, dealing a final burst of damage based on the ability's skill level. This skill also has a unique property that makes it so that the skill is only consumed when catching an enemy with it, as missing it will not consume your gamma charge. Landind a succeful gamma allows you to heal yourself in 1:1 ratio with the damage you are dealing. It heals HP first, but once your HP is full, healing goes to your GP. This property may come in a clutch and save your life, but most of the enemies won't let themselves be caught due to their superior mobility and short range of the gamma skill.
A significant downside of this move is that Ibara remains completely stationary for the entire animation, making her an easy target. However, the grab can be canceled early. While this will sacrifice some damage ticks, it allows you to land the final throw and, most importantly, free yourself from the vulnerable state much sooner. Remember, Ibara's Gamma grants her Super Armor, which means she doesn't flinch from attacks but will still absorb all the incoming damage, often leading to her taking more damage than usual during the animation.
Another major downside is random teammates. When your allies see you holding an opponent in your grasp, they want to capitalize on it and will often knock your enemies from your grasp much earlier than intended resulting in a loss of the final and most damaging hit of the Gamma and making the levels you invested into it go to waste.
Despite previous criticism, Gamma ability is still a very strong tool in the hands of skilled players. It can be used as an alternative wake-up punisher and, with the right tuning build, can even one-shot certain characters. Moreover, it’s a great tool against enemies in Plus Ultra state, since they might be low on HP. However, utilizing it effectively demands strong game sense, match-up knowledge, and precise timing.
If you are a new player and don’t feel confident in your Gamma, don’t force it, this skill is very punishable. The feeling will come naturally as you learn the character. Another effective tactic for using your Gamma is to lure enemies around a corner and catch them as they chase you. This strategy is especially deadly if you manage to catch someone in the storm.
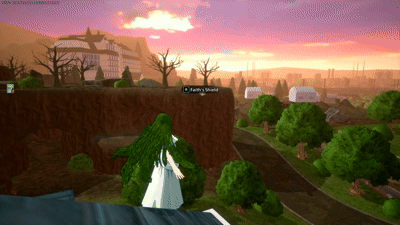
Special Action - Faith's Shield
Ibara's Special Action is an incredibly powerful ability and her true killer feature. She carries two instant revives with a pretty long range. Using this ability wisely can single-handedly turn the tide of a battle, which is why you will constantly be the primary target for other teams. To revive an ally, you do not require a direct line of sight; the ability works through walls and other obstacles, even if you or your teammate are in the air. Using this ability mid-air will stop you from falling for a moment.
Pressing a PU reloads both of your SpA charges instantly, so sometimes it worth it to use your Plus Ultra even if you're not in direct threat, but you desperately need to revive your downed allies.
It’s crucial to feel the range of this ability. Despite its long range, teammates tend to scatter around, and sometimes, they can get too far from you. Make sure to close range with your ally before they get DOWNed.
Basic Attacks
Ground Melee
A simple 3-hit melee chain. Despite having a deceitfully wide-looking slash, Ibara slows down before every attack, so the range on these is too short to be used reliably. Ibara prefers using her Beta and Gamma skills to repel close-range aggression. Despite being an unreliable tool, Ibara has several niche combos that start off her melees. They will be described later.
Air Melee
A single slash with thorny hair. It is slightly more reliable than her original ground melee chain because this is literally the only skill in Ibara’s kit that doesn’t slow her down.
Leveling Paths
Alpha Level 4 is a must
Your combat potential before reaching Alpha level 4 is incredibly low. With only two charges, you will often be useless in fights. That third charge, along with the extra range and larger projectile size, is crucial for your consistency. Remember, you start the game with two revives. Sometimes, the correct play is to let a teammate be downed so you can secure the early levels you desperately need, just make sure you’re close enough to save them. Getting drawn into early battles can leave you under-leveled, and failing to hit Alpha level 4 will have severe, long-lasting consequences for your entire match. Landing on an uncontested golden box to secure your loot is a good strategy to hit your Alpha level 4 ASAP.
Balanced Path A
This is a balanced build path. After getting Alpha to level 4, proceed to upgrade Beta to level 4. The level 1 Beta has a very small range, which leaves you vulnerable to close-range aggression. Securing Beta level 4 allows you to protect yourself much more effectively. Afterwards, prioritize Alpha level 9 to become a formidable long-range fire support.
Balanced Path B
This is another viable path, focused on close-quarters combat and zone control. The level 9 Beta is an incredibly strong, nuke-like attack that melts your enemies and is excellent for catching opponents on their wake-up. You should use this path if there are a lot of melee threats in your lobby, or if you are forced inside a building during the final circles of a match.
Balanced Paths Tip
If you are not confident in your playstyle and don't know which path to choose, let random guide you. Get to a4 → b4 first, and then start saving your upgrade cards in your inventory. Both level 9 skills provide a significant power spike. You will eventually find your Alpha and Beta cards, and your teammates might even bring you some.
You should use your universal cards (Level-Up Cards) right before a fight to secure key levels first. For example, let's say you have Alpha level 5 and Beta level 8 before a fight and only 3 universal cards. Use them to get that Beta level 9 and invest any remaining cards into your Alpha before you engage.
Sniper Path
Sniper path is viable for experienced players in a coherent team if they trust their aiming abilities. The downside of this path is that you’re leaving yourself vulnerable to close range threats and give up on catching your enemies on wake up.
On the other hand, you receive a significant range and projectile size boost earlier in the game. Your alpha is a great third-partying tool and a great fire support for your teammates. It disrupts your opponent's moves and prevents them from escaping, which makes this path especially good for snowball tactics if your teammates are competent.
Space Hop users may prefer this path over balanced paths because high jump allows you to evade some close-ranged threats even in open areas and provide you with unexpected, long angles to shoot.
Why don't we recommend level up Gamma?
Gamma is a high-risk, high-reward tool. Missing it leaves you completely vulnerable. Furthermore, leveling up Gamma only increases its release damage. In many situations, your teammates can knock the enemy out of your grasp, causing you to miss out on that key source of damage entirely.
While its purpose is to punish close-range aggression, your Beta ability is a more reliable and consistent tool that fully covers this need without the same associated risk. Gamma vampirism may make it look alluring, but the consitency of this skill still severely lacks.
Techs
Air Stalling
All your moves lock you in place and stops you from falling. If you find yourself high in the air, you can delay your falling by shooting your Alpha or spamming your Gamma. Gamma skill has a very short cooldown if it doesn’t catch anyone.
Safe Shooting
If Ibara is standing behind a fence or a similar obstacle, her hair may go over said obstacle and hit your opponents behind it, while they can’t directly attack you back. It works best with un-aimed mode, but happens with both. Another safe shooting trick is to shoot from above building entrances.
Split Shooting
Firing your un-aimed Alpha at corners or doorways will cause it to split, dealing damage to both sides of the obstacle. You can also split your aimed Alpha, but it’s hard to control and affects a much smaller area. Another niche interaction is 180 split. Face the wall and fire down on the floor without aiming. Your alpha will attack both ways.
Combos
The different ways you can combine and chain various skills for higher damage within 500 DP (Downpower). The downpower of Ibara's abilities are as follows:
The text of the combos below will be colored by how true they are, in this case, we will define as "True" combos that, without 3rd party or tuning interference, can only be escaped/interrupted by Overhaul and/or Mirio, as those are special cases.
White Text means that part of the combo is True on both GP and HP. Green Text means that part of the combo is True if the target is on HP only. Blue Text means that part of the combo is True if the target is on GP only (Guardbreak hits are considered GP hits). Red Text means that part of the combo is Untrue, and therefore the enemy can escape it.
Another niche combo to add 25 damage to your beta if the situation is right. This combo allows you to deal 236 damage, but most of the time, you’d rather not risk missing a melee.
Air Melee -> Melee 1 -> Alpha (Aimed)
A very niche combo that is worth using only in a situation, where you don’t have your beta. It’s much harder to land, but the damage is very similar. Allows you to deal damage above beta's up close.
Air Melee -> Gamma
A highly dangerous combo that combines high damage with target control. It locks an enemy in place to deal 295 damage before tuning, with 225 of it going straight to HP, ignoring shields.
Melee 1 -> Melee 1 -> Melee 1 -> Melee 1 -> Gamma
This is another combo based on a similar principle. It locks the opponent in place for an even longer duration, dealing 325 total damage. However, it only works reliably in an isolated 1v1 scenario. Keep in mind that landing a ground melee could be harder than air melee.
Air Melee 1 -> Melee 1 -> Melee 1 -> Gamma
This is a less reliable version of the previous combo. While it deals 50 extra damage, it's trickier to execute. You must use your air melee close to the ground to have enough time to land and follow up with two basic melee attacks. Be careful not to knock the enemy too far away, and ensure they don't land on higher ground. If you're uncertain about the timing, simply use your Gamma ability before the basic attacks to guarantee the combo.
Positioning
As a non-mobility character, you don’t have the luxury of switching your positions too often. Remember, Ibara is a very high risk character that does not forgive your mistakes. That is why even one poor positioning decision may completely ruin your game, no matter how successful it was before.
Secure the High Ground
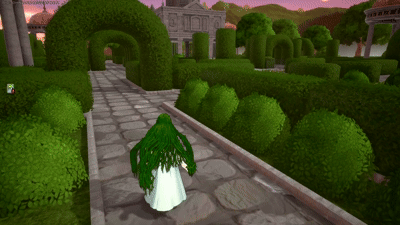
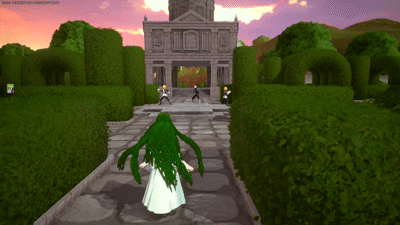
Holding the high ground is vital for Ibara. It provides a clear view of the battlefield, allowing you to snipe players more consistently. Furthermore, it helps you analyze the situation, understand potential dangers, possible engagements, and maintain better overall control of the fight. A particularly good kind of high ground is a rooftop of the building, you can possibly enter if someone forces you to retreat.
Secure the Buildings
Ibara's Beta and Gamma thrive in tight spaces, which is why luring enemies into a building is a highly effective tactic. With strong area control abilities like her Beta and unaimed Alpha, she can hold buildings well enough. Making a safe spot for your team is incredibly useful, especially in the final circles when the battlefield turns completely chaotic. From this secure position, you can also consume support drinks or use your special action to safely revive teammates outside the building.
Ibara is usually heavily targeted in last circles, and staying inside the building is a good strategy for surviving and making your special action useful. However, avoid being completely passive. If you lack support drinks or revives, you should actively seek for safe engagements and poke opponents whenever you have an opportunity.
Play on the edge
Whenever possible, you should play around cover. However, if no cover is accessible, position yourself on the edge of the poison mist. Staying away from the center statistically reduces your chances of being spotted and targeted, which is especially effective when your team is drawing attention at the front.
Even if you are targeted, you always have the option to retreat into the poison. As a 400 HP character, Ibara can survive in the mist much longer than most. Players are reluctant to chase into the zone, but if they do, your deadly Beta and Gamma are perfect punishing tools. Your Gamma deals damage directly to HP, which synergizes devastatingly with the poison effect.
Teamplay
Ibara is the most team-reliant character in the game. Your Special Action is incredibly valuable and has the potential to flip the outcome of any battle. However, to utilize this fully, you need a coherent team.
This is naturally easier with a pre-made group, but that doesn't mean you can't build effective synergy with random players. It will require more effort and communication on your part, but the payoff is well worth it.
In-game Leadership
As a low-mobility character, your matches typically involve less mechanical intensity, and engaging in fights takes more time. This provides you with a unique opportunity to think strategically and analyze the match on a deeper level than most. Furthermore, as a support character, you are naturally more invested in building a coherent team than any other player.
These two advantages grant Ibara significant In-Game Leader (IGL) potential. Therefore, instead of complaining about teammates, take the initiative to forge effective teamplay with your own hands, using the tips listed below.
Stay Vocal
In a random queue, you have limited time to build relations with your teammates. Fully stock your emotes and voicelines wheels, and use them actively—greet your team at the start, praise them for a good play, or apologize if you cannot revive them. This may seem like a small gesture, but it makes your teammates acknowledge your presence and demonstrates your willingness to cooperate.
In the heat of the battle, players tend to forget about their team. By interacting with them more, you encourage them to pay better attention to your calls and needs.
Pings
Pings are the most essential tool for sharing information, and you cannot afford to neglect them. Ping everything—from enemy positions to potential looting spots. Always answer your teammates' pings, and remember to use the negative option when necessary.
Most importantly, do not hesitate to call for help immediately. As a character with no mobility or escape options, you cannot afford to wait until a situation becomes dire. The moment you feel at a disadvantage, drop an SOS ping. You will be surprised how often teammates will respond to a call for help.
Another crucial ping is “Group up”. A lot of players tend to panic on low health, they will try to escape the battle and will often run away from you, leaving the range of your revive. In these moments, ping the ground at your feet to signal that you can save them if they regroup on your position. Furthermore, use the "Group Up" ping to guide your team's positioning. If you see a good building to occupy or a rooftop to hold, mark it to let your teammates know you want to hold it.
Prioritize Saves Over Kills
If you are an active member of any MHUR-related community, you have likely heard that Ibara requires protection from her teammates. Is this true? Yes, but not in the way most players imagine.
You do not need a literal bodyguard shadowing your every move. What you truly need is a team that remains alive and combat-ready—one that actively controls space and draws enemy attention away from you.
Ibara is only as strong as her enemies allow her to be. Every living teammate creates much needed strategic space for you, regardless of their' individual skill. The moment your teammates fall, you become the primary target, inevitably leading to you being overwhelmed or forced into a passive, defensive playstyle. Trading your teammates for kills is never a positive trade for you.
Decision-making
Backline fire support.
In an ideal engagement, you should be the last one to join the fight. This allows you to maintain a safe distance, secure a superior position on high ground, and use your Alpha's knockdown to provide fire support while your teammates draw enemy attention. The knockdown from your Alpha also serves as a valuable combo-breaking tool, effectively shutting down characters like Shinso or Iida to save your allies.
This supportive role extends to covering a retreat. If the fight turns and your teammates attempt to disengage, pursuing enemies become perfect targets for you to hinder. By slowing the chase, you defend your teammate, giving them crucial time to recover and rejoin the fight. In this scenario, you typically hold the advantage, as your previous safe positioning means you are likely undamaged and ready to counter-attack.
Rez botting
Your Special Action is your most valuable tool, and you can't afford to die without using it effectively. If you find yourself in a poor condition to fight—whether due to low HP, lack of healing, or being under-leveled—do not force it. Instead, retreat to a safe location, recover, and focus on reviving your teammates. Remain hidden until you've used both charges or the circle forces you to move.
Do Not Allow a Team Wipe
In a critical, no-escape situation, always prioritize saving your teammates over yourself. As a low-mobility character, your chances of survival are minimal once you are surrounded and low on health. Most of your teammates, however, possess decent mobility. If a team wipe is imminent, focus on helping them escape, as they have a far better chance of surviving.
However, if your team is failing a fight but you still have a chance to safely disengage, you must consider it. Try to abandon the fight and go for the respawn cards while they are still uncontested and outside the poison mist. This tactic is most applicable in the early circles, typically when only one teammate is still standing and under heavy focus.
Use Their Thirst to your Advantage
Public perception often labels Ibara as a weak character, but this thought is deceptive. While many of her deaths result from poor positioning, being focused, or unfavorable circles, she holds her own remarkably well in a 1v1 scenario. Your opponent knows about your instant revives and lack of mobility, but it doesn't guarantee them a victory.
The key is to control the terms of the engagement. Lure them into a disadvantageous position, such as inside a building or within the poison mist. They will often pursue, giving a perfect opportunity for a free Beta or Gamma. If you successfully catch their wake-up afterwards, you will likely kill your opponent.
Heal-baiting
A useful tip for any character, but especially good for Ibara is heal bating. When you knock down an opponent, you have a small safe window, while they're recovering. Since both your Beta and Gamma are good for catching wake-ups, you really want to be successful with it. However, experienced players know the importance of i-frames, and won’t let you catch them. But even the most experienced players can lose their temper. When you knock down your enemy, start drinking a small healing potion. It will make you look vulnerable, but in fact, healing cancels into your Beta and Gamma instantly. Many players would try to capitalize on your seemingly vulnerable state, which will only lead to falling into your Beta or Gamma.
Reinforced Revive The best in slot tune that allows Ibara to replenish the shields of revived allies. Unlike Cementoss and Kurogiri, Ibara can’t provide safety to revived allies. Reinforced Revive usually makes the critical difference between your ally surviving or being immediately downed again.
Space Hop This tune gives Ibara much needed vertical mobility and allows her to shoot from unexpected angles. It helps her to take high ground and air stall effectively. Keep in mind that you can cancel it with an air melee.
Wall Runner A Space Hop alternative that is slightly better for escapes, and maneuvering in dense terrain. However, it performs worse on flat and open areas. It is also less effective as an alpha set-up tool.
Critical Permeation This tune does not fix your mobility issues. However, as Ibara, you will often be targeted by the opponents. Having a 7 second break can be a key to surviving the encounter, crossing a dangerous area and securing a more advantageous position.
Quirk Factor Release All your abilities are heavy-hitters which make you break the shields of your enemies frequently enough to take full advantage of this tune. It significantly speeds up your Alpha and Beta reload, and also reduces the cooldown of your special action.
Revenge Technical An overall solid option that lets you use your abilities more frequently, especially critically dangerous situations. It also speeds up your Special Action's cooldown, providing an additional boost.
Special Action Reload Boost A rather niche tune that significantly boosts your Special Action reload speed. However, meeting its activation conditions can be quite challenging if you aren't good enough at Ibara.
Extra Wind Having additional PU charges is extra valuable to Ibara beacause it restores both of her revives and allows quadruple Reinforced Revive on certain costumes. Extra Wind allows you access to your first PU before the fight, so you will havr all four revives ready in case it goes badly. Troughout the match, build your PU charge by managing cards and Tuning's cooldown. Level up your gamma last strictly for PU gain.
Recommended Builds and Costumes
Casual Wear (Fancy)
This outfit's key feature is the ability to run Reinforced Revive and Wall Runner simultaneously,
which
is a massive boost to Ibara's effectiveness on its own. On top of that, it comes with very flexible
standard tuning slots. The abundance of Strike slots also provides a noticeable increase to her
overall
damage output. It also fits all “Special Action Reload+” normal tuning slots in it.
Festival Yukata (Heat)
This costume enables the powerful combination of Reinforced Revive and Space Hop. While it may lack
in
Strike slots, Space Hop itself compensates by providing superior positioning and unique sniping
angles.
Furthermore, the build is highly flexible, capable of accommodating all three "Special Action
Reload+"
normal tunings.
Casual Wear (Default)
This tuning build allows a combination of Critical Permeation and Reinforced Revive. Unlike other
outfits, this one has Reinforced Revive in the second slot, making it possible to reach the level 11
for
that tune. The standard tuning slots, while not exceptional, are quite solid. This setup also allows
you
to run triple "Special Action Reload+".
Casual Wear (Heat)
This is a more self-sufficient option, recommended for experienced and skilled players. This costume
allows you to combine Wall Runner and Space Hop, drastically increasing Ibara's mobility and
carrying
potential. We don’t recommend it to newer players, because running this build means you’ll have to
give
up on Reinforced Revive, but it could be a breath of fresh air for experienced Ibara mains.
Adventurer (Dangerous)
This is the worst PUR costume for Ibara so far, but since she does not have many options, some
players
may find themselves in a situation, when other PUR options are unavailable. In case this is your
only
PUR, I've included the best recolor of the Adventurer line. This version allows Reinforced Revive +
any
Strike tuning. There is a variety in Strike slot. The good choices are Extra Wind (for quadruple revives mentioned earlier), Wilpower, Ability Manifest
and
Revenge Strike.
Undefeatable (Dangerous)
This outfit is exceptional for a non-PUR budget option due to its high number of Strike slots. Since
tuning effectiveness isn't affected by costume rarity, this build provides a solid and consistent
damage
boost, making it the prime choice if you don't possess a PUR skin. The combination of Strike and
Assault
Villain slots enables the powerful Iron Fist + Embrittlement combo. When enhanced with six Gamma
Damage+
and HP Damage+ tunings, this setup can one-shot many opponents, ideal for those that want to focus
on
one-shooting with her gamma's power.
An alternative not focused on one-shots is Willpower + Quirk Factor Release. This provides reliable
performance and serves as an excellent build for new players until they acquire a PUR alternative.
Izuku Midoriya (Default)
Difficulty Score: 🟡Even🟡
A battle against the original Deku is primarily a test of aim for both players. As a long-range fighter, Izuku can apply significant pressure and deal damage from a distance while maintaining a decent mobility. Your success in this matchup hinges entirely on your accuracy with the Alpha skill. If you can land your shots consistently, you will knock him down with every hit and shut down his offense. At close range, your Beta ability becomes an ultimate tool that he cannot counter. However, if your aim is unreliable, Deku will prove to be a formidable opponent and punish your stationary state.
Izuku Midoriya (Full Bullet)
Difficulty Score: 🟢Favorable🟢
The Full Bullet matchup is very similar to the one against the original Deku, but he is much easier to punish due to his complete lack of horizontal mobility. At close range, you can effectively trade damage using your Beta, as it prevents him from escaping. You should also keep in mind that the rocks created by his Gamma are considered part of the map geometry. This is why the vines from your Alpha can travel over them, often interrupting his only escape option.
Izuku Midoriya OFA
Difficulty Score: 🟢Favorable🟢
OFA Deku is a melee-focused character who will constantly attempt to close the distance. However, this plays to your advantage at close range, where your Beta ability can rapidly delete his HP. Furthermore, as a Rapid character, OFA Deku's players often fail to utilize their i-frames effectively. This makes punishing them on wake-up significantly easier.
Katsuki Bakugo (Default)
Difficulty Score: 🟢Favorable🟢
A battle with Strike Bakugo is somewhat similar to Assault Deku, but since Bakugo's Alpha is less consistent and his Gamma is vulnerable to your Beta, this matchup is generally easier.
Katsugi Bakugo (Machine Gun)
Difficulty Score: 🔴Unfavorable🔴
Rapid Bakugo is a highly mobile character with a very unpredictable movement trajectory. Many Bakugo players will close the distance to hit you with their Gamma, which is a good opportunity to trade damage using your Beta. However, more experienced players typically harass you from afar, only closing in when they know you are vulnerable.
The Space Hop tuning helps significantly in this matchup, as it allows you to match their height and utilize your Beta or Gamma to catch them by surprise.
Ochaco Uraraka (Default)
Difficulty Score: 🟡Even🟡
Unlike Rapid Bakugo, Uravity's movement is more predictable, making it easier to catch her with your Alpha. At close range, your Beta is still an ultimate tool. Many Uraraka players fail to utilize their i-frames effectively, making it easier to catch their wake-up.
That being said, her combo potential is still deadly, and her Gamma is generally a very dangerous tool against Ibara who doesn’t like being under any control effects.
Ochaco Uraraka (Zero Satellites)
Difficulty Score: 🟢Favorable🟢
Assault Ochako has very limited and predictable mobility, making it easy to attack with your Alpha and knock her back. She’s also stationary while attacking with her own Alpha. Unlike Rapid Ochako, she cannot use her Gamma in the air, making the move much easier to predict and punish with a well-timed roll.
Tenya Iida
Difficulty Score: 🟢Favorable🟢
As a melee-heavy character with a comparatively small HP pool, Iida is very easy to catch with your Beta and Gamma. The super armor on your abilities can also whiff his combos.
That being said, you must always keep track of him, as he will constantly try to catch you by surprise and attack when you least expect it.
Shoto Todoroki (Default)
Difficulty Score: 🟡Even🟡
Shoto Todoroki is a grounded character, which makes it harder for him to evade Alpha spam. However, you are also a grounded character, making you vulnerable to his freezing combos. You have an advantage at long range, but the matchup becomes significantly riskier the closer he gets. A poorly timed super armored ability can lead to you suffering a devastating combo. It is generally a good idea to keep high ground against him.
Shoto Todoroki (Ice Fang Wind Flame)
Difficulty Score: 🟢Favorable🟢
Unlike the original Battle Style, Technical Todoroki lacks a way to deal burst damage. He remains a grounded character, making him an easy target for your Alpha, but he lacks the effective combos or stuns to seriously threaten you. He also relies heavily on the protection from his Gamma that Ibara can easily pierce.
Tsuyu Asui
Difficulty Score: 🟢🟢Very Favorable🟢🟢
The matchup against this character is similar to the one against Iida, but even less threatening. Your super-armored Beta completely shuts her down. She is easy to catch on wake-up and is vulnerable to your Alpha even while in flight.
Eijiro Kirishima (Default)
Difficulty Score: 🟢Favorable🟢
Assault Kirishima is a heavy brawler who can effectively trade damage with you due to his large HP pool and Hardening state, which reduces the damage he takes.
You have a significant advantage at long range. At close range, you are also favored unless Kirishima is in his Hardening state. While he takes significantly less damage than expected in this state, you have a great tool to waste his special action resources if you manage to catch him with your Gamma.
Eijiro Kirishima (Red Drive)
Difficulty Score: 🟡Even🟡
Strike Kirishima is a high-risk opponent. Although you can pierce his shield, his Hardening state often grants him immunity to the knockdown from your first Alpha. He possesses a dangerous burst combo and enough mobility to effectively chase you down, but he is not unbeatable if you play your cards right and utilize your Beta and Gamma to control him even in Hardening state. Without Hardening, this match up could be favorable.
Denki Kaminari (Default)
Difficulty Score: 🟢Favorable🟢
Denki is a mid-range fighter who is most dangerous at medium range. You have the advantage in both long-range and close-quarters combat. The Super Armor on your Beta prevents you from being shocked by his Gamma. This allows you to evade his most deadly combo while dealing significant damage to him. He’s also relatively an easy target for your alpha.
Denki Kaminari (Lightning)
Difficulty Score: 🟢Favorable🟢
While Technical Denki can be annoying at long range with his auto-lock Alpha, he becomes an easy target while using his aimed mode. Unlike Strike Denki, his DPS is relatively bad, making him significantly less dangerous. His only mobility tool is his Gamma, which has an easy-to-punish startup animation.
Momo Yaoyorozu
Difficulty Score: 🟢🟢Very Favorable🟢🟢
Momo Yaoyorozu is another grounded character who has a hard time escaping your Alpha. You can pierce her shielded dash and overwhelm her up close. However, you must pay close attention to her Gamma cannons and avoid getting cornered in the building filled with those.
Fumikage Tokoyami
Difficulty Score: 🟢Favorable🟢
His beta is your main threat since it locks you in place and Ibara hates any crowd-controllin abilities. You significantly out-DPS Tokoyami on long range and in close range, well levelled beta or mastered gamma timing would help you survive and come on top.
Neito Monoma
Difficulty Score: 🔴Unfavorable🔴
A fight against Monoma heavily depends on what quirks he copied, but as a character with insane mobility and air stalling potential, he’s generally a dangerous opponent. If you catch them up close, you clearly have an advantage, but usually, he will try to stay a long distance. He also has a slim hitbox, which is quite hard to hit.
Itsuka Kendo (Default)
Difficulty Score: 🟢Favorable🟢
Itsuka Kendo is a very melee-centered character. However, unlike Assault Kirishima, she does not have a hardened state and you can pierce her shields, making it relatively easy to keep her at a distance. The battle becomes riskier if she gets up close, but it remains fairly even. Your Beta can trade with her Gamma, and a well-timed roll can create an opening for you to catch her with your grab move.
Itsuka Kendo (Twin Palm Strike)
Difficulty Score: 🔴🔴Very Unfavorable🔴🔴
Strike Kendo possesses a very dangerous Alpha that causes flinch with every hit. She has decent mobility, and her Beta grants her Super Armor. Furthermore, attacking her beta may cause a powerful counterattack.
Ibara Shiozaki
Difficulty Score: 🟡Even🟡
In the mirror match-up, the match-up is decided by two factors: Aim for other alpha and recognition of wake-ups. The Ibara who can time their wake ups and counter the others will be the victor.
Mirio Togata (Default)
Difficulty Score: 🟢Favorable🟢
Mirio is a high-mobility character who is very hard to hit. Luckily, the nature of his Alpha makes it relatively easy to dodge, which often turns this matchup into a standoff. Your best strategy is to dodge his Beta and punish him with any of your abilities. Keep in mind that if you land your Gamma at level 9, you can one-shot him.
That being said, Mirio is extremely dangerous if he catches you in a vulnerable position, as his superior mobility makes escape nearly impossible.
Mirio Togata (Sheer Counter)
Difficulty Score: 🔴Unfavorable🔴
Technical Mirio is an extremely dangerous threat. His ability to deal damage while remaining completely invulnerable is a serious problem for a low-mobility character like Ibara. However, you still have counter-play options at close range, as your Gamma does not trigger his counter. You can bait it out and catch him with your Beta or Gamma, which may be fatal for him. A good tip for Space hop users is to jump over his Beta and shoot him when he pops out.
Tamaki Amajiki
Difficulty Score: 🟡Even🟡
The battle between Shiozaki and Amajiki often comes down to who spots the other first. Both sides have abilities which can be used to counter the other. Leaving the result to be whoever is better versed in said character. Keep in mind that he has a powerful grab move, and he can become invisible after hitting the Beta skill. If possible, avoid fighting him in open space.
Nejire Hado
Difficulty Score: 🟢Favorable🟢
Despite Nejire’s flight, Ibara is well versed in dealing with enemies within the air by using her alpha. That being said, trying to fight her in Open skies will lead to much more rolling and dodging than attacking. Bait her inside of enclosed spaces and/or buildings to allow your beta and gamma room to finish her off.
Nejire Fairy
Difficulty Score: 🟢Favorable🟢
Nejire's support skillset may be less threatening is a direct combat, but at the same time, the veil she gives to her teammates makes yougenerally more thretened in the match
Hitoshi Shinso
Difficulty Score: 🔴Unfavorable🔴
Ibara’s kit forces her into a stationary position, making her a prime target for Shinso’s alphas. Ibara is best played as a secondary target against him. Using alpha’s to save someone or getting close enough to gamma him during his alpha combos. Be careful with your i-frames, a lot of Shinso players will try to catch your wake up.
All Might (Default)
Difficulty Score: 🟡Even🟡
While Ibara gamma can snag his beta and her alpha can stop his Gamma, that doesn’t make this battle one sided at all. The combination of his special action leap and alphas are still more than capable enough to melt an unsuspecting Ibara. Your main focus is to keep him in your sights and stay aware of the splash damage his alphas hold. However, his bulky hitbox and delays on his mobility moves makes him an easy target for your alpha.
All Might (Gatling)
Difficulty Score: 🟡Even🟡
The match-up is one that comes down to who catches the other first. All might holds the advantage of armoring through attacks and high amounts of mobility. Meanwhile, Ibara takes the lead in terms of range and damage. With both sides having stats that can help to fight the other, it comes down to a battle of skill and who can get the drop on the other first.
Armored All Might
Difficulty Score: 🔴Unfavorable🔴
Armored All Might is a flying character with superior mobility and long-range stunning capabilities. As Ibara, you struggle against stuns a lot, which makes him a serious threat, even though your DPS is comparably close. This match-ups is not exactly one-sided, because his big hitbox allows you to apply consistent pressure on him and hinder his gameplan, but it's generally better to avoid direct confrontations
Shota Aizawa
Difficulty Score: 🔴Unfavorable🔴
Despite her alpha being useful in saving someone from his gamma, her kit makes her extremely stationary. Making her a prime target for his combos quite similar to Shinso. Another downside of this match-up is his mobility; it's very fast and unpredictable, making it incredibly hard to snipe him. A well-levelled beta helps a lot in this match-up since Aizawa will always try to close range on you.
Present Mic
Difficulty Score: 🔴Unfavorable🔴
The best way to treat mic is similar to a turret. In the time it takes Ibara to fire one shot, he’s likely fired up to 3-4 or even 5 shots onto her. His alphas are extremely hard hitting and come out extremely fast, which is also boosted by his special action which is available to him at all times. In addition to that, his gamma ping is not stopped by beta or Gamma, forcing you to avoid the punch or take it, with high levels of varying damage.
Cementoss
Difficulty Score: 🔴Unfavorable🔴
While Ibara’s scoped vines can climb a Cementoss tower, a majority of the fight will be spent rolling his alphas and gammas as he retains a position upon a cement tower. Making it hard to damage him without taking equal or more damage in the process.
Endeavor (Default)
Difficulty Score: 🟡Even🟡
Despite his high attack power, Endeavors attacks are easily telegraphed, allowing you to counter and/or roll his attacks. Well-placed alphas are excellent for shutting down his special action flight as well as his gamma. His large hitbox allows you to hit him more consistently than other targets.
Endeavor (Inferno Fist)
Difficulty Score: 🟢Favorable🟢
In this battle against AOE, while her Alpha can prevent his gamma, his beta trap as well as Aoe alphas make countering back quite risky. While you can use air stalling to prevent grounded alphas, it doesn’t do much against direct hit alphas.
Hawks (Default)
Difficulty Score: 🟡Even🟡
While rapid hawks maintains higher mobility and lock-on alphas which can/ will pepper her, Ibara retains a sole advantage in her beta and gamma being able to slow/ halt his beta, which is his largest damage source. His special action flight makes him a predictable and easy to hit.
Hawks (Slicing Wind)
Difficulty Score: 🔴Unfavorable🔴
Strike hawks has a special gimmick once his abilities his lvl 7. One of which being he no longer staggers on his beta. Which can have deadly consequences as Ibara’s beta is her best get off me tool. This change leaves her open for one of his many combos.
Mt Lady
Difficulty Score (Small Form): 🟢🟢Very Favorable🟢🟢
Difficulty Score (Giant Form): 🔴🔴Very Unfavorable🔴🔴
Mt. Lady in her small form follows the trade of a melee fighter, which makes her susceptible to beta or gamm, though beta gives more protection against her stomp. The main point of this match-up is to not give her the chance to use alphas, which don’t do as much damage as All might’s but can still deal a decent amount of damage.
In her giant form, while can still do damage to her, Ibara’s lack of mobility and escape tools make her susceptible to the goat Sonos and kicks. Quickly whittling down her health pool.
Tomura Shigaraki (Default)
Difficulty Score: 🟢🟢Very Favorable🟢🟢
Despite having large Aoe and constantly making the floor unusable, this match-up is actually much more even if Ibara uses her air-stall. Which allows her to attack and momentarily avoid his for as long as she can air stall. In addition, her gamma can also capture his gamma, premiering damage. Though only if timed correctly. If you play this match-up correctly, Shigaraki will be completely unable to hit you most of the time.
Tomura Shigaraki (Catastrophe)
Difficulty Score: 🟢Favorable🟢
Though having more movement and his attacks are now projectiles, his abilities lose their AOE status that his predecessor version had. Making him easier to deal with. However, the same trick does apply. Use air stalling to prevent his maximum damage. As his abilities still need to hit the ground to do their most amount of damage. If he attempts to get closer or land on you with his gamma, Beta can be used as a punish. But even though we mark this matchup as favorable, his beta->gamma combo may be quite devastating.
Tomura Shigaraki (Thousand-Hand Break)
Difficulty Score: 🔴Unfavorable🔴
One of the worst Ibara's match-ups. His ability to see you through the walls and hitting you while being outside of your reach makes him especially threatening agaisnt a non-mobility characer like Ibara. Whenever it is possible, try to attack and focus him if you see Shigaraki in open field because he will be a problem later. In open field, the fight can be even, but Tomura's super regeneration and mobility aloows him to apply a lot of pressure on you essentially for free.
All For One (Default)
Difficulty Score: 🟢Favorable🟢
While both characters hold a reputation of slow or stationary, Ibara can take full advantage of his by range. His gamma offers two different courses of action you can use, these being alpha if you avoid getting caught or Beta if you do end up being caught. Cancelling the damage altogether.
All For One -Youth Age-
Difficulty Score: 🔴Unfavorable🔴
Not only can he take away her revives, but his large AOE and delayed attacks make the battle difficult for her lacking mobility to avoid said attacks. His gamma super armor makes him especially dangerous because he becomes nearly invulnerable to your alpha knockdown, but knock you down with every gamma charge.
Dabi (Default)
Difficulty Score: 🟢🟢Very Favorable🟢🟢
Ibara’s alpha has the special capabilities to ignore both Tech Dabi’s Gamma and beta, his best protective abilities. Also, with him also lacking movement, allowing Ibara to easily punish his wake-or even cancel a follow up gamma. In addition, he alpha negates the barrier his special action revive holds. Making it simpler to take him down.
Dabi (Crazy Torch)
Difficulty Score: 🟢Favorable🟢
Similar to Tech Dabi, Ibara’s alpha can go through his gamma explosions. Even better, however, is the fact that she can negate his beta entirely with a well timed beta. While you may still get lifted up, you will take none of the damage.
Himiko Toga (Default)
Difficulty Score: 🟢Favorable🟢
Tech Toga can beam opponents with alpha which can be fought with well placed alphas. Her beta can also be a tool which can be stopped with a wide beta or an extremely well timed gamma. The best time to grab her is when she begins her slashing charge as she’ll sometimes power through your gamma during. But it wouldn't be a problem if you shut her movement with well-placed knockdowns.
The most important part of the match up, however, is to avoid her gamma. As getting caught by it gives her access to your revive.
Himiko Toga (Sting Dance)
Difficulty Score: 🟡Even🟡
Unlike her tech counterpart, her rapid skillset is much less predictable. While a well timed Scoped alpha can interrupt her mid-air gamma, it’s more likely that you’ll get sight in her large zone beta or shredded by her boomerang like alpha. Making short work of Ibara’s stationary health bar. That being said, you will be prevalent, if you successfully predict and punish her movement. Rolling her beta shuts down most of her combos.
Twice
Difficulty Score: 🟢Favorable🟢
Twice is a very straightforward character that Ibara should be able to deal with rather easily. While he can snag her with his gamma, a well-placed beta or gamma removes any worry
That being said, twice is dangerous if does manage to get behind you and you don’t notice. As he can use his clones to quickly remove your health bar if you’re not paying attention.
Mr. Compress
Difficulty Score: 🟢Favorable🟢
This match-up relies on staying up close and personal with him. While you can challenge him with your alphas at a distance, as well as go through his beta with your moves, up close offers more potential. Potentially forcing a gamma which you can cancel with beta or gamma.
Kurogiri
Difficulty Score: 🔴Unfavorable🔴
Ibara’s stationary playstyle makes her a prime target for Kurogiri’s beta combo. As well as a fine target to be shredded by his alphas. In a direct duel, you will have an advantage, if you hit your alphas consistently enough, but his ability to teleport you away and break your positioning makes him a significant threat.
Lady Nagant
Difficulty Score: 🔴🔴Very Unfavorable🔴🔴
Ibara's stationary position makes her incredibly vulnerable to snipes. Nagant exceeds Ibara's alpha range by a big margin and a win is only possible with perfect aim if you take this fight on midle range and keep stunlocking her. But even in these situations, her beta based combos and headshots are deadly for you.
Overhaul
Difficulty Score: 🟢Favorable🟢
Overhaul is a grounded character with comparably large hit box. You should focus him using your alpha, from a long range or a high ground. THis way he will have hard time hitting you. Close up, he can be threatening, but his combos are not fatal and you can succefully trade with him using your beta skill. Keep in mind that his special action can knock you away when you old him in your gamma. Double tap it to end your gamma animation earlier while maintaining most part of your damage.