
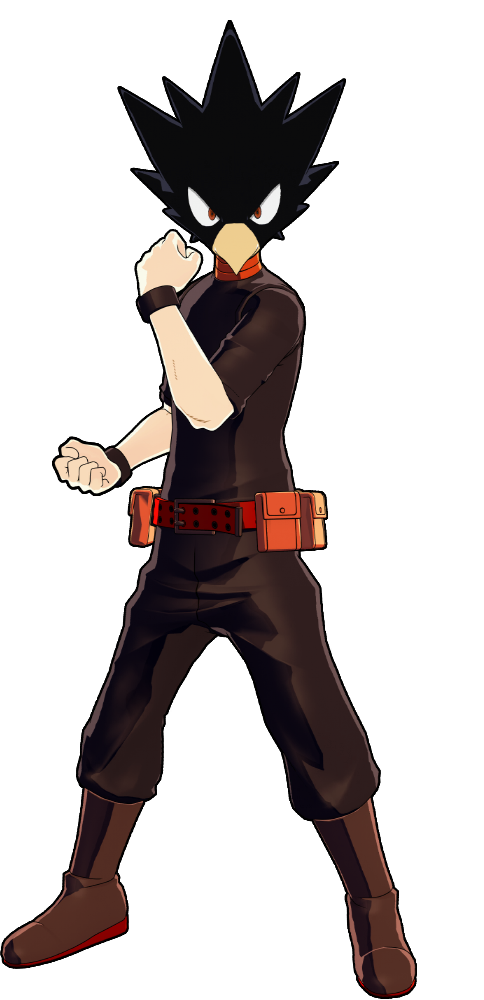


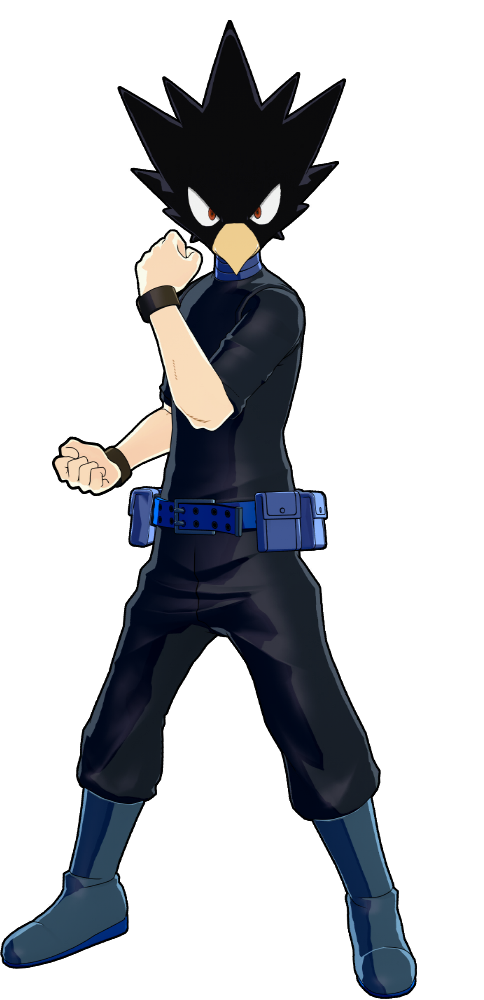
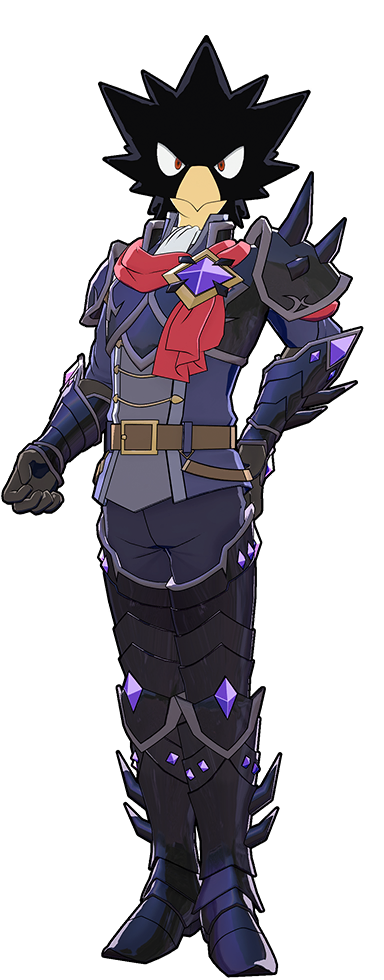
Hero Costume (Heat)
Budget Costume gained via rolls. On the purple slot, you can use Special Action Boost or Hyper Regneration. On the red hero slot, you can use Willpower.

Last Update: July 8th, 2026
"Revelry in the dark..."
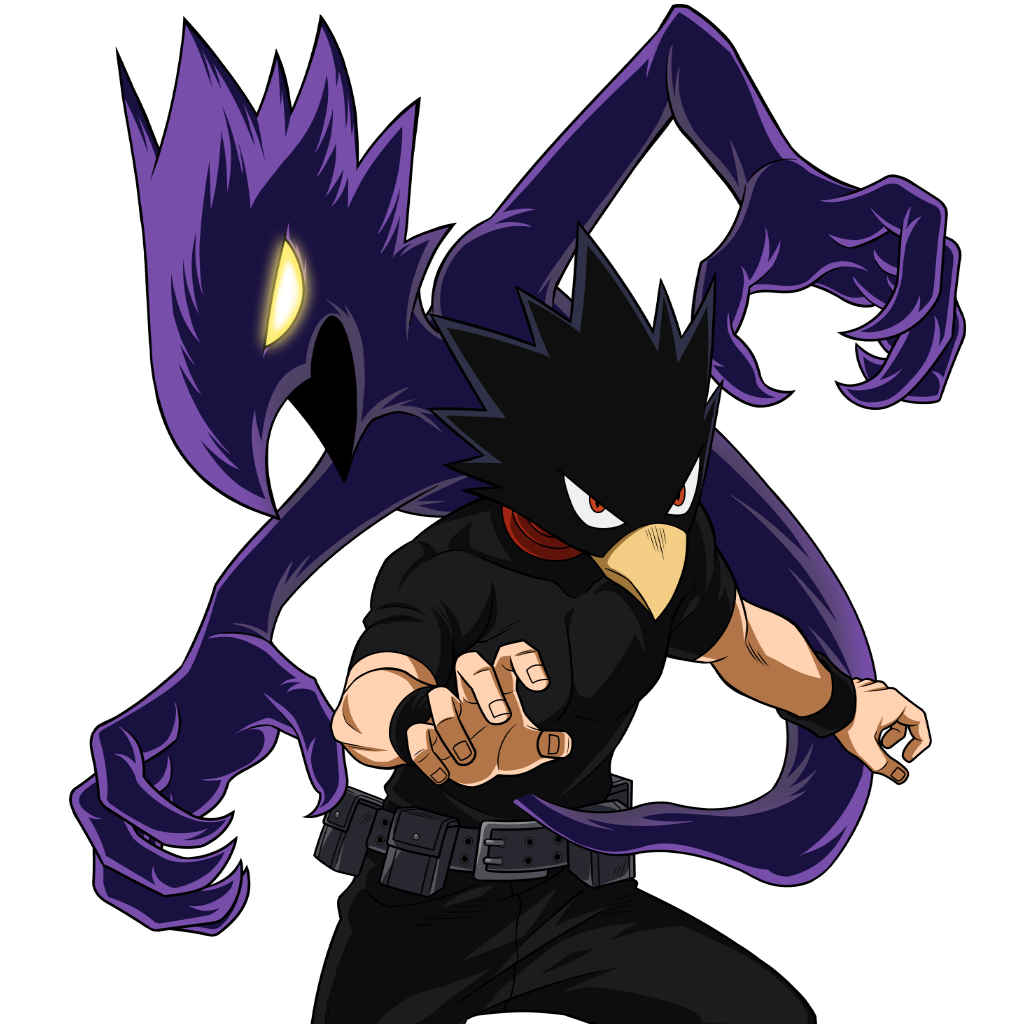
Tokoyami is a jack-of-all-trades, master of none that constantly switches between a normal form and a stance that significantly empowers his mobility and melee power. He excels at enemy lockdown, mobility, and general utility, but longer TTK (Time to Kill), has average HP, and crumbles without cooldowns.
His base kit covers his basic needs containing a slow, but large and piercing projectile Alpha, a low combo potential, but large and long-lasting lockdown AoE Beta, and a weak, but extremely versatile shield Gamma.
Tokoyami can leap high into the air. He can glide at will and heal while gliding. With Gamma, he can protect himself while performing various actions such as reviving, rescuing, and even recovering while downed.
What sets Tokoyami over the edge is his Special Action stance, Black Ankh. When in Black Ankh, Tokoyami becomes significantly stronger. He moves much faster, his melees are greatly enhanced, and his leap has a reduced cost.
This is not without a significant downside. If Tokoyami does not manage his Black Ankh resource well, he will be left vulnerable for a long period of time, and has to rely on his basic kit.
| Pick if you like | Avoid if you dislike |
|---|---|
|
|
Tokoyami's kit is versatile enough to work well on all maps. However Chaos City is worse for Tokoyami, this is due to the map's low map ceiling causing higher gravity upon hitting the skybox.




Tokoyami's Alpha sends out Dark Shadow in a straight line to attack opponents. Dark Shadow himself has a rather large hitbox, can hit pierce through opponents, and even travel up walls.
The main weaknesses of this move is that it deals below-average damage, is fairly slow, and only has three uses. While the cooldown is forgiving, every shot needs to count.
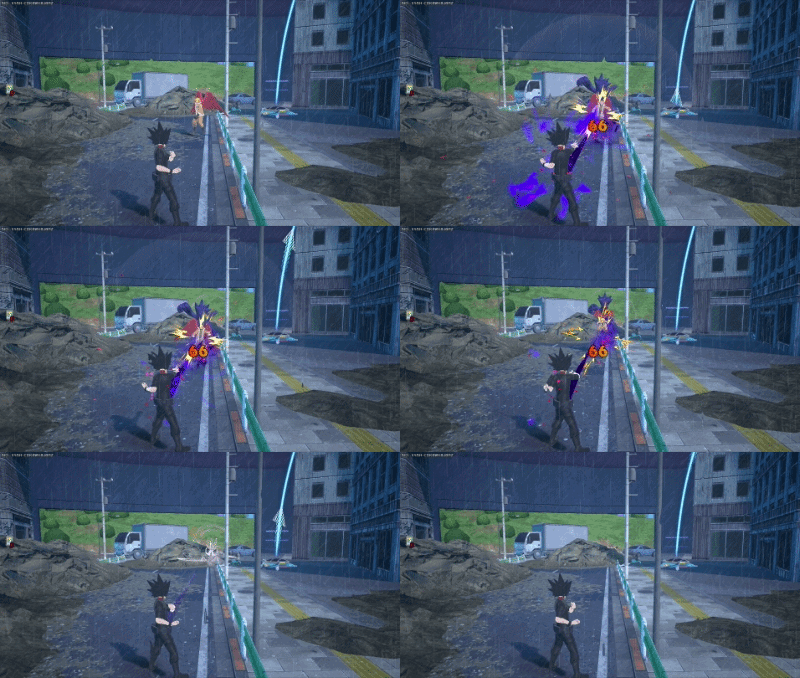 "Sink your teeth in!"
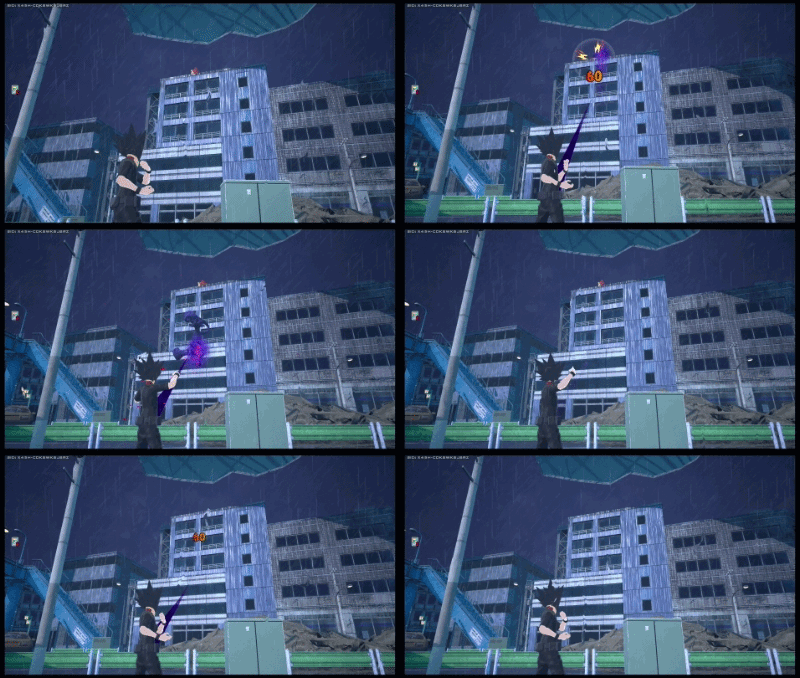
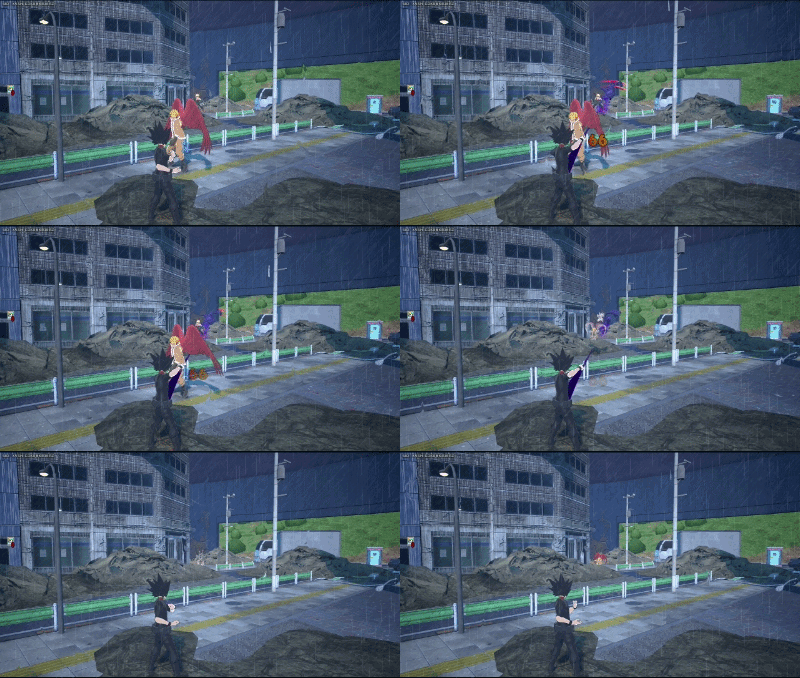 "Savage!"
Tips for Tokoyami's Alpha:
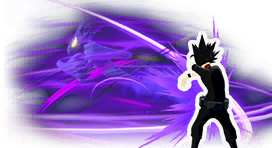
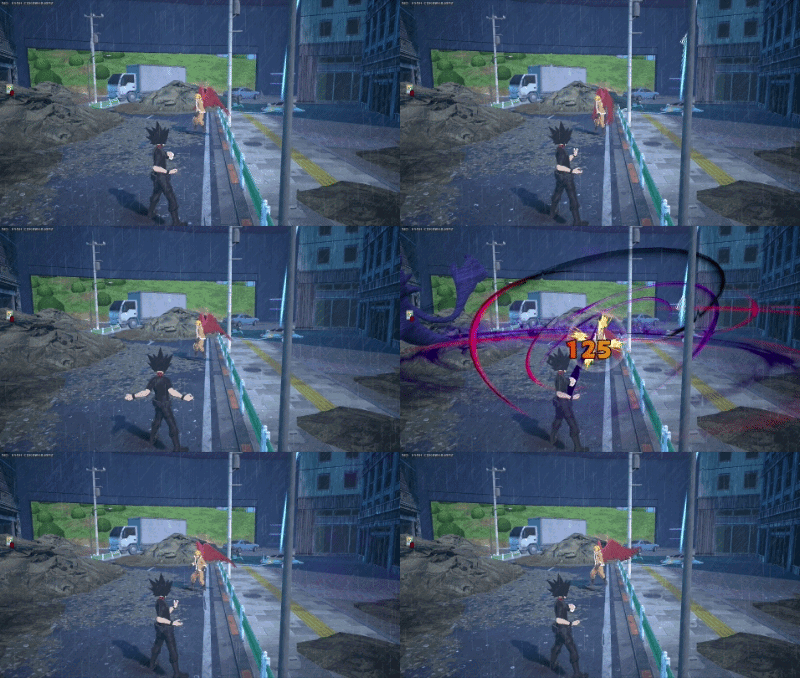
Tokoyami's Beta sends out Dark Shadow to a location, who then proceeds to attack and stagger opponents inside the circle.
The main weakness of this move is that it causes high down power which can limit potential combo routes for yourself or teammates.
 "No escape!"
Tips for Tokoyami's Beta:
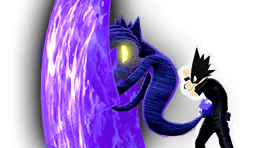
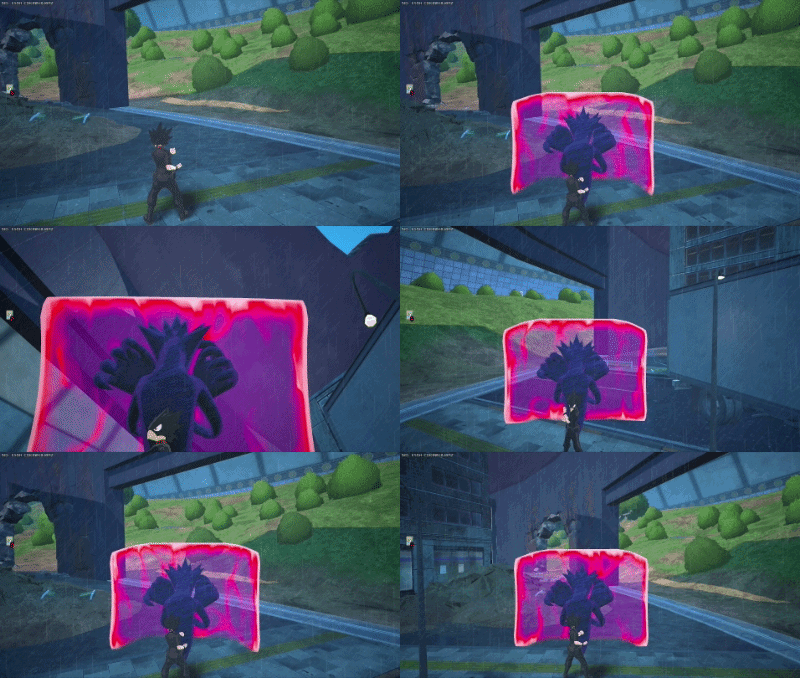
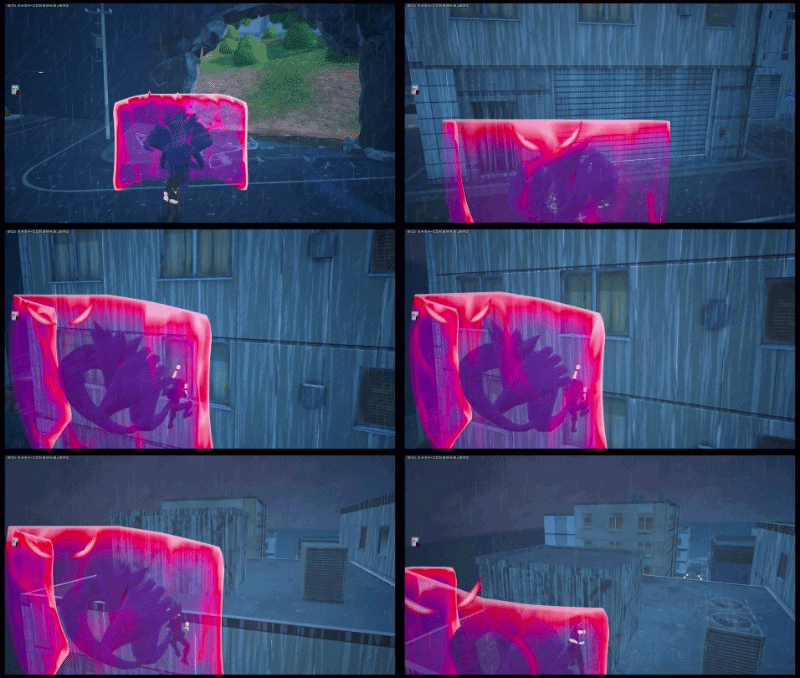
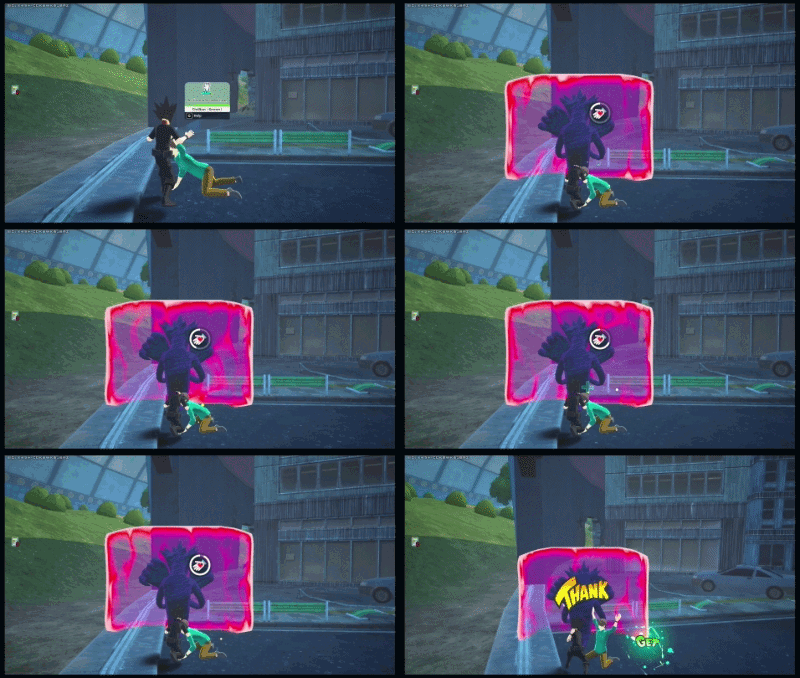
Tokoyami's Gamma commands Dark Shadow to protect Tokoyami with a small, weak shield with a large amount of utility. When used, Dark Shadow blocks in the direction that Tokoyami's crosshair is facing. While the shield is out, Tokoyami can perform specific actions while Dark Shadow is protecting him, such as reviving a teammate, opening a chest, or healing.
If Tokoyami is downed, he can use Dark Shadow to provide protection for him. This can effectively stall an attempt to finish off Tokoyami, but keep in mind you cannot use Gamma while attacked and that Gamma is brittle.
Additionally, Tokoyami can "lock" Dark Shadow to a specific direction, by pressing and holding the Gamma button again when Dark Shadow is out. Tokoyami can then move his crosshair in a different direction while Dark Shadow protects that direction.
The main weakness of this move is that it's brittle and reloads extremely slow when not broken.
 "Be my shield!"
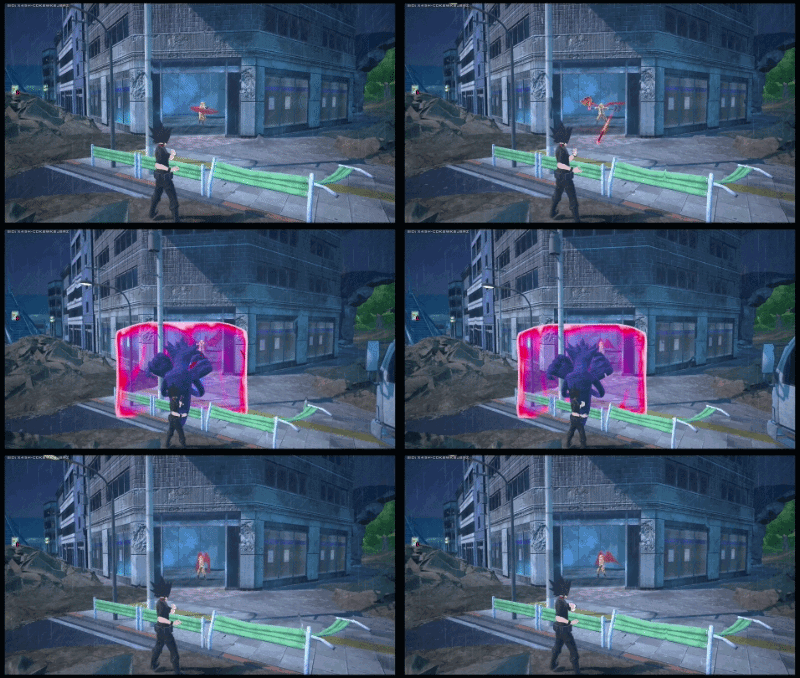
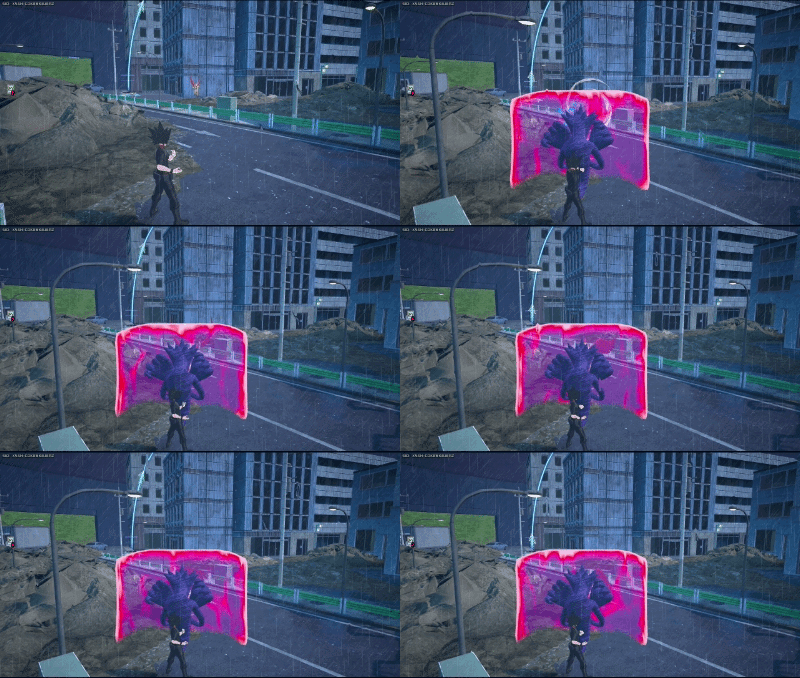 "Hold them back!"
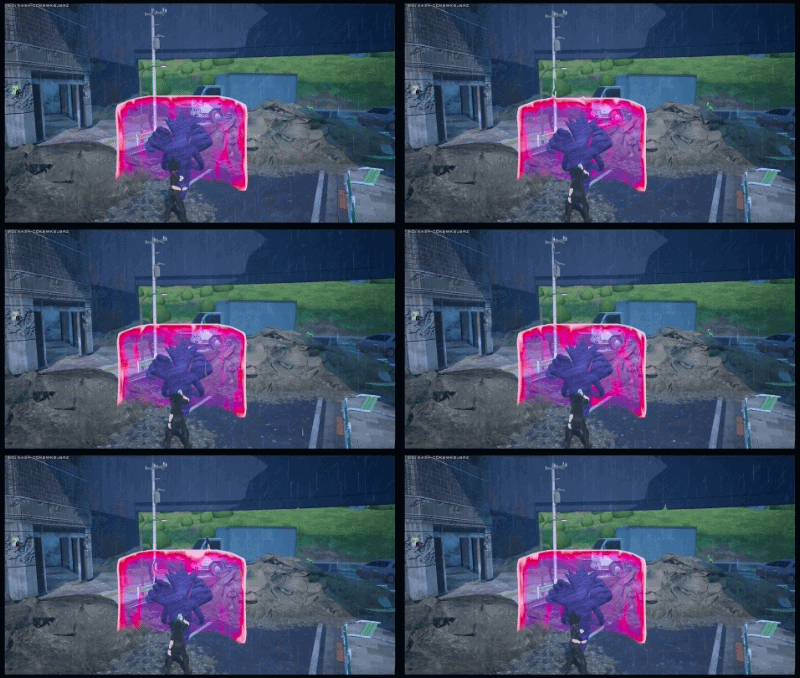
 "Show them your power!"
Tips for Tokoyami's Gamma:
The interactions between skills and Tokoyami's gamma are as follows:
✅ Means "Blocks and Staggers"
🟡 Means "Blocks Only"
❌ Means "Ignores"
➖ Means "Not Applicable"
* Denotes skills that can go through Gamma at close ranges
** Denotes skills that need to be blocked at specific angles
*** Denote skills that stop early when hitting a shield
| Battle Style | Alpha | Beta | Gamma | Special Action | Melee |
|---|---|---|---|---|---|
 Izuku Midoriya
|
🟡 | ✅ | 🟡 | ➖ | ✅ |
 Izuku Midoriya - Full Bullet
|
🟡 | ✅ Heel 🟡 Shockwave |
❌ | ➖ | ✅ |
 Izuku Midoriya (OFA)
|
🟡 Ground 🟡 Air |
✅ Normal ❌ Overdrive |
❌ Normal ✅ Overdrive |
➖ | ✅ Ground ✅ Air** |
 Katsuki Bakugo
|
🟡 | 🟡 | ✅ Cartwheel 🟡 Explosion |
➖ | ✅ |
 Katsuki Bakugo - Machine Gun
|
🟡 | 🟡 | 🟡* | ➖ | ✅ |
 Katsuki Bakugo - Cluster
|
🟡 Projectile 🟡 AoE 🟡 Aimed |
🟡 Thrown 🟡 Mines |
🟡 Dash* 🟡 Explosion |
➖ | ✅ |
 Ochaco Uraraka
|
🟡 | ✅ Spin 🟡 Throw |
❌Float AoE ✅ Debris |
➖ | ✅ |
 Ochaco Uraraka - Zero Satellites
|
🟡 Throw ✅ Swing |
✅ | ❌Float AoEs ✅ Debris ✅ Floating Island |
➖ | ✅ |
 Tenya Iida
|
✅ | ✅ | ➖ | ➖ | ✅ |
 Shoto Todoroki
|
✅ | ❌ | 🟡** | 🟡 | ✅ |
 Shoto Todoroki - Ice Fang Wind Flame
|
🟡 Fire 🟡 Ice* |
🟡 Ice 🟡 Explosion |
🟡 | ✅ | ✅ |
 Tsuyu Asui
|
🟡 | ✅ | ➖ | ➖ | ✅ |
 Eijiro Kirishima
|
✅ | ✅ | 🟡* | ➖ | ✅ |
 Eijiro Kirishima - Red Drive
|
✅ | 🟡 | 🟡 | ➖ | ✅ |
 Momo Yaoyorozu
|
🟡 | ✅ Shield Run | 🟡 Cannonball 🟡 Explosion |
➖ | ✅ Melee 1, 2 🟡 Melee 3 (Hammer) |
 Fumikage Tokoyami
|
🟡 | 🟡 Dark Shadow 🟡 AoE |
➖ | ✅ BA Ground Melee ✅ BA Air Melee 🟡 BA Ground Projectile 🟡 BA Air Projectile |
✅ |
 Denki Kaminari
|
🟡 Bullet 🟡 Connection |
❌ | ✅ | ➖ | ✅ |
 Denki Kaminari - Lightning
|
🟡 Normal 🟡 Lock-On |
🟡 | ✅ | ➖ | ✅ |
 Neito Monoma
|
🟡 | ✅ Knee ✅ Dash |
✅ | ➖ | ✅ |
 Itsuka Kendo
|
🟡 | ➖ | ✅ | ➖ | ✅ |
 Itsuka Kendo - Twin Palm Strike
|
🟡 Normal 🟡 Charged |
✅ | ✅ | ➖ | ✅ |
 Ibara Shiozaki
|
❌ | 🟡 | ✅ | ➖ | ✅ |
 Mirio Togata
|
✅ Uncharged ❌ Charged |
❌ | ❌ | ➖ | ✅ |
 Mirio Togata - Sheer Counter
|
🟡 | ✅ | ❌ | ➖ | ✅ |
 Tamaki Amajiki
|
🟡 Swordfish 🟡 Tentacle |
✅ | 🟡 | ✅ | ✅ |
 Nejire Hado
|
🟡 | 🟡 | 🟡 | ➖ | ✅ |
 Nejire Hado - Fairy
|
🟡 | 🟡 | ➖ | ➖ | ✅ |
 Hitoshi Shinso
|
🟡 | ✅ Grounded ✅ Air |
🟡 | 🟡 | ✅ |
 All Might
|
🟡 Bullet 🟡 Shockwave |
✅ Dash 🟡 Tornado Slam |
✅ | ➖ | ✅ |
 All Might - Gatling
|
🟡 Bullet | 🟡 Projectile ✅ Dash |
✅ | ➖ | ✅ |
 Armored All Might
|
🟡 Ice 🟡 Fire |
🟡 Shock ✅ Pull |
🟡 | ➖ | ✅ |
 Shota Aizawa
|
🟡 Grounded ✅ Air Dash |
✅ | 🟡 | ❌ | ✅ |
 Shota Aizawa - Flow Runner
|
🟡 Cloth ❌ Toss |
❌ Swing 🟡 Ground Slam |
🟡 Dash ❌ Silence ❌ Lock-on Dash |
❌ | ✅ |
 Present Mic
|
🟡 | 🟡 Tap 🟡 Hold |
✅ | ❌ Boombox Throw 🟡 Boombox Alpha 🟡 Boombox Beta |
✅ |
 Present Mic - D.J. Board
|
🟡 Projectile 🟡 Bounce |
✅ Boost 🟡 Echo Voice 🟡 Radio Clash |
🟡 Shockwave* 🟡 Echo |
❌ Boombox Throw 🟡 Alpha Projectile 🟡 Alpha Bounce 🟡 Gamma Echo |
✅ |
 Cementoss
|
🟡 Ball ❌ Creation |
❌ | 🟡 Ball ❌ Creation |
➖ | ✅ |
 Endeavor
|
🟡 | 🟡 Arrow 🟡 Pillar |
🟡 | ➖ | ✅ |
 Endeavor - Inferno Fist
|
🟡 Projectile 🟡 Fire Ground** |
🟡 Initial Hits** 🟡 Initial Pull** ❌ Ring Pull |
🟡 Ball 🟡 Explosion** |
➖ | ✅ |
 Hawks
Hawks
|
🟡 | ✅ | 🟡 | ➖ | ✅ |
 Hawks - Slicing Wind
|
🟡 | ✅ Dash 🟡 Follow-through |
✅* | ➖ | ✅ |
 Mirko
Mirko
|
✅ | ✅ | 🟡 | ❌ | ✅ |
 Stars and Stripes
|
🟡 Projectile 🟡 Explosion |
🟡 Sphere*** ❌ Pull |
✅ Dash 🟡 Laser |
➖ | ✅ |
 Mt. Lady
|
🟡 Regular 🟡 Giant 🟡 Giant Explosion |
🟡 Regular 🟡 Giant |
✅ Regular 🟡 Giant |
➖ | ✅ |
 Tomura Shigaraki
|
🟡 | ❌ | ✅ | ✅ | ✅ |
 Tomura Shigaraki - Catastrophe
|
🟡 Debris 🟡 Cracks |
🟡 Debris 🟡 Pulses |
✅ Dash 🟡 Shockwave |
✅ | ✅ |
 Tomura Shigaraki - Thousand-Hand Break
|
❌ Initial Hit ✅ Extended Arm |
✅ | ❌ | ✅ | ✅ |
 All For One
|
🟡 Regular 🟡 Charged |
✅ | ❌ | ✅ | ✅ |
 All For One - Factor Fusion
|
🟡 | 🟡** | ✅ Normal✅ Alpha-infused✅ Beta-infused✅ Both-infused | ❌ | ✅ |
 All For One (Youth Age)
|
🟡 Regular 🟡 Explosion |
🟡 Line** 🟡 Expansion** |
🟡 Orbs 🟡 Expansion |
🟡 | ✅ |
 Dabi
Dabi
|
🟡 | 🟡 | ❌ | ❌ | ✅ |
 Dabi - Crazy Torch
|
🟡 | ✅ | 🟡 Pulse 🟡 Expansion |
🟡 | ✅ |
 Himiko Toga
|
🟡 | ✅ | 🟡 | ➖ | ✅ |
 Himiko Toga - Sting Dance
|
🟡 | 🟡 | ✅ | ➖ | ✅ |
 Twice
Twice
|
🟡 | 🟡 | ✅ | ➖ | ✅ |
|
Twice (Sad Man's Parade)
|
🟡 | 🟡 Projectile 🟡 Placement |
✅ Clone ✅ Dash |
➖ | ✅ |
 Mr. Compress
|
🟡 | ➖ | 🟡 | ➖ | ✅ |
 Gentle Criminal
|
🟡 Uncharged 🟡 Charged |
🟡 | ✅ Dash 🟡 Follow-up |
➖ | ✅ Melee 1 🟡 Melee 2 ✅ Melee 3e |
 Overhaul
|
🟡 | ❌ | 🟡 | ✅ | ✅ |
 Overhaul - Blighted Precipice
|
🟡 Unaimed 🟡 Aimed |
❌ | ✅ | 🟡 | ✅ |
 Kurogiri
|
🟡 Projectile 🟡 Linger |
🟡 Portal Shot | 🟡 Alpha 🟡 Alpha Linger 🟡 Beta |
➖ | ✅ |
 Nagant
|
🟡 Projectile | 🟡 | 🟡 Grounded 🟡 Aerial |
🟡 | ✅ Melee 1, 2 🟡 Melee 3 (Bullet) |
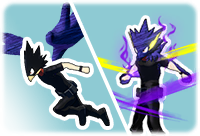
Tokoyami's special action enhances his melee attacks and mobility. Black Ankh is a stance that enhances Tokoyami's overall speed and grants his melee attacks special properties. Twin Wings of the Black Arm allows him to leap high into the sky and/or glide in the air.
When fully depleted, Tokoyami's Special Action has a base 30 second cooldown penalty.
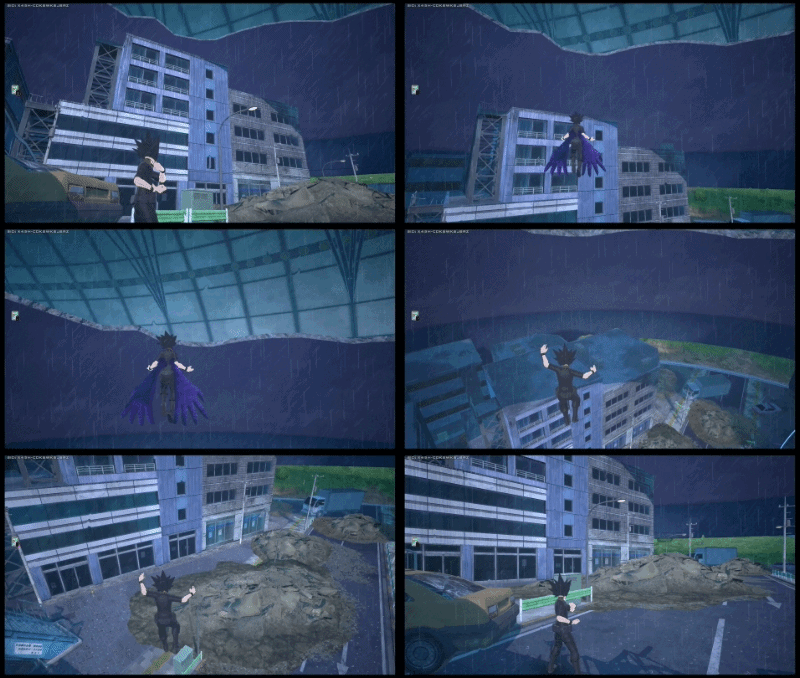
Tokoyami uses Dark Shadow to leap high into the air, allowing him to attack from above or escape a fight. The ability can be used midair, allowing Tokoyami to ascend higher.
By pressing the sprint button while in the air, Tokoyami will glide through the use of Dark Shadow. This ability is a considered passive and is tied to Black Ankh, but does not need or consume Special Action meter. Clever use of your abilities or the environment will allow you easy access to many areas for little cost. Tokoyami can heal while gliding, allowing you to heal yourself, or even heal your team from the safety of the skies.
Gliding has a time limit until Tokoyami hits the ground. This means Tokoyami can re-glide as many times as he desires as long as he doesn't hit the time limit.
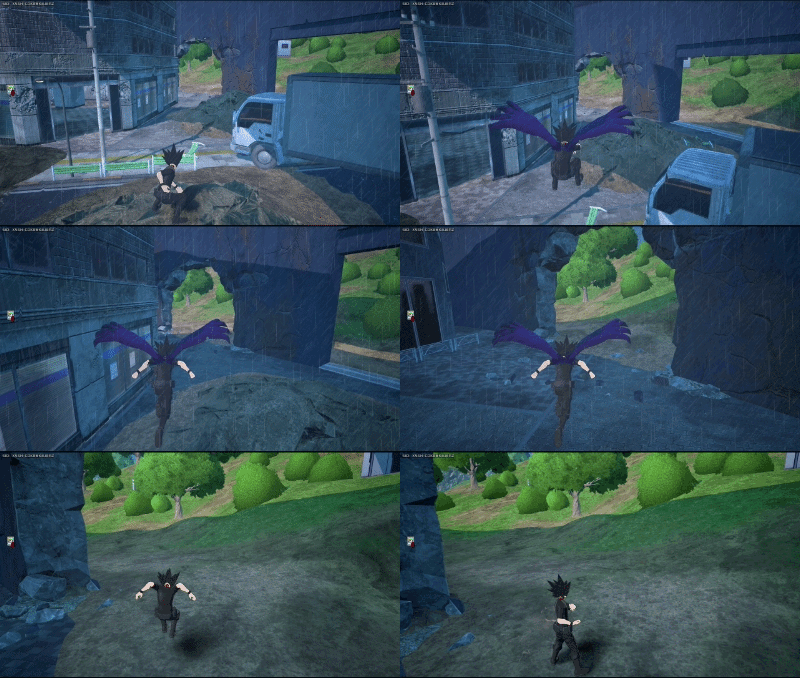
Tips for Twin Wings of Black Arm:
Dark Shadow covers Tokoyami, greatly increasing his movement speed, melee attack power, and melee tracking.
Tokoyami's increased mobility extends to his leap height and his glide speed, but not glide distance. During Black Ankh, Tokoyami's leap costs 35% of his Special Action meter instead of 50%. However, Leap has a brief action lock-out period during Black Ankh where he spends ~5% of his meter while in recovery. Effectively the cost of Leap is 40%.
All melee attacks will gain an increase in down power, meaning Tokoyami sacrifices many combos for the ability to heavily pressure opponents by constantly knocking them down. Tokoyami's Air Melee and Ground Melee fire out large projectiles, but these will not activate melee special tunings and will not pierce enemies.
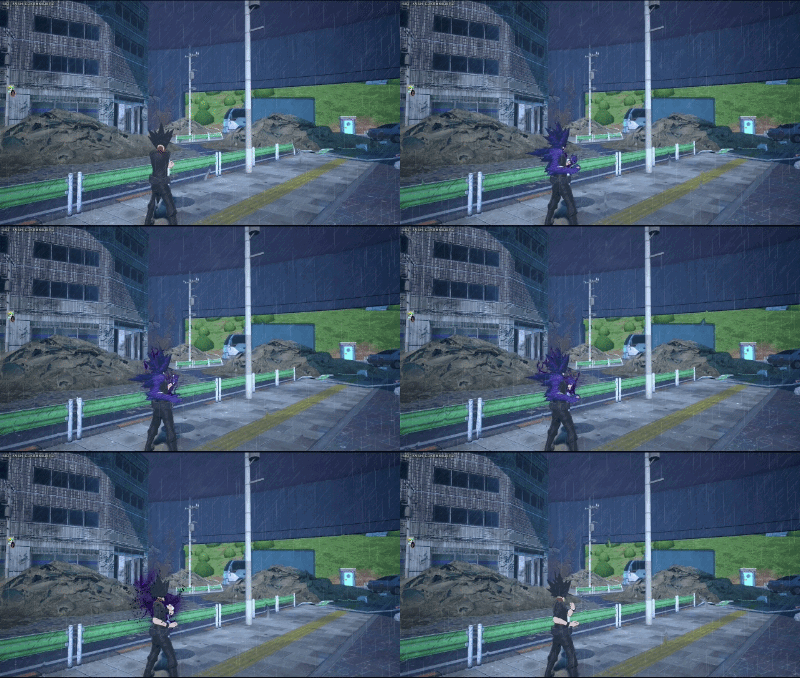
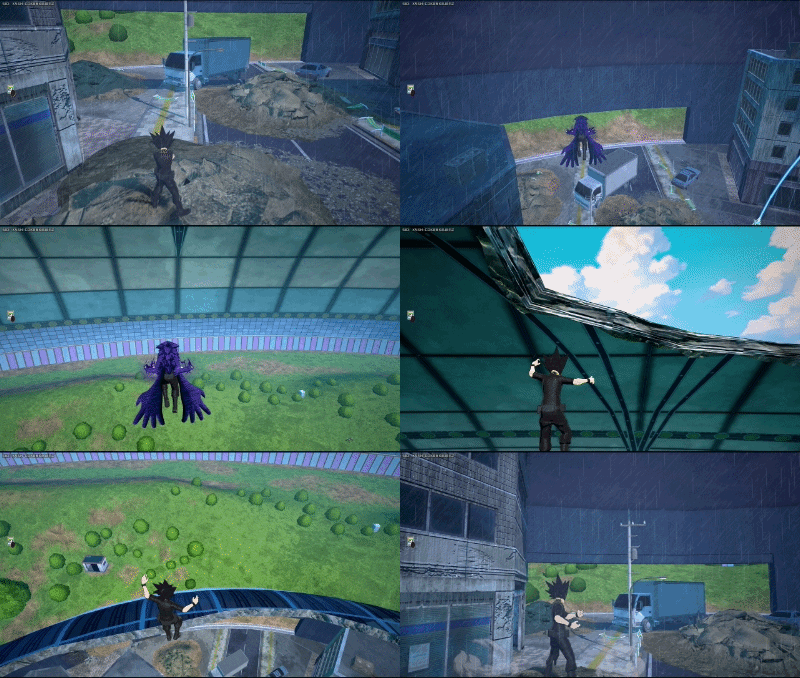
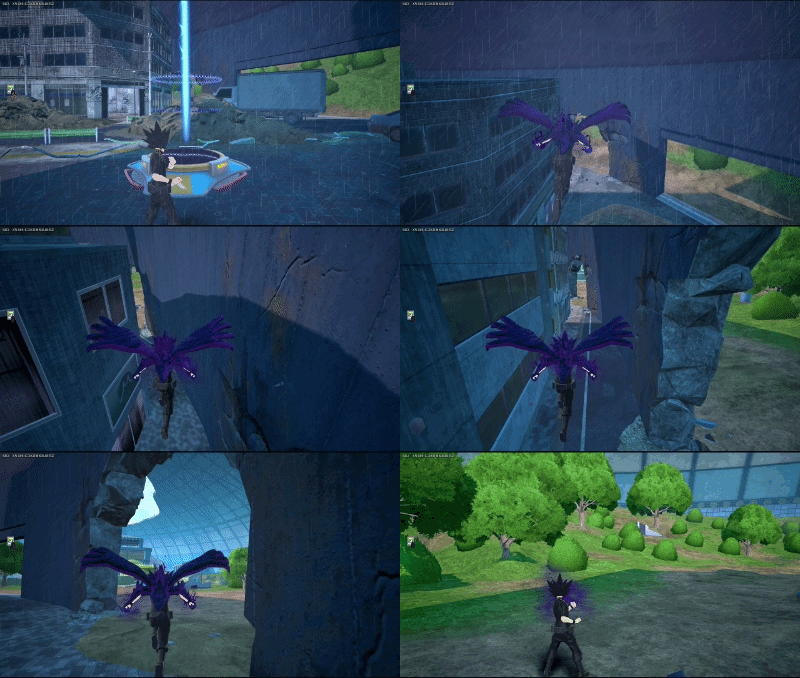 "Cloak yourself around me."
Tips for Black Ankh:
A basic 4-hit string with fair tracking and okay damage.
The 1st melee is a double hit whirlwind.
The 2nd melee is a rising back swipe.
The 3rd melee is a diving attack. It has a very niche use case as a fast fall. The attack falls at a ~45 Degree angle until it hits the ground.
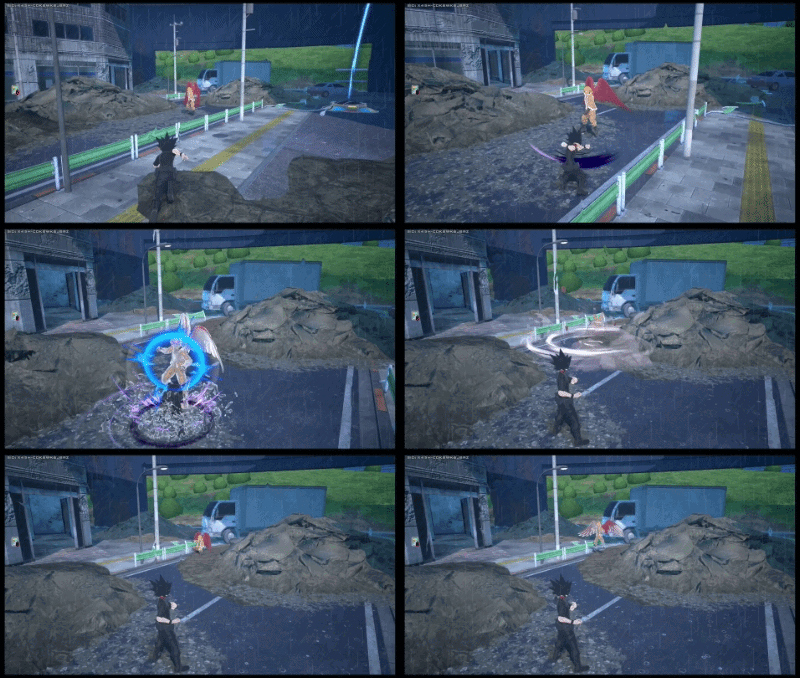 "Barrage!"
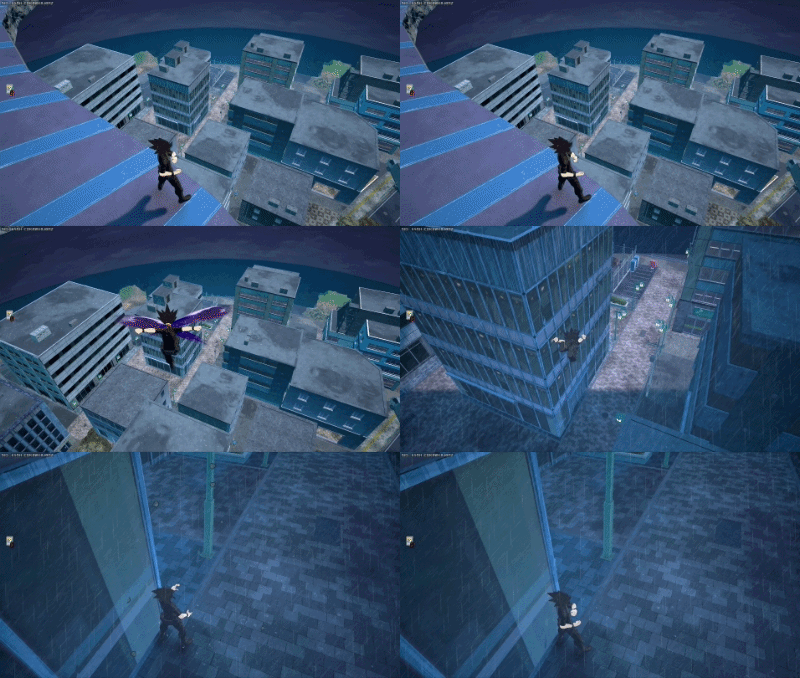 Cleared to land, runway 11
An aerial melee with serviceable tracking and okay damage. It has low down power and has a ground bounce property on HP. Air melee provides the main structure of Tokoyami's normal form combos and is an amazing melee for stabilizing team combos.
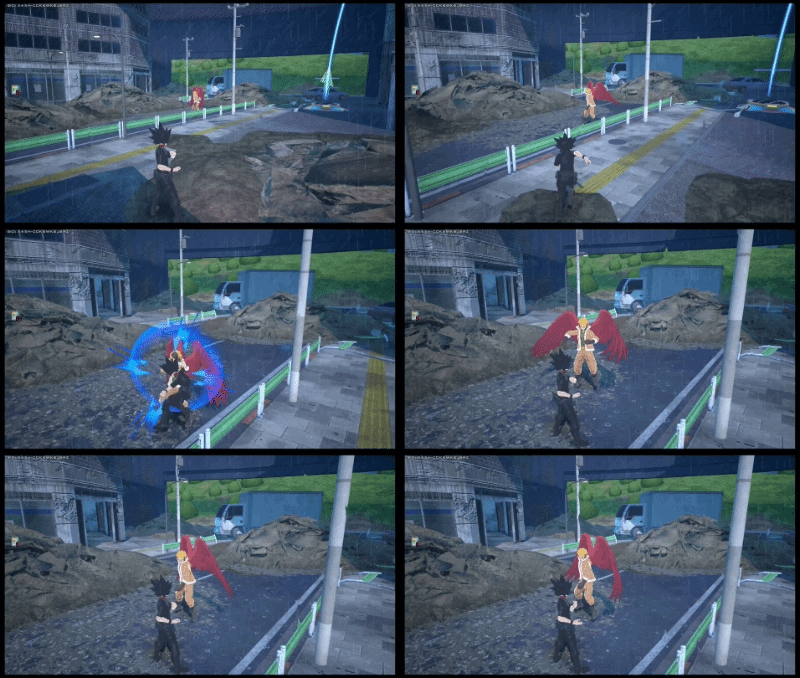 "Float!"
Black Ankh Melees are the same as normal forms, but have extra properties tied to them.
A good damage 4-hit string combo.
The 1st melee attack performs a whirlwind that also throws out a decent damage, but extremely large projectile.
The 2nd melee attack is exactly the same as the formal form except with slightly less down power.
The 3rd melee attack has a shockwave that performs a hard knockdown. The shockwave is useful for salvaging the string for a knockdown if the initial 2 melees did not land.
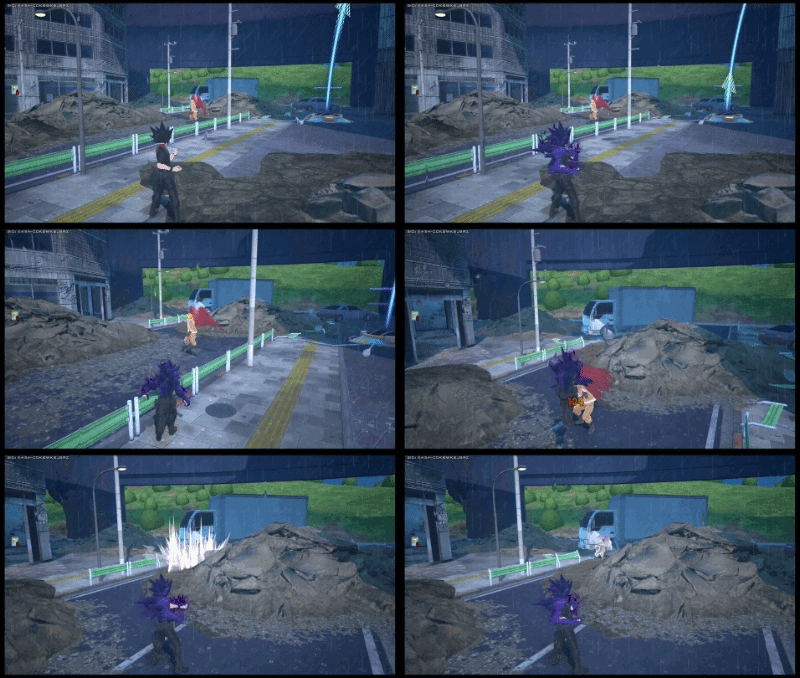
Ground Melee's projectile is extremely large, so large that it can hit opponents over ledges or around corners. It also has a very low down power. When used at distance, it a good choice for tagging on extra damage during a teammate's combo. The projectile does not pierce enemies, it merely stops at the first one struck.
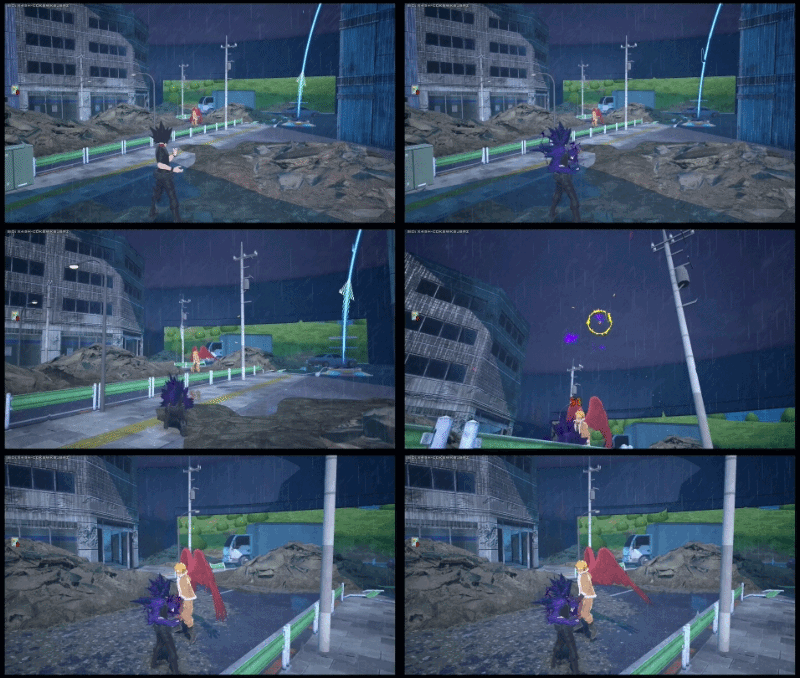 Throwing out house-sized projectiles.
A decent damage aerial claw slash that has a projectile. This air melee has incredible tracking and can hard knock down, but has a "sour spot". The physical melee attack portion does NOT stagger. Air melee only knocks down when BOTH the melee and projectile hit.
Hitting the sour spot is the worst of both worlds. An enemy will take minimal damage and have high down power applied to them effectively letting them get away or get knockdown invulnerability for little damage taken.
Compared to the Black Ankh Ground Melee projectile, it does more damage and goes farther, but has a higher downpower and smaller hit box. The projectile's main draw is that you can stay very mobile while firing a projectile.
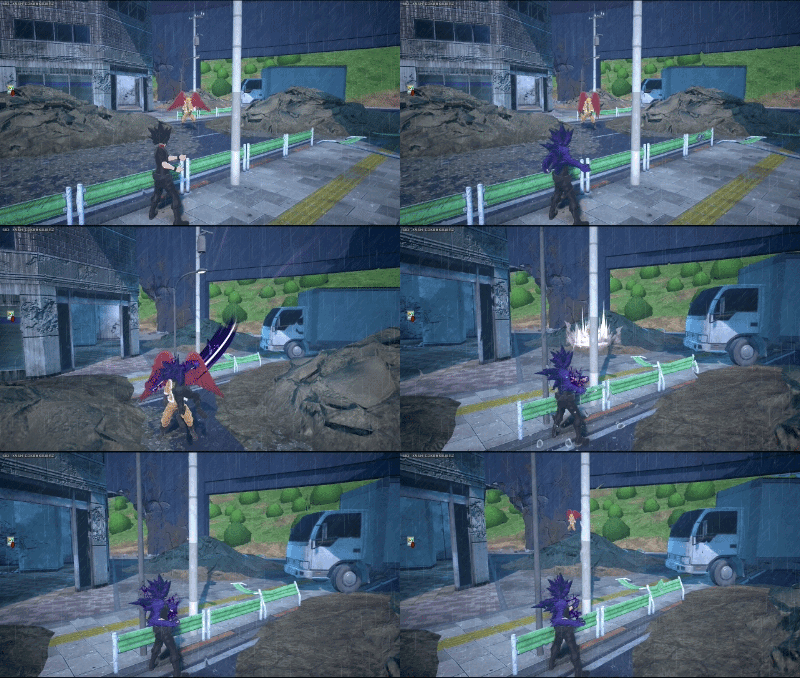
Compared to the Black Ankh Ground Melee projectile, it does more damage, goes farther, and lets you stay mobile, but has a higher down power and a smaller hit box.
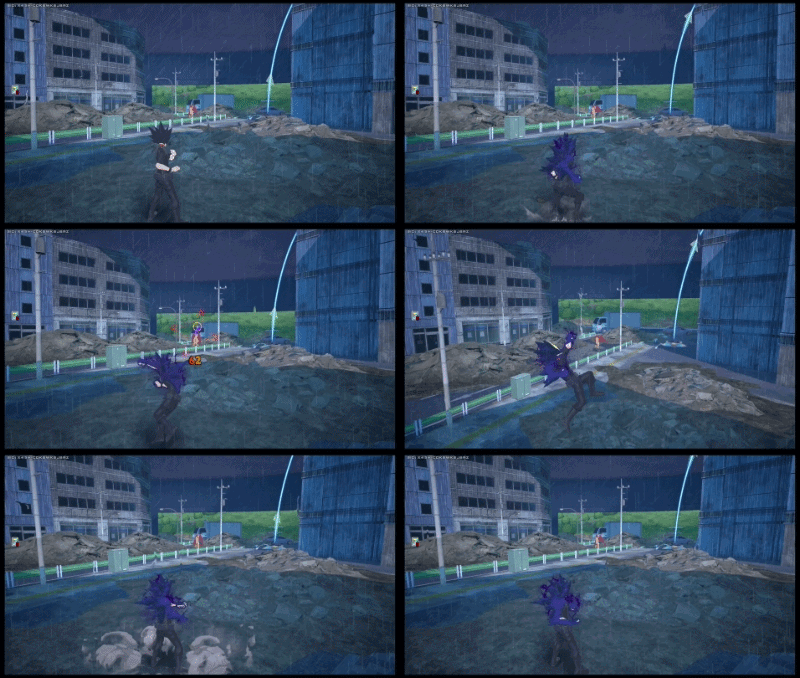

Tokoyami is not very level dependent early in the match, due to his basic kit performing below average and Black Ankh providing a lot of damage and utility. Generally, Gamma is leveled last as it reloads very slow. These level paths are merely a suggestion and not a rule.
Maxing Alpha early allows for much better poking and combo damage. This path is good on maps with a lot of open space or verticality.
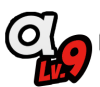


Maxing Beta early allows for much better lockdown and interruption. This path is good on maps with tight corridors, in chaotic lobbies, or lobbies with characters that must be controlled.
Alpha levels 1-4 provides more damage per level than Alpha 5-9. Beta at 4 increases the size of the AoE. It makes catching wake-up situations and locking down multiple enemies much easier.
Maxing Beta or Alpha first can be interchangable depending on what you want. Alpha max will improve poking and combos. Beta max allows for much more leniency with Beta placement.


Jump pads give a great resourceless way to traverse an area. Essentially, it acts as a free special action leap. Glide can be used at any point during the jump pad launch to control your height. Every jump pad has a different launch height which will result in different minimum and maximum glide heights. This means some jump pads will send you up higher than others, and also have a higher minimum height for gliding.
You can use it in creative ways, such as juking enemies or traversing to different heights of the map.
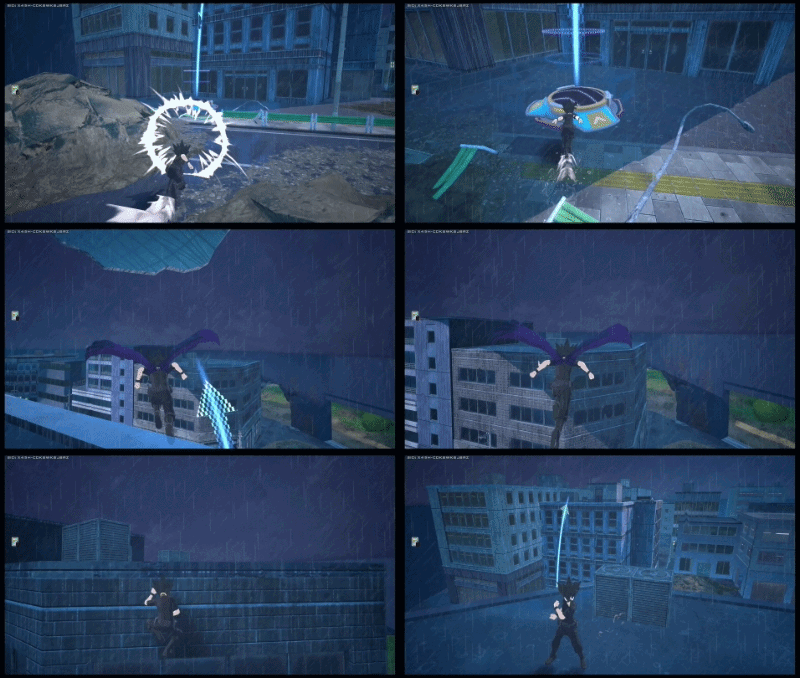
During a wallrun jump, you can transform into Black Ankh while you're gaining height. This allows you to keep very mobile and get into Black Ankh quickly. Afterwards, you can do any movement option such as gliding. When gliding after a superjump, you will lose a slight amount of height due to the wallrun jump penalty. Too alleviate this, melee right after the transformation in order to override the penalty.
To learn about wallrun jump, see the wallrun guide.
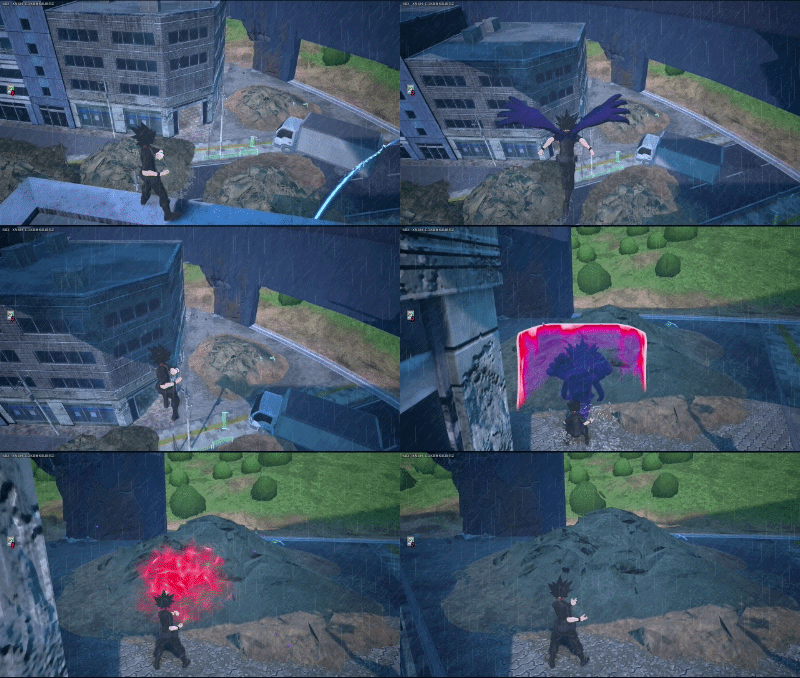
If Tokoyami is drinking and cancels it mid-air with any move, he falls much faster than usual. This can be useful for quickly regrouping with your team, going down into ground cover faster, or juking enemies by going up, then down quickly. This tech can be done at full HP or GP, but requires a team heal.
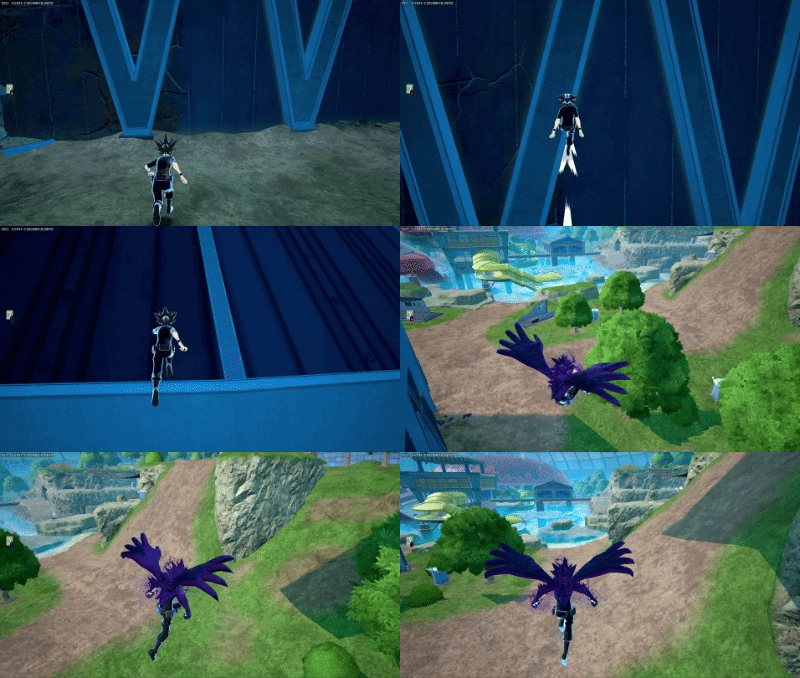
The order of inputs for jumping:
The order of inputs for walking off a ledge:
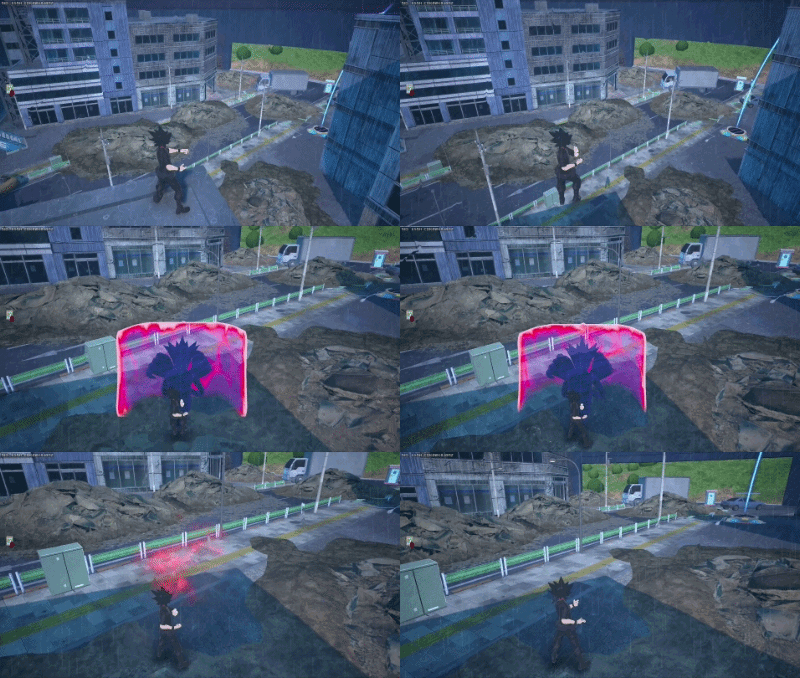
During the start-up of jump or falling off a ledge, you can use both Tokoyami's shield and glide. This requires quick consecutive button presses. This can be useful to protect yourself while either gaining distance on an enemy or running away from one. Do remember, Tokoyami's shield is very weak, so this will stall only for a little bit.
The order of inputs for jumping:
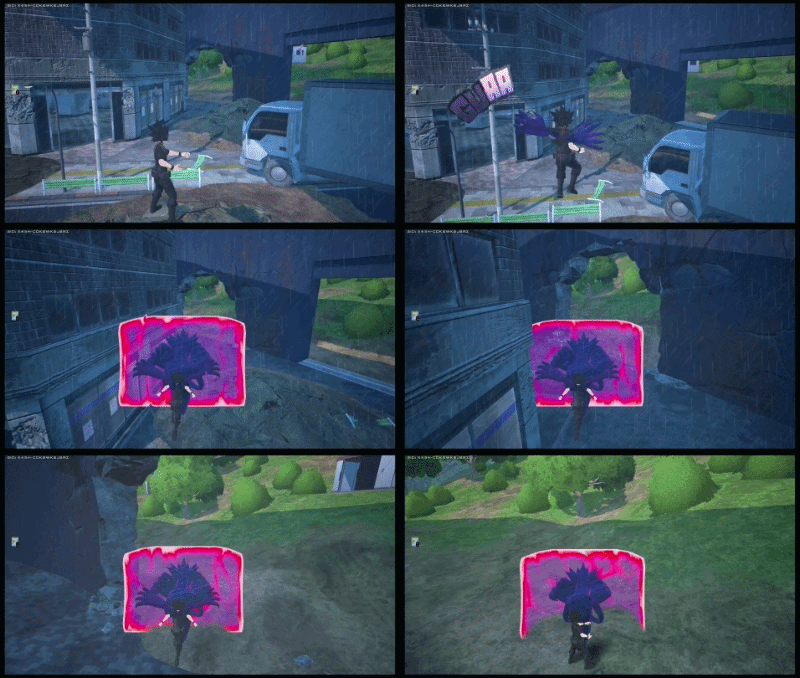
The order of inputs for walking off a ledge:
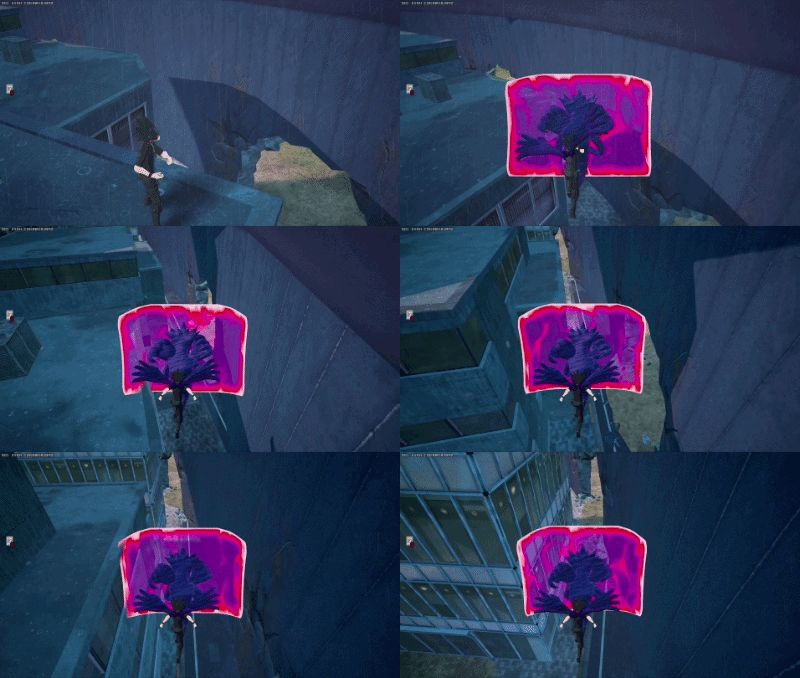
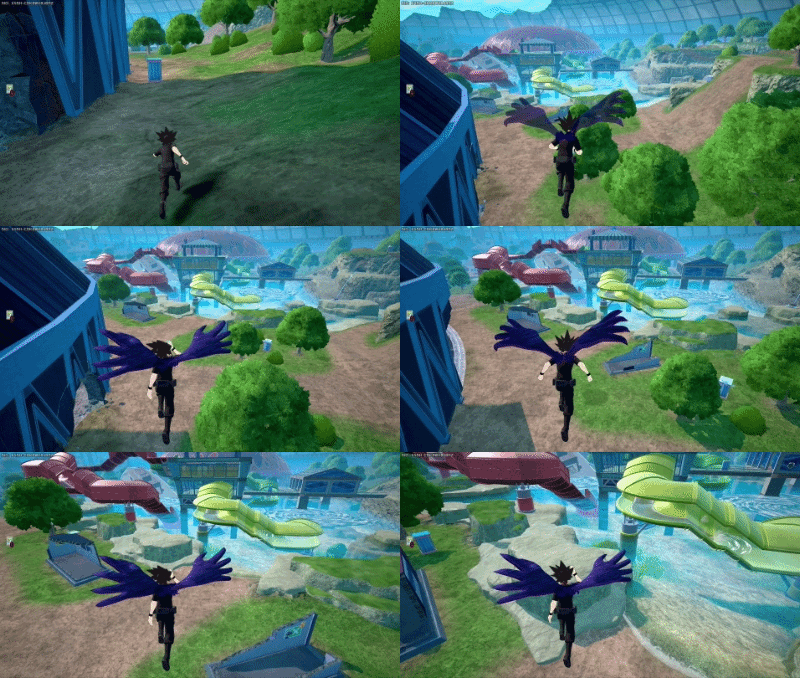
If Tokoyami resets his glide while healing in the air, his fall speed is even lower than normal. It allows him to drink, 2 team fulls from 1 Black Ankh Boosted leap before hitting the ground instead of normally 1. There's a brief period after finishing a heal where his horizontal momentum and vertical momentum are lowered. However, if you glide again twice, it resets his momentum to normal glide momentum.
Keep in mind that Tokoyami is much easier to shoot in the sky. Combine this with Stealth Healing to have the best results.
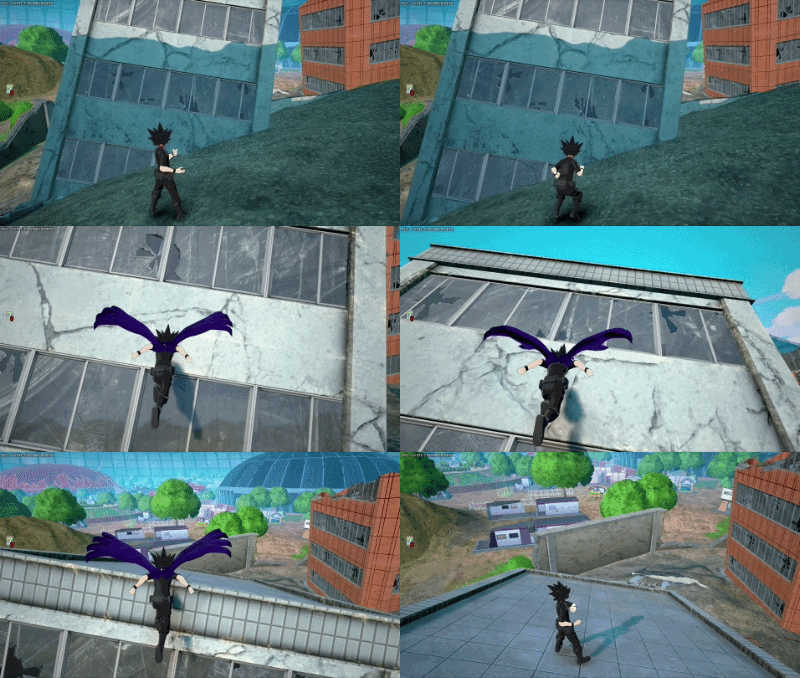
Tokoyami's glide can be used to go up slopes. As climbing is about the same speed, this tech isn't particularly useful, and is mostly for fun. Tokoyami can heal during this, but will slide down.

In the air, Tokoyami can re-glide as many times as he desires as long as he hasn't reached the flight duration limit. You can combine this in conjunction with Alpha or Beta to deal damage while keeping your movement unpredictable.
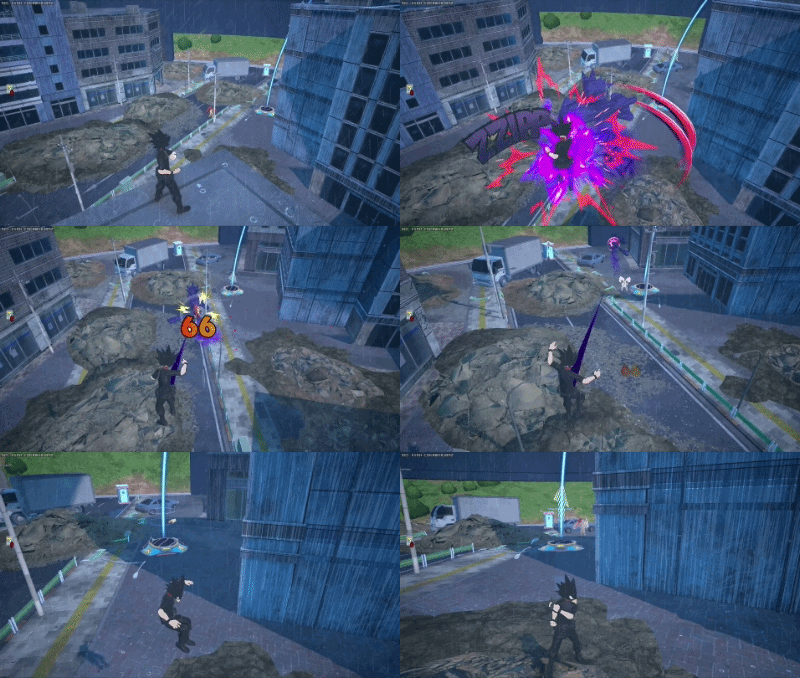
Black Ankh is Tokoyami's most important resource. The penalty cooldown for using all of Black Ankh meter is 30 seconds. Being without Special Action puts Tokoyami in a very bad situation. His other skills often times will not be enough to cover for him during that down period. Therefore, you should usually untransform to conserve meter when it's at a low percentage or when there are no engagements. To do this, you can manually untransform with the Special Action button or use Alpha, Beta, or Gamma.
In a life or death situation, it's okay to use all of your Black Ankh meter. It's better to live than to save a meter you can't use when dead.
A key thing to note is that Black Ankh will not start recharging while in the air. You need to either touch the ground, cling on to a wall, wall jump, or wall run to start the recharge.
In normal form, leap during consumes 50% meter. When using leap, 51% of meter is require to not go into cooldown penalty.
In Black Ankh, leap consumes 35% meter, but also has an action lockout period that wastes about 4-5% of meter before you can deactivate it. This means 41% meter is the maximum limit for not going into cooldown penalty when leaping during Black Ankh.
When fighting, make sure you have enough Black Ankh gauge to untransform safely. Stun timers vary depending on the move used and your height. 20% is considered the safe zone threshold to untransform. 10% is considered the danger zone. 5% is irrecoverable.
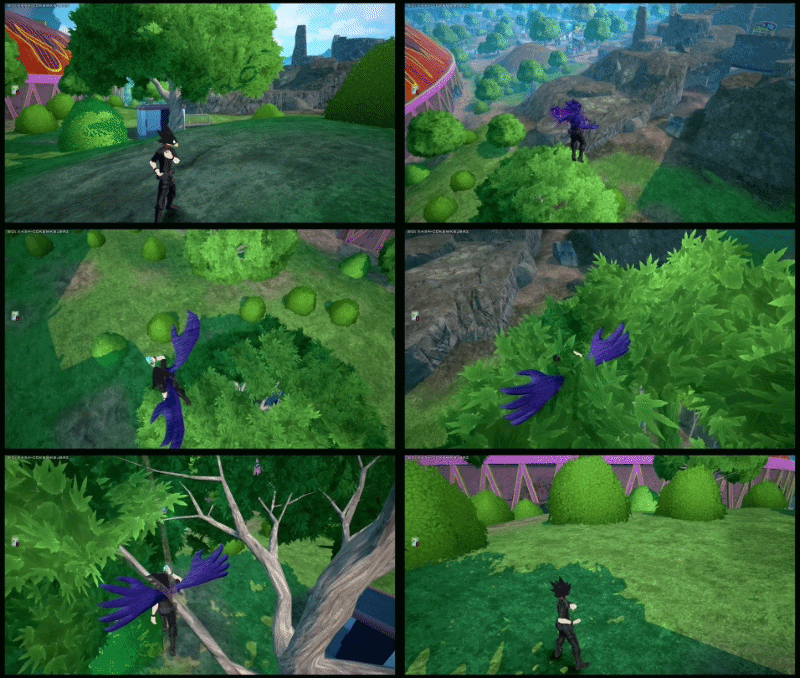
While Tokoyami is drinking during his glide, his glide speed is lower than normal. To make the most out of this, use the nearby environment to your advantage by staying hidden inside them. Tall pillars, corners in buildings, or trees are great ways to hide yourself while healing.
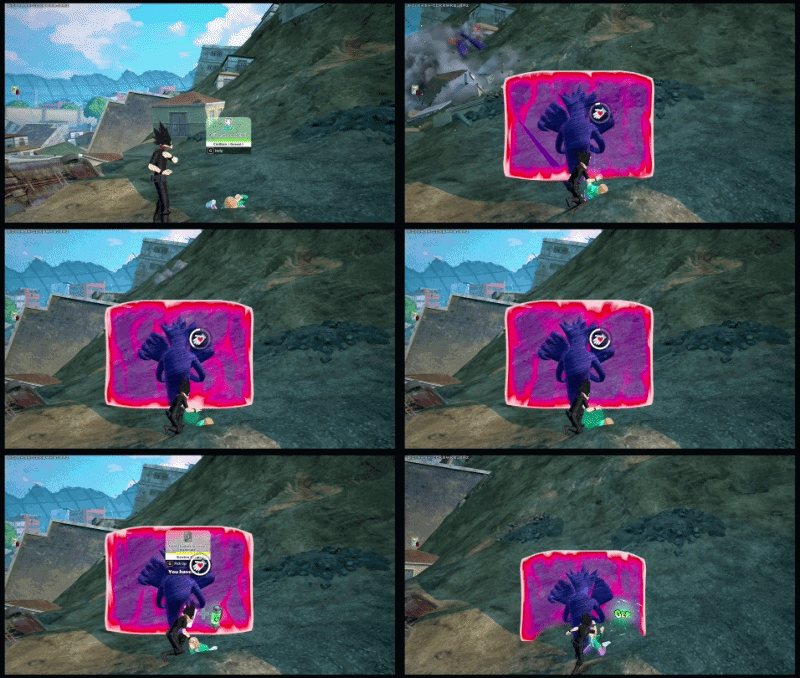
Using Gamma on a chest or civilian is considered an independent action from Alpha or Beta. This means Gamma won't interrupt whatever action Dark Shadow is performing ONLY while opening a chest or rescuing a civilian. So as long as you don't use another Alpha, Beta, or Special Action, Dark Shadow can protect and break buildings for you while you open a chest or rescue a civilians!
If you know an enemy will try to perform a physical attack on you, you can intentionally run into a physical attack with shield to stagger an enemy and punish them. Shield Gliding can be extended to this strategy.
Be wary of any fights happening around you. This will most likely break your shield or nearly break it, so you likely won't have shield for a while.
Due to Tokoyami's versatile kit, he is naturally good at team play. Generally in fights, his role is to be disruptive, ie. lockdown an enemy or bodyguard an ally from other enemies via knockdowns and staggers. He is also able to protect allies with a shield or heal them via team heals while staying gliding.
Like many other shield characters, Tokoyami can use his shield defensively to protect himself and teammates. This can be done reactively or predictively.
Unlike most shields, Tokoyami can also perform actions while shield is out. This must be done pre-emptively as using Gamma will override what he is doing. Tokoyami's shield will often break in 1-2 interactions and has a high cooldown. Therefore, Tokoyami's shield must be used with more intention than other shields.
You must consider several things before you use Gamma. The risk of the action you are doing, the risk of that action being interrupted, and the reward for the action being completed.
Knowing this can be difficult since every situation is nuanced and shield must be done pre-emptively for many actions. Sometimes using shield will draw attention to you from enemies that were otherwise oblivious. Sometimes you needed to use shield to block an attack that interrupted something important.
For example, using a revive card to revive your team is a high urgency action. The risk of using revive card is already high since your location is shown, and the reward for it is tremendous. Therefore, shield should be used here as it would not change the inherent risk of using a revive card.
Another example, using a team full to keep pressure in a fight is a high urgency action. There is a lot of fighting near you, but no one knows where you are. The reward for healing is high. Using shield can block a potential attack, but the risk of getting found is higher with a shield up. Therefore using a shield can be double-edged and is up to your discretion.
Knowing when to use shield is something you learn as you play more often. Mistakes often happen and you learn from them.
Tokoyami is not very level dependent early, due to his special action being strong at the start of the game. You can consider giving your teammates cards instead of yourself, if you feel like your teammate's skill spikes are stronger than yours.
However, don't neglect your own levels entirely. As the zone progresses, without levels, your vulnerable periods are more punishing.
Tokoyami's high down power makes him less than ideal for team combos. Whether or not you can help with a combo is largely dependent on your teammates' characters and your own tuning.
For teammates that have high damage, high downpower solo combos, it's better to act as a bodyguard for them or to help them chase.
For teammates with low downpower combos, it's better to use BA Ground Projectiles or Normal Air Melee on HP.
You can fix combos that would otherwise drop with Normal Air Melee, but this requires high situational awareness.
If you have team-based melee special tuning equipped, melees can provide utility for teammate during or after the combo, ie. Embrittlement or Perception.
If you have team heals and your teammates are in a fight or low, it's a good idea to retreat and start a team heal to keep them alive. You can use shield prior to protect yourself while healing or use leap into glide to hide in a safe position. If the team heal is not time-sensitive, after leaping, you can do a brief wall-jump, or wall run, with a rapid card or wall runner, to start recharging Special Action early. Be sure to untransform before drinking to conserve special action meter.
Shield can be used to protect yourself and allies while performing actions. As Tokoyami's shield is very visible and brittle, sometimes it's best not to use shield as to not draw attention. Be sure to use shield prior to an action to protect yourself while drinking, reviving a downed ally, or starting a revive card.
Sometimes an enemy is a high damage threat, shields and team heals can only do so much. This is where Tokoyami's specialty of enemy lockdown comes in. You are dragging their attention to you using staggers and hard knockdowns, so that your teammates can get some space to heal.
In normal form, Tokoyami can use Beta to keep enemies staggered and off your allies. Tokoyami can make use of shield bashing to stagger an enemy off their teammate.
In Black Ankh, he can make use of Black Ankh Melees to keep enemies off of teammates.
The different ways you can combine and chain various skills for higher damage within 500 DP (Downpower). The downpower of Fumikage Tokoyami's abilities are as follows:
Alpha: 225 DP
Beta: 93 DP (Per Tick), 465 DP (Total)
Gamma: - DP
Melee 1: 100 DP (Per Hit), 200 DP (Total)
Melee 2: 100 DP
Melee 3: 100 DP
Air Melee: 100 DP
"BA" refers to while transformed in Black Ankh.
BA Melee 1: 125 DP (Per Hit), 250 DP (Total)
BA Melee 1 Projectile: 25 DP
BA Melee 2: 75 DP
BA Melee 3: 75 DP
BA Melee 3 Shockwave: 500 DP
BA Air Melee: 450 DP
BA Air Melee Projectile: 200 DP
The text of the combos below will be colored by how true they are, in this case, we will define as "True" combos that, without 3rd party or tuning interference, can only be escaped/interrupted by Overhaul and/or Mirio, as those are special cases.
White Text means that part of the combo is True on both GP and HP.
Green Text means that part of the combo is True if the target is on HP only or the hit guardbreaks.
Blue Text means that part of the combo is True if the target is on GP only.
Red Text means that part of the combo is Untrue, and therefore the enemy can escape it.
The DMG of the following combos at max level and accounting for the character's strike role is classified under the following tags:
Basic DMG (100-149 DMG), Basic+ DMG (150-199)
Light DMG (200-249 DMG), Light+ DMG (250-299)
Medium DMG (300-349 DMG), Medium+ DMG (350-399)
High DMG (400-449 DMG), High+ DMG (450-499)
Heavy DMG (500-549 DMG), Heavy+ DMG (550-599)
Deadly DMG (600-649 DMG), Deadly+ DMG (650-699)
Numbers in parentheses denote the number of hits, ex. Beta (1) means one hit of Beta, Beta (5) means five hits of Beta.
Basic Beta combo that's good for non-committal poking.
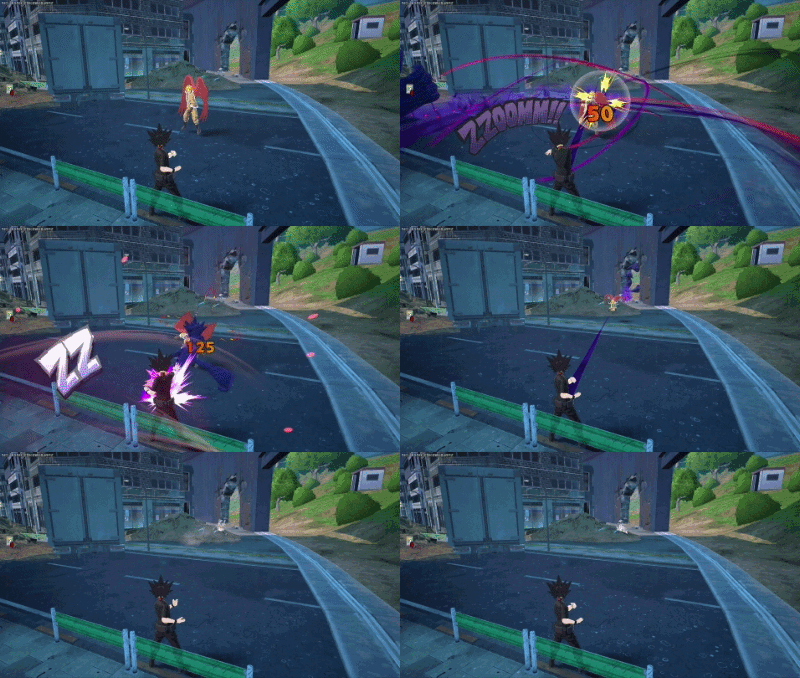

Basic close-ranged Beta combo that can apply melee tunings.
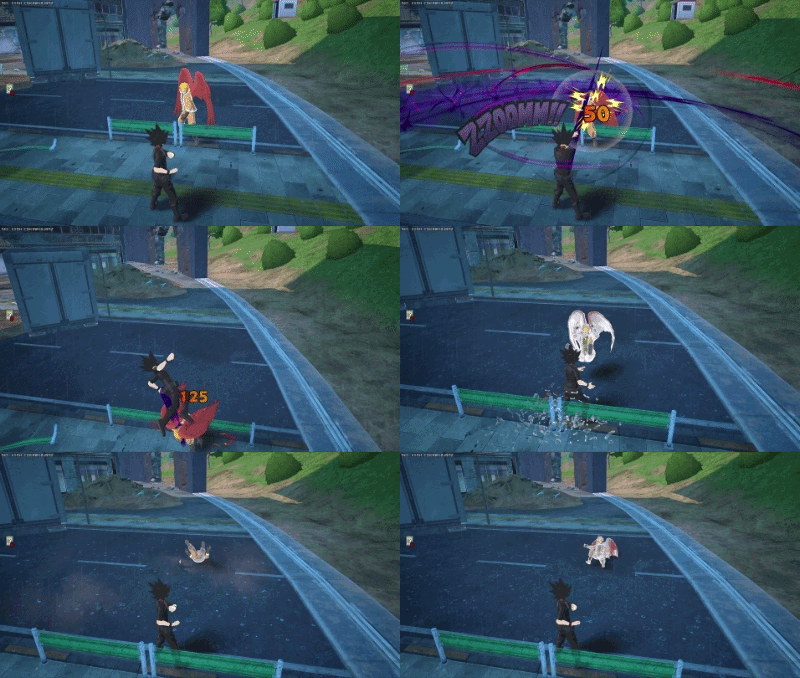
Basic HP and acceleration only combo that uses many of Tokoyami's foundational combo theory.
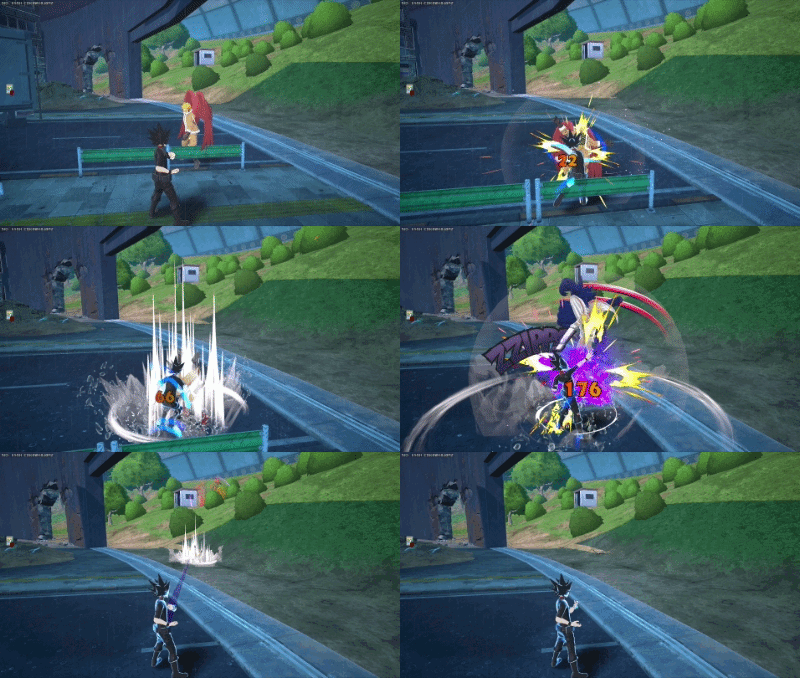
Air Melee Loops or also known as the "Dribble Combo" or "Basketball Combo". This combo makes use of air melee on jump startup. Alpha can be applied at the end on HP with Acceleration or down a slope.
Tips for doing the combo:
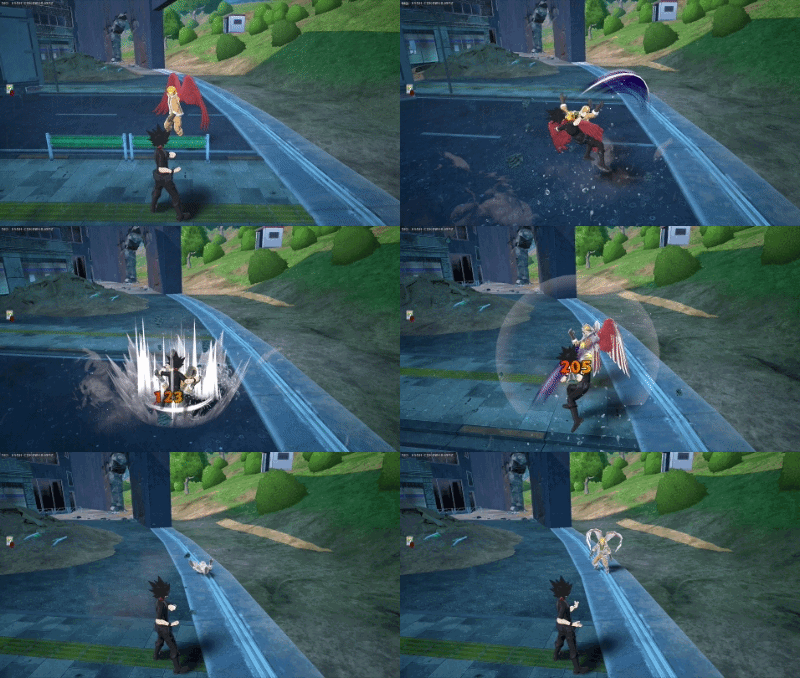
 Non-acceleration
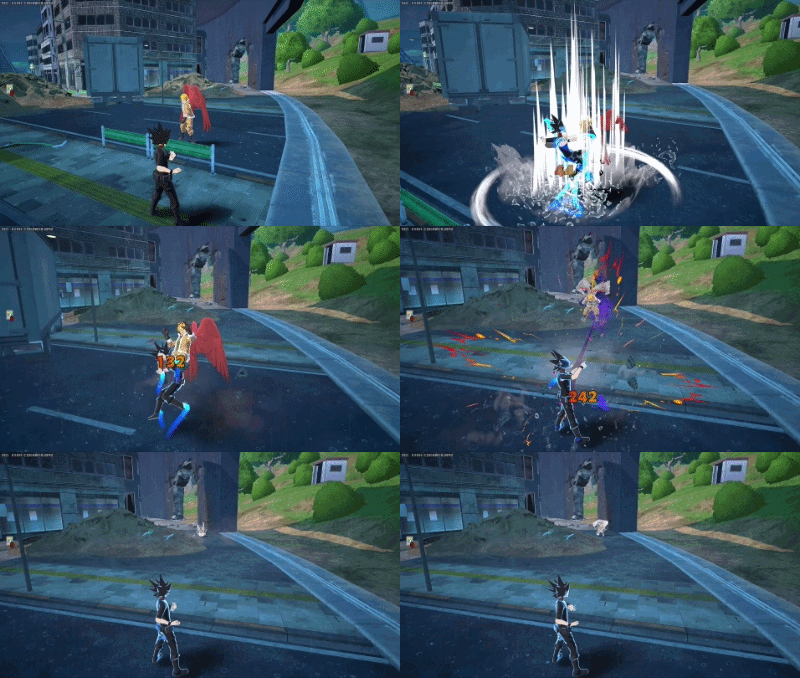
 This combo can be done on HP with acceleration and on GP without acceleration.
Decent combo that can be used to salvage damage from a mistiming during the Air Melee Loop.
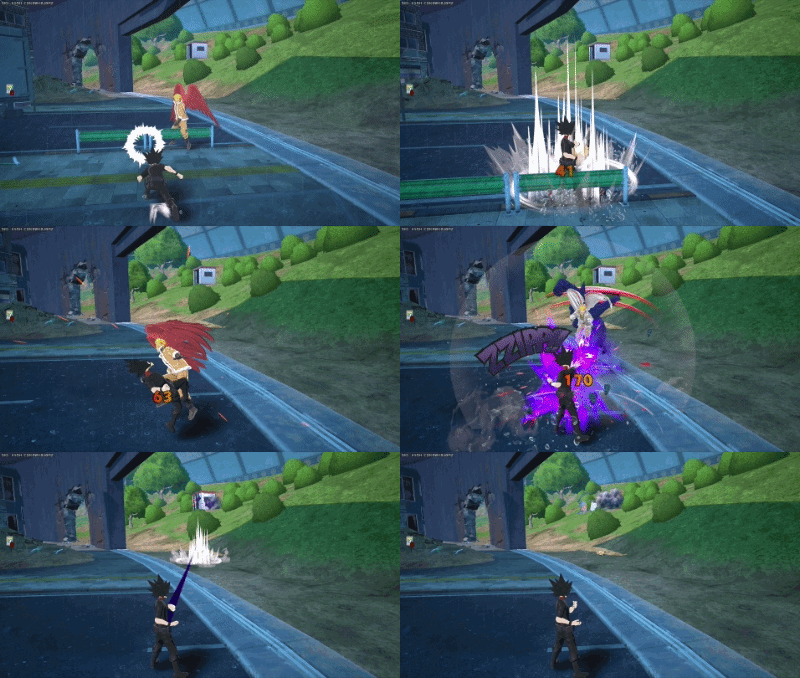 "Whoops! I messed up my air loop."
Highest Damage Combo for Tokoyami in base form. This combo requires getting one tick of Beta damage, then transitioning into Air Melee Loops. In practicality, this combo is very expensive and is mostly for flexing your mastery.
Breakdown:
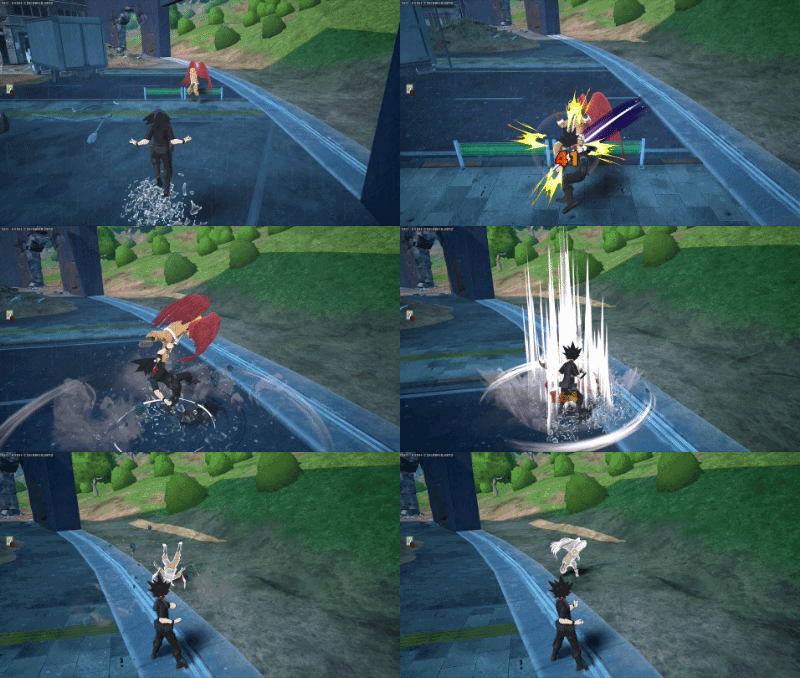 Non-acceleration
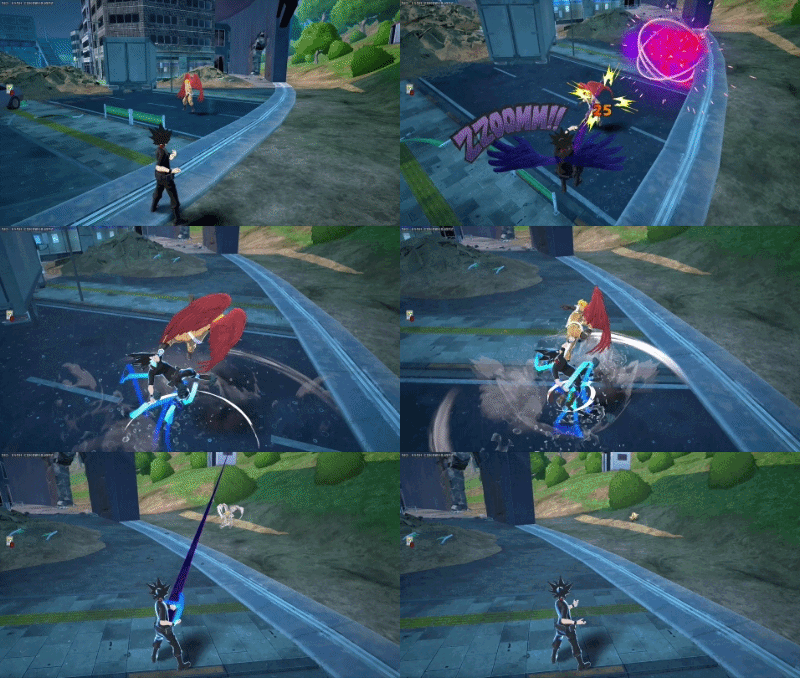 Acceleration
Tips:
Great damage untrue combo in Black Ankh. BA projectiles don't stagger, so BA Melee 1 is not guaranteed. It's also very spacing dependent due to needing to whiff the BA Melee 1 to avoid it's hit and tracking. This combo is best used when catching an opponent off guard while relatively closeby.
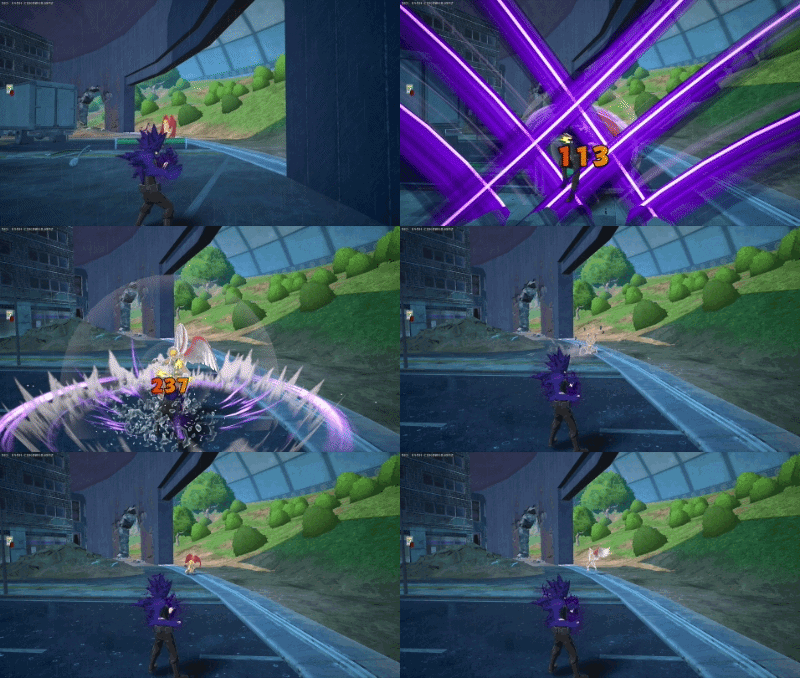 More projectiles can be added, but it will provide a larger amount of time for an enemy to react.
Tips:
Difficult, HP Acceleration only combo.
The timing on BA Ground Melee > (Untransform) > Air Melee is precise. You must manually untransform during your jump, then come down with a normal form Air Melee.
Tips for this combo:
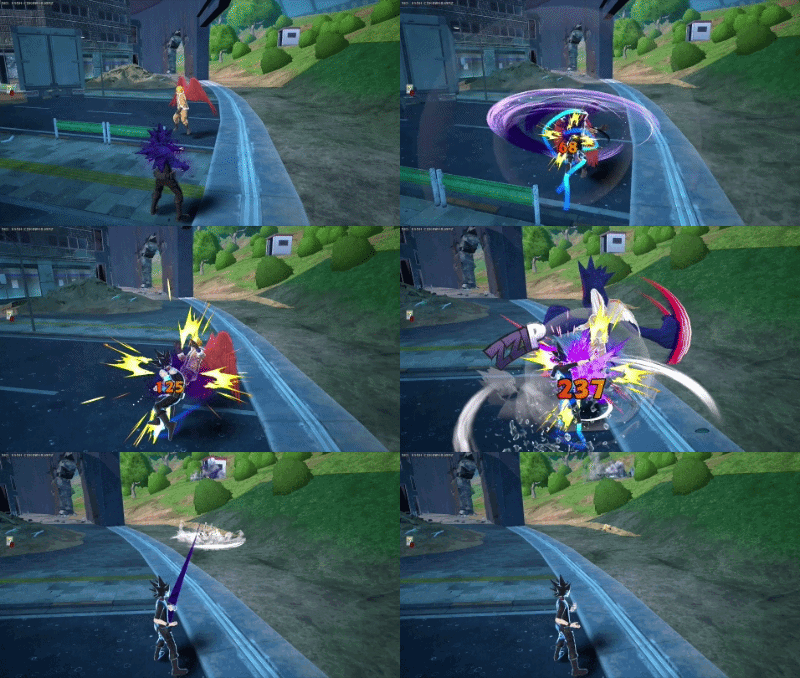
Spacing dependent variant of the above combo. It requires the first hit of BA Melee 1 to whiff to reduce down power and allows for an extra hit of air melee for more damage.
Tips for this combo:
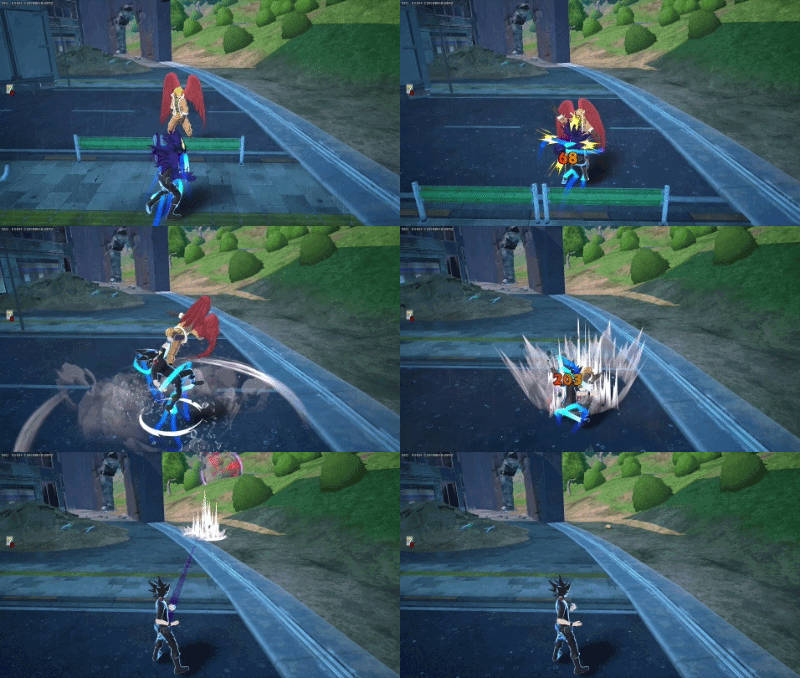
Normal Form Air melees are the highest damage, lowest down power move to fit into Tokoyami's combos, so it's the best way to extend combos.
Alpha is the highest damage ender for Tokoyami, but is tied to specific conditions. Alpha Ender can only be used on GP, with Acceleration on HP, or off an air melee combo that is on a downward slope. Without acceleration, on hp, Tokoyami recovers too slow to be able to use Alpha which will cause it to whiff entirely.
Air Melee is the most consistent ender for Tokoyami due to not having any conditions tied to it. This ender is best used when you don't have resources such as Acceleration or Alpha, or if you want to practice Air Melee loops.


Strike Slots: Melee DMG = Alpha DMG > HP DMG > GP DMG > Beta DMG > Else
Assault Slots: Melee DMG > GP DMG > HP Defense > Alpha Defense > Beta Defense > Gamma Defense > Else
Rapid Slots: Melee DMG > Alpha Reload > Beta Reload > Forward Jump HT+ > Else
Support Slots: HP+ > GP+ > Else
Technical Slots: Special Action Reload > Alpha Reload > Beta Reload > HP Defense > Gamma Reload > Else
Highly Versatile
These tunings can be used a plethora of situations and can potentially change how Tokoyami plays.
Personal-Preference
These tunings have good uses when needed and are ultimately up to a player's own individual playstyle.
Niche
These tunings have rare use cases and are often used in specific playstyles or gimmicks.
These special tunings are geared towards general play with a focus on self reliance.
|
Acceleration Highly Versatile Acceleration is one of the best tunings for Tokoyami, arguably the best one. It has a very easy proc condition for Tokoyami being a mere melee of any kind. It makes Tokoyami's speed unmatched when combined with Black Ankh and it allows Tokoyami high damage potential for his combos. |
|
Bunny Hop Highly Versatile Bunny Hop covers a wide range of options for Tokoyami when he needs them and provides high vertical mobility for the effort. When Tokoyami gets knocked down, the tech distance from Bunny Hop allows Tokoyami to easily retreat, or chase. If Tokoyami is knocked down with Acceleration, Black Ankh, or both, the tech speed and distance is incredible, an enemy cannot run from Tokoyami or chase him. |
|
Space Hop Highly Versatile Space Hop provides much needed free vertical mobility for Tokoyami. Although it is slower than leap, it covers essentially the entire height of a normal leap at no cost. It can be used for general movement, or in a pinch as an option to get away after being knocked down. |

|
Critical Permeation Highly Versatile Critical Permeation allows for Tokoyami to freely stall for his cooldowns. When guard broken out of the air, Tokoyami can freely drink and glide without worrying about losing his invulnerability. |

|
Willpower Personal-Preference Willpower is a strong safety net for Tokoyami. It can stall time for your cooldowns to come back up, especially for Black Ankh. However, Willpower cannot save you from really bad situations, such as Black Ankh being on cooldown. You must manage your resources well and Willpower always be should your last resort. |
|
High-Speed GP Replenishment Personal-Preference High Speed GP Replenishment reduces downtime for Tokoyami and lets get quickly back in a fight after leaping away, putting up Gamma, or simply find a good time to heal. |

|
High-Speed HP Replenishment Personal-Preference Much like GP Replenishment, High Speed HP Replenishment reduces Tokoyami's downtime, however HP Replenishment can extend to inside storm. Because Tokoyami can stay mobile in while drinking, he can stay in storm for extended periods of time as long as he has enough drinks and HP. |

|
Special Action Reload Boost Personal-Preference Special Action Boost greatly reduces the downtime for Tokoyami's Black Ankh, but can be clunky to manage because it requires Tokoyami to not have Black Ankh running. |
|
Wall Runner Personal-Preference Wallrunner allows for Tokoyami to save Special Action meter by allowing him to freely move vertically on a building, he can begin to recharge Special Action meter while wall-running, and it allows him to use various wallrunner techs to keep his movement tricky. |
|
Embrittlement Personal-Preference Embrittlement has a very easy proc condition for Tokoyami and applies a great damage boost for Tokoyami to squeeze out more damage from his combos. |
|
Spiraling Leap Personal-Preference Where Space Hop is good for long distance, Spiraling Leap's vertical mobility lets Tokoyami have short bursts of movement when combined with glide. It also keeps you lower to the ground which can make you harder to notice. |
|
Hyper Regeneration Personal-Preference Hyper Regeneration is a great tuning when combined with other revenge tunings as it greatly extends the total duration of them. Revenge Assault or Support combined with Hyper Regeneration allows for Tokoyami to be extremely tanky for a long period of time. |
|
Area Reduction Personal-Preference Area Reduction extends Tokoyami's time in storm. When paired with Tokoyami healing while gliding, he go in and out of storm to recuperate as needed. |
|
Sisterly Disposition Personal-Preference Sisterly Disposition has an easy proc condition for Tokoyami and provides great defensive benefits for him as well. There are times where Tokoyami may not be able to leave and Sisterly can deliver much needed survivability in those situations. |
|
Quirk Factor Release Personal-Preference Quirk Factor Release will reload all of Tokoyami's skills very quickly with the exception of Gamma. This means you will have less downtime for your entire kit. |

|
Slicing Wind Niche Slicing Wind can have uses for Tokoyami as he doesn't need levels urgently early in the game. This means he can trickle in levels as the game progresses to get many uses out of his plus ultra. However, this tuning loses it's use when Tokoyami has full levels and it can be dangerous to carry a lot of level cards. |
|
Speedy Self-Revive Niche Speedy Self-Revive is a very gimmicky tuning that relies on enemy negligence and Gamma protecting you. |
|
Quick Reload Niche Quick Reload allows Tokoyami to poke entire fights repeatedly, but is under the condition of Alpha being hit that downs. Due to the high down power of Tokoyami's Alpha, there will be a decent period where enemies are invulnerable and you cannot hit them with Alpha. |
These special tunings are geared towards players that enjoy supportive playstyles revolving around using team heals and keeping enemies off teammates.

|
Twisted Fortune Highly Versatile WE LOVE GAMBLING! Tokoyami has more opportunities to heal than other characters due to glide and can protect himself while healing with Gamma. Twisted Fortune allows Tokoyami to act as a team heal bot while he stays out of sight or safe from the fighting. |
|
|
Embrittlement Highly Versatile Embrittle is a great tuning to enhance a teammate's combos. It's very easy to proc for Tokoyami. It works best with teammates with grabs or low down power combos. |
|
Perception Personal-Preference Perception allows Tokoyami and his teammates to relentlessly chase a single enemy or multiple if Tokoyami tags more than one. If Tokoyami cannot chase, his teammate can chase instead. If no one can chase, then Tokoyami and his team can know where they are to fight later. When in comparison with Annihilation, Annihilation is less consistent with higher potential reward. While Perception is more consistent with moderate reward. |

|
Annihilation Niche (Solo) / Personal-Preference (Pre-made team) Annihilation's value depends on your team's level of communication. From a solo queue perspective, Annihilation provides very little if teammates do not make full use of the wall-hack to hunt down enemies. However, this changes when in a pre-made team. Annihilation is great when you can communicate with your team on the whereabouts of enemies, so that you can keep the pressure on. When playing with teammates that have high damage, it can be difficult to proc annihilation. When in comparison with Perception, Perception is more consistent with moderate reward. While Annihilation is less consistent with higher potential reward. |
|
Speedy Civilian Rescue Niche Speedy Civilian Rescue can put you in a good position for early-mid game fights with team heals or allow your team to recover from a bad fight. Tokoyami can safely rescue civilians by using Gamma while rescuing them. While carrying a lot of team heals, you must play passively to prevent another team from getting all of your team heals. If you prefer playing aggressive, consider giving some of the team heals to your teammates. This tuning can be fantastic when paired with Twisted Fortune (Nejire - Fairy). |
|
Divine Protection Niche Much like Speedy Civilian Rescue, Divine Protection can put your team in a good position by making a box open near instant. Tokoyami can guarantee a box open when combined with his Gamma to prevent any interruptions. |
|
Reinforced Revive Niche Tokoyami's gamma can be used to protect himself and a teammate while reviving them. Reinforced revive makes reviving a high-risk, high-reward action, but Tokoyami's shield can mitigate much of the risk through stalling. |
Budget Costume gained via rolls. On the purple slot, you can use Special Action Boost or Hyper Regneration. On the red hero slot, you can use Willpower.

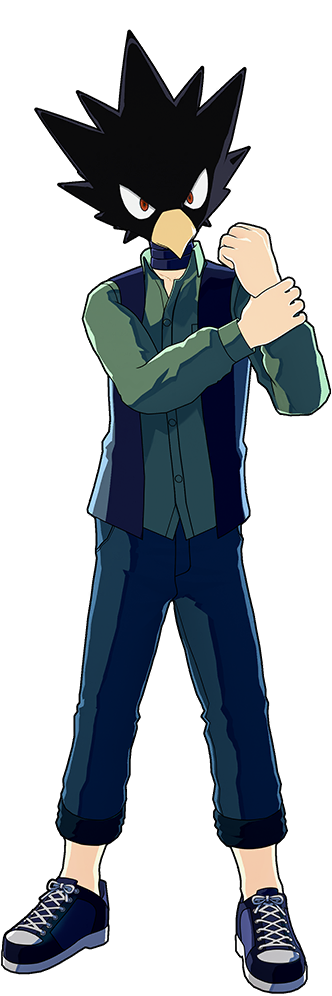
Budget Costume gained via customizations tab for gold coins. On the red slot, you can use willpower. On the yellow hero slot, you can use Sisterly Disposition/Revenge Assault.


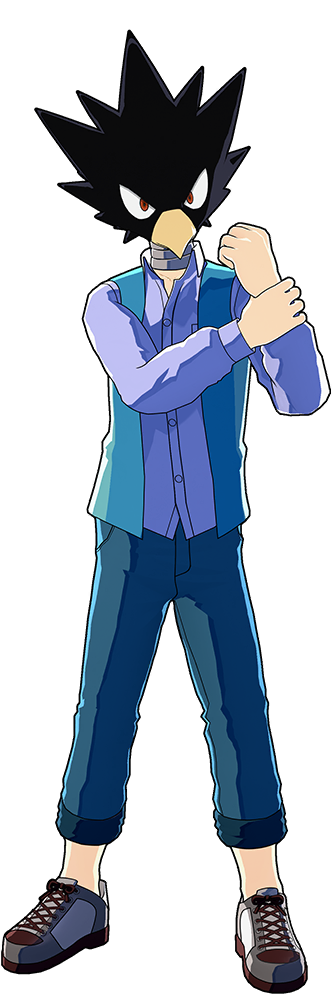
PUR Costume that allows for a lot of movement or utility tuning to allow Tokoyami to play fast. On the blue slots, you are able to use Acceleration, Wall Runner, Bunny Hop, and/or Perception. If using Acceleration, it's recommended to use it on the hero slot to reach lvl. 11 for minimal downtime when on cooldown.


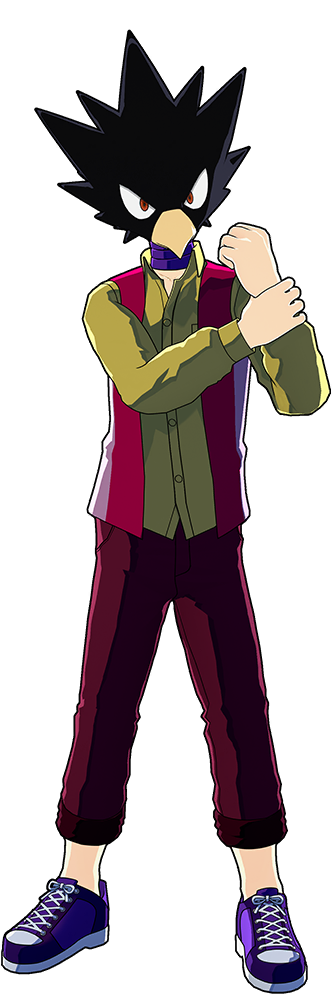
PUR Costume for Tokoyami with good utility and/or defense. Yellow slots are flexible and have good utility. Yellow slot candidates include, Revenge Assault, Space Hop, Embrittlement, Sisterly Disposition, or Quirk Factor Release. When using Quirk Factor Release, it's recommended to put it in the lvl 11 villain slot to minimize it's downtime.

PUR Costume with either support utility or extended survivability. Green slots are flexible for Twisted Fortune, Revenge Support, or Divine Protection. The purple villain slots are flexible for Hyper Regeneration and Special Action Boost. With Hyper Regeneration, it's recommended to go Revenge Support to extend it's duration.
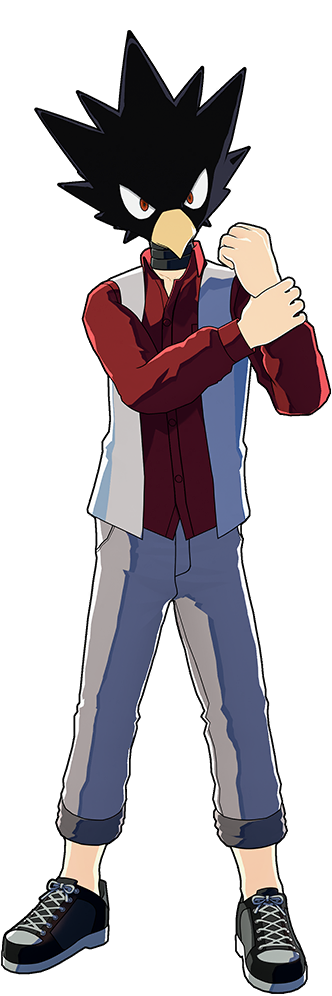

PUR Costume with good flexible utility and/or defense. Purple slots can be used for Critical Permeation, High Speed GP Replenishment, Spiraling Leap, Hyper Regeneration, or Special Action Reload. Yellow Hero slot candidates include, Revenge Assault, Space Hop, or Sisterly Disposition.
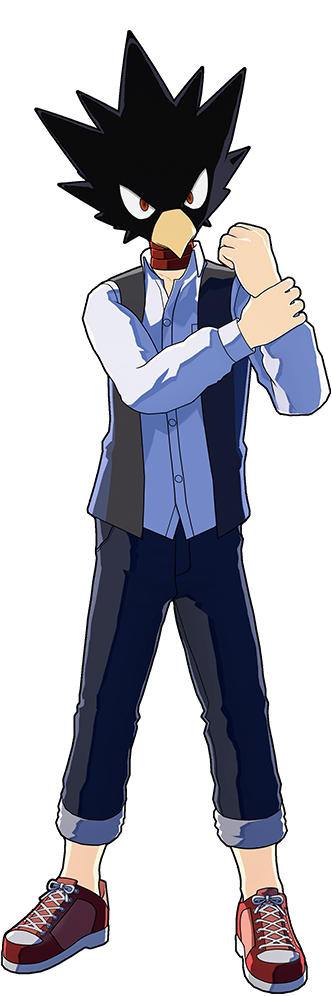

PUR Costume for Tokoyamis that like strong self and team utility. On the blue slots, you can use Wall Runner, Bunny Hop, or Acceleration. On the red villain slot, you are able to use Quick Reload or Annihilation.
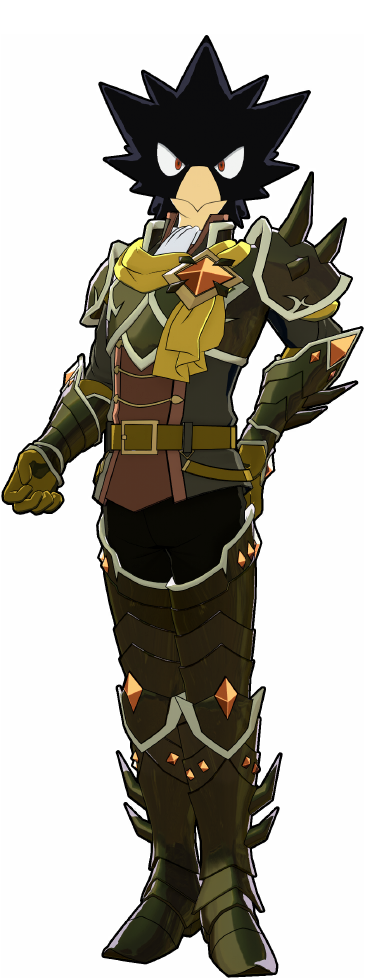
PUR costume that focuses on general survivability. In the red slot, you can run Willpower or High-Speed HP Replenishment. In the purple slot, you can run Special Action Reload or Hyper Regeneration.
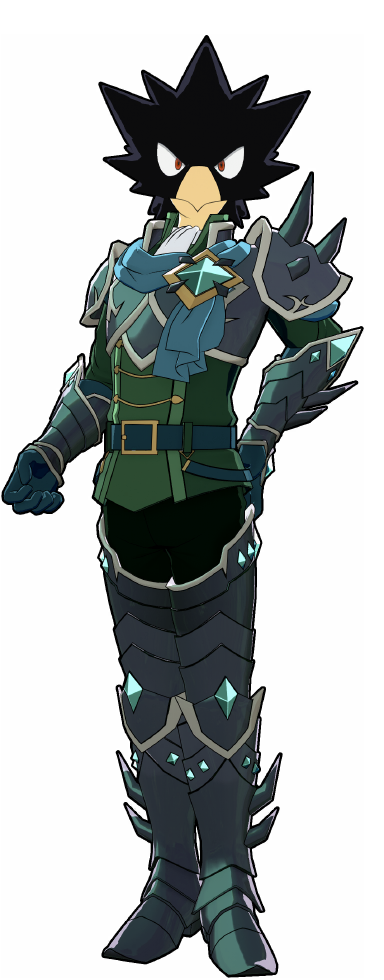
PUR costume for Support or Tanky playstyles. Green Special Tuning is very flexible being able to use Revenge Support, Twisted Fortune, or Divine Protection. Yellow Special Tuning can run Revenge Assault, Speedy Civilian Rescue, or Space Hop.
Decent PUR costume for Support Tokoyami players that have a drinking problem. Purple Special Tuning is flexible for High-Speed Replenishment or Special Action Boost. Green Special Tuning can be used for Reinforced Revive, Compression Magic, or Warp Heal.

Depending on the match-up, Tokoyami should focus on different playstyles. Poking is generally staying at medium range and whittling down an enemy's health or knocking them down so that Tokoyami has a chance to close the distance. Lockdown is generally staying at close range and repeatedly knocking down an enemy for as long as possible.
Although both playstyles should be incorporated in some form, some match-ups prefer one over the other or a balance of both.
Difficulty Score: 🔴Unfavorable🔴
Deku has various tools to deal with Tokoyami's tools and vice versa. This match-up depends on Tokoyami's movement and meter management vs. Deku's aim. With bad meter management, Deku can have the upperhand as Tokoyami will be significantly weak for a long period of time. Deku's crouch shot can keep you under control as it performs a hard knockdown which will halt Tokoyami's momentum. Deku's beta is incredible for getting out of Tokoyami's Beta as it has armor for the duration of the kick.
Tips vs Izuku Midoriya (Default):
Difficulty Score: 🔴Unfavorable🔴
Full Bullet's mobility makes it awkward for Tokoyami to chase. However, Tokoyami can make use of his Alpha and BA Projectiles to counteract this. In a straight on fight, Tokoyami loses. Tokoyami must make use of his movement and lockdown to prevent Deku from beaming him.
Tips vs Izuku Midoriya (Full Bullet):
Difficulty Score: 🔴🔴Very Unfavorable🔴🔴
OFA Deku outpaces, outdamages, and out-shoots Tokoyami. Tokoyami must make good use of all of his tools in order to counter Deku.
Tips vs Izuku Midoriya OFA:
Difficulty Score: 🟡Even🟡
Bakugo and Tokoyami have similar movement. Tokoyami can easily lockdown Bakugo with his Beta and Black Ankh Melees. However, Bakugo can turn a fight quickly from just one mistake.
Tips vs Katsuki Bakugo (Default):
Difficulty Score: 🔴Unfavorable🔴
Machine Gun can make himself very difficult for Tokoyami to reach him. Tokoyami must make use of his projectiles to pressure Bakugo to land.
Tips vs Katsugi Bakugo (Machine Gun):
Difficulty Score: ➖ Need more Data ➖
Placeholder
Tips vs Katsugi Bakugo (Cluster):
Difficulty Score: 🔴🔴Very Unfavorable🔴🔴
Catching Ochaco is notoriously difficult for most characters. This is no exception for Tokoyami. Ochaco has the initiative in most engagements vs Tokoyami as she can leave and engage as she pleases. Tokoyami will need to try to knock down Ochaco when she approaches. When on the offensive, Tokoyami must make the most out of his knockdowns and poke at Ochaco whenever he can.
Tips vs Ochaco Uraraka (Default):
Difficulty Score: 🟢Favorable🟢
Ochako has very telegraphed attacks with large recovery. Tokoyami can punish these mistakes to lead into repeated knockdowns. However, a single mistake will allow Ochaco to take a mile back.
Tips vs Ochaco Uraraka (Zero Satellites):
Difficulty Score: 🔴Unfavorable🔴
Iida easily outmaneuver Tokoyami and outdamage him. Tokoyami must be careful at close-medium range and poke at long-range. Tokoyami's Gamma is great at hindering Iida's approach. However, Iida can easily walk past it. Punish him accordingly for overextending too much.
Tips vs Tenya Iida:
Difficulty Score: 🔴Unfavorable🔴
Todoroki's close range damage output and damage at range make it very difficult for Tokoyami to poke or stay on top of Todoroki. Outside, it can be easy to bait Todoroki into committing resources to keep Tokoyami out. However when indoors, Todoroki can hit Tokoyami easily and put Tokoyami in a bad situation.
Tips vs Shoto Todoroki (Default):
Difficulty Score: 🟢Favorable🟢
Although Tokoyami's Gamma is easily broken, it shuts down nearly everything that Todoroki can throw out. Todoroki can control space with Beta explosions, but if Tokoyami stays relatively low to the ground, he can easily avoid the explosions with rolls.
Tips vs Shoto Todoroki (Ice Fang Wind Flame):
Difficulty Score: 🟡Even🟡
Tsuyu easily outmaneuver's Tokoyami and does good damage as well. However, Tokoyami can prevent her from getting in with Gamma and poke at her while she's maneuvering in. Tokoyami must play around Tsuyu's approach and try to keep her locked down.
Tips vs Tsuyu Asui:
Difficulty Score: 🟢Favorable🟢
Kirishima's moves are very telegraphed meaning they are easy to dodge. However, don't underestimate the damage that they can do. Tokoyami can easily keep Kirishima locked down even in unbreakable during Black Ankh. When Black Ankh is down, Tokoyami must instead poke as Kirishima can charge at him.
Tips vs Eijiro Kirishima (Default):
Difficulty Score: 🔴🔴Very Unfavorable🔴🔴
Red Drive's raw damage output obliterates Tokoyami. Along with unbreakable, Red Drive forces Tokoyami to commit to using resources to halt Red Drive at all. Red Drive's mobility is must cheaper than Tokoyami, so more often than not Red Drive can get away from Tokoyami for little to no consequence.
Tips vs Eijiro Kirishima (Red Drive):
Difficulty Score: 🟡Even🟡
Denki struggles versus Tokoyami's tool kit. Denki's Alpha is shorter range than Tokoyami's Alpha and BA projectiles. Denki's Beta will go through shield, but Tokoyami has tools to punish him for that. Denki's Gamma will be blocked by Tokoyami's Gamma. However, Denki has absurd damage if he is able to apply electricity on to Tokoyami.
Tips vs Denki Kaminari (Default):
Difficulty Score: 🟢Favorable🟢
At distance, Denki beats Tokoyami. At mid-close range, Tokoyami beats Denki. Tokoyami must patiently approach Denku, ideally without using many resources to close the distance.
Tips vs Denki Kaminari (Lightning):
Difficulty Score: 🟡Even🟡
Momo is a great close-range combatant and has great deterrant skills. A Tokoyami that is overly aggressive can find himself in over his head trying to kill Momo.
Tips vs Momo Yaoyorozu:
Difficulty Score: Skill Match-up
Skill match-up that is largely dependent on who gets momentum first and maintains it.
Tips vs Fumikage Tokoyami:
Difficulty Score (Base Skills): 🔴🔴Very Unfavorable🔴🔴
Difficulty Score (Special Action): 🟣Unknown🟣
Monoma's base skills can easily ignore Tokoyami's entire kit. Monoma's Gamma's i-frames last longer than Tokoyami's entire Beta, so it is very difficult to lock down Monoma. Should Tokoyami make a mistake, Monoma's beta combos will easily break Tokoyami's GP and allow Monoma to leave.
How well Monoma plays versus Tokoyami during Special Action depends entirely on what quirks Monoma has stolen. If Monoma has stolen Tokoyami's quirks, Monoma will be left with an extremely underwhelming copied quirkset.
Tips vs Neito Monoma:
Difficulty Score: 🔴🔴Very Unfavorable🔴🔴
Kendo is a stronger close-range combatant than Tokoyami. Even if Tokoyami plays a poke war, Kendo's shield will hold no matter how many projectiles are thrown at her. Despite these issues, Tokoyami has the great benefit of mobility; allowing him to retreat to fight again later. However, as the match goes on, Tokoyami may find himself needing to interact with Kendo.
Tips vs Itsuka Kendo (Default):
Difficulty Score: 🔴🔴Very Unfavorable🔴🔴
Kendo is incredibly good at close range and countering close-range characters. Tokoyami has a very awkward time dealing with Kendo due to her Beta. When Kendo is on the offensive, Kendo can lockdown Tokoyami at an distance.
Tips vs Itsuka Kendo (Twin Palm Strike):
Difficulty Score: 🟢Favorable🟢
Ibara outdamages Tokoyami at distance and is deadly at close-range. Caution is required when fighting Ibara at those ranges. Ibara's Alpha goes through Tokoyami's Gamma. Ibara's Beta will easily break Tokoyami's Gamma. Ibara's Gamma has armor, so it will trade favorably with Tokoyami's Beta if he hasn't hit her already, and is dangerous due to Tokoyami having 300 hp.
Despite all of this, should Tokoyami play patiently and punish, Ibara should have no large openings. Ibara must commit to options in order to prevent Tokoyami from approaching.
Tips vs. Ibara Shiozaki:
Difficulty Score: 🟡Even🟡
Skill match-up. If Mirio is reckless, Tokoyami can punish him. If Tokoyami is reckless, Mirio can punish him. Tokoyami can lockdown an overly aggressive Mirio, but a Mirio with good reads can bait Tokoyami into overcommitting or undercommitting, allowing free damage or an opportunity to escape. Mirio has an edge due to permeation allowing cooldown stalling and baiting out abilities.
Tips vs Mirio Togata (Default):
Difficulty Score: 🔴🔴Very Unfavorable🔴🔴
Mirio has the initative in every interaction and Tokoyami must respond accordingly to Mirio. Mirio can play mind games with his counter which will lead to devasting damage against Tokoyami. Tokoyami must be patient and minimize free that Mirio can deal during Alpha.
Tips vs Mirio Togata (Sheer Counter):
Difficulty Score: 🔴Unfavorable🔴
Tamaki punishes mistakes tremendously. Should Tokoyami have Beta, he must use this to prevent Tamaki from using Special Action. Tokoyami must keep in mind that if he is in Black Ankh, he must keep his movement unpredictable in order to avoid getting pulled by Tamaki. If Tamaki uses Beta to escape in the air, Tokoyami can easily fire Black Ankh Projectiles to pepper Tamaki.
Tips vs Tamaki Amajiki:
Difficulty Score: 🟡Even🟡
Nejire has good mobility that is air based and has great damage via Alpha and Beta. Tokoyami pokes at air characters very well, but has low damage compared to Nejire and will have a hard time chasing her.
In the end, this match-ups becomes a game of cat and mouse while shooting at each other.
Tips vs Nejire Hado:
Difficulty Score: 🟡Even🟡
It is very difficult for Nejire to miss Tokoyami with her Alphas and she can heal herself via Beta and Gamma. However, Tokoyami can catch up via his speed and put pressure on Nejire.
Much like his match-up with Tech Nejire, this match-ups becomes a game of cat and mouse, but this is much scrappier.
Tips vs Nejire Hado (Fairy):
Difficulty Score: 🟢Favorable🟢
Shinso can deter Tokoyami from approaching, but Tokoyami will eventually get in. Once Tokoyami is in, it can be difficult for Shinso to shake off Tokoyami and if Shinso commits to an option, Tokoyami can easily punish.
Tips vs Hitoshi Shinso:
Difficulty Score: 🔴🔴Very Unfavorable🔴🔴
All Might's sheer damage output can put Tokoyami in a very difficult spot before he can even get close.
Tips vs All Might (Default):
Difficulty Score: 🟡Even🟡
Tokoyami has great tools to stop All Might from running away, but All Might is at advantage if he attacks at distance or is able to catch Tokoyami off guard.
Tips vs All Might (Gatling):
Difficulty Score: 🔴🔴Very Unfavorable🔴🔴
Like Tokoyami, Armored All Might has versatile tools for many situations, but the difference is that All Might's are much better than Tokoyami's. Tokoyami will have a hard time locking down Armored All Might due to All Might being able to use his mobility during i-frames. Should Tokoyami be able to hit All Might, he has drones to stop Tokoyami's combos/pressure in it's tracks. Black Ankh Projectiles will often not be high enough to reach All Might.
Tips vs Armored All Might:
Difficulty Score: 🟡Even🟡
Aizawa cannot silence Tokoyami's Black Ankh, but his Alpha and Gamma can be dangerous for Tokoyami. Tokoyami can make use of unpredictable movement and poke with Alpha and Beta until he can close the distance on Aizawa. Afterwards, the fighting ends up being who catches who the most.
Tips vs Shota Aizawa:

Difficulty Score: ➖ Need more Data ➖
Need more Data...
Tips vs Shota Aizawa (Flow Runner):
Difficulty Score: 🟢Favorable🟢
Despite Present Mic doing a large amount of damage, he can easily crumble due to his short mobility. Should he use Gamma to escape, it'll greatly reduce the threat of his Beta Gamma combo. Tokoyami can easily close the distance on Present Mic from distance and catch-up should Present Mic try to run.
Tips vs Present Mic:
Difficulty Score: ➖ Need more Data ➖
Placeholder
Tips vs Present Mic:
Difficulty Score: 🟡Even🟡
Cementoss can easily tower up and make it difficult for Tokoyami catch him, and Cementoss is deadly indoors when combined with his damage and ease of closing corridors. However, Tokoyami has great tools to deal with Cementoss' towers and can fight relatively well versus Cementoss indoors. Cementoss' Alpha and Gamma projectile can be blocked by Tokoyami's Gamma. But if the projectile hits ground nearby, then Tokoyami cannot shield the terrain creation.
Tips vs Cementoss:
Difficulty Score: 🟢Favorable🟢
Although Endeavor is strong indoors, Tokoyami can maneuver around his lances or simply block them with Gamma. When outside, Endeavor must be more precise when hitting his Beta or close to hit his Alpha. If Tokoyami's movement is unpredictable, Endeavor's Beta will be difficult to hit. If Endeavor uses Alpha instead, Tokoyami can close the gap.
Tips vs Endeavor (Default):
Difficulty Score: 🟢🟢Very Favorable🟢🟢
Endeavor has strong air to ground capabilities, however struggles in air-to-air battles and versus very mobile characters. Tokoyami can outmaneauver Endeavor's setups and keep in the air to minimize damage.
Tips vs Endeavor (Inferno Fist):
Difficulty Score: 🟢Favorable🟢
Hawks has a difficult time versus characters with shields and Tokoyami is no exception.
Tips vs Hawks (Default):
Difficulty Score (Low Level Level): 🔴Unfavorable🔴
Difficulty Score (High Level): 🔴🔴Very Unfavorable🔴🔴
Hawks has incredible mobility and damage. He does everything Tokoyami does, but better. Tokoyami must play cautiously vs Hawks as a single mistake can snowball into a down.
Tips vs Hawks (Slicing Wind):
Difficulty Score: 🟡Even🟡
Tokoyami has great tools to deal with Mirko and keep her locked down, but Mirko has moves to disrespect any knockdown that Tokoyami does. Both characters end up taking turns on each other until one dies.
Tips vs Mirko:
Difficulty Score: 🟡Even🟡
Star's attacks are very telegraphed and fairly easy to dodge, but do devastating damage. Tokoyami can easily lockdown Star and prevent her from escaping, but the same can be said from Star.
Tips vs Star and Stripe:
Difficulty Score (Small Form): 🟡Even🟡
Although Tokoyami has oppressive lockdown, Mt. Lady has good tools and damage to keep Tokoyami on his toes.
Tips vs Mt Lady (Small Form):
Difficulty Score (Giant Form): 🔴🔴Very Unfavorable🔴🔴
Mt Lady in Giant Form wins versus anything close-range meaning Tokoyami's ideal range is his weakness.
Tips vs Mt Lady (Giant Form):
Difficulty Score: 🟢Favorable🟢
Shigaraki thrives in indoor fights by making the floor lava. Thankfully, Tokoyami can ignore most if not all of his ground moves through the use of his glide. Tokoyami also has good lockdown for Shigaraki to prevent him from counterattacking.
Tips vs Tomura Shigaraki (Default):
Difficulty Score: 🔴Unfavorable🔴
Shigaraki can take miles off of a single mistake from Tokoyami. His Gamma can indirectly hit Tokoyami due to it's large AoE. If Shigaraki catches Tokoyami with one Beta, then he can start his TOD.
Tokoyami can leap above Shigaraki and make it difficult for him to attack, but he must land eventually. If Tokoyami is able to knockdown Shigaraki and close the distance, Tokoyami can easily lock down Shigaraki.
Tips vs Tomura Shigaraki (Catastrophe):
Difficulty Score: 🔴🔴Very Unfavorable🔴🔴
Tech Shigaraki's raw damage output and tankiness will allow him to outlast Tokoyami. If Tokoyami does not keep pressure on Shigaraki, Shigaraki can take a mile.
Shigaraki's Alpha and Beta easily breaks Tokoyami's Gamma. Shigaraki cannot easily attack Tokoyami in the air, unless Tokoyami's movements are predictable.
Tips vs Tomura Shigaraki (Thousand-Hand Break):
Difficulty Score (Base Form): 🟢Favorable🟢
Difficulty Score (With Stolen Quirk): Unknown / Dependent
AFO has various tools that can hinder Tokoyami's approach and lockdown game, but ultimately Tokoyami also has tools to deal with AFO and allow himself to approach. This can change depending on what quirk AFO has taken.
Tips vs All For One (Default):
Difficulty Score: 🟡Even🟡
All For One is very easy to lockdown as he has no fast panic moves and mobility. Tokoyami must be careful about AFO's Beta lightning, as it will allow AFO to get a free punch.
Tips vs All For One (Factor Fusion):
Difficulty Score: 🔴🔴Very Unfavorable🔴🔴
YAFO has all the tools to shutdown Tokoyami. A single Special Action from YAFO will shutdown Black Ankh removing most of Tokoyami's power. From there, YAFO can bully Tokoyami with Alpha combos or Gamma. The best Tokoyami can do in that state is use Gamma ,but even that will not hold long vs YAFO.
Tips vs All for One
Difficulty Score: 🟢🟢Very Favorable🟢🟢
Dabi is reliant on Gamma and Beta to keep enemies out. Tokoyami has tools to deal with much of Dabi's kit.
Tips vs Dabi (Default):
Difficulty Score: 🟢🟢Very Favorable🟢🟢
Dabi relies on his damage in Gamma which is a double edged sword for him. His main form of reliable poke damage is his Alpha and his source of strong burst damage comes from his Beta. Although Dabi does more damage than Tokoyami at distance, Tokoyami's pokes allow him to close the distance easily. Tokoyami can block Dabi's Beta with his Gamma or merely roll it. Once Dabi is knocked down, it's very difficult for Dabi to run away from Tokoyami.
Tips vs Dabi (Crazy Torch):
Difficulty Score: 🟢Favorable🟢
Difficulty Score (Transformed): Dependent
Toga's base form is very easy to lockdown as Tokoyami. As long as Tokoyami denies Toga his blood, then there should be no major issues.
Tips vs Himiko Toga (Default):
Difficulty Score: 🟢🟢Very Favorable🟢🟢
Difficulty Score (Transformed): Dependent
Sting Dance has high burst damage, but significantly less HP and more readable movement than Tech Toga. Tokoyami can easily lock down Toga as she moves in a straight line and her Beta is telegraphed.
Tips vs Himiko Toga (Sting Dance):
Difficulty Score: 🟢🟢Very Favorable🟢🟢
Twice has a difficult time keeping Tokoyami off of him. Tokoyami can easily stay on Twice, cover his wake-ups, and dispatch of his clones.
Tips vs. Twice:
Difficulty Score: ➖ Need more Data ➖
Placeholder
Tips vs. Twice (Sad Man's Parade):
Difficulty Score: 🔴🔴Very Unfavorable🔴🔴
At range, there is little Tokoyami can do to Mr. Compress due to his deflect shield. Due to Compress' Gamma armor, it's very difficult for Tokoyami to catch him if Tokoyami is not already on top of him. Even if Tokoyami is near, Tokoyami must hit both hits of BA Air Melee, otherwise Compress will be able to leave.
Tips vs. Mr. Compress:
Difficulty Score: 🟡Even🟡
Kurogiri can keep Tokoyami out, but only for so long. Once Tokoyami gets close to Kurogiri, it is very difficult to shake off Tokoyami.
Tips vs. Kurogiri:
Difficulty Score: 🔴🔴Very Unfavorable🔴🔴
Nagant has incredible damage and mobility that Tokoyami cannot match. Nagant can be locked down, but if she gets away once, it's too expensive for Tokoyami to chase.
Despite being a sniper, Nagant has very strong close-range capabilities. Her air melee can lead to a strong combo with Gamma and will make her movement very sporatic.
Tips vs Lady Nagant:
Difficulty Score: ➖ Need more Data ➖
Placeholder
Tips vs Gentle Criminal:
Difficulty Score: 🟢Favorable🟢
Overhaul has a very hard time fighting flyers, but has a strong close-range ground game. Tokoyami can poke at Overhaul from the air, but must be careful when fighting Overhaul at close-range as Gamma will tag Tokoyami if he's not careful.
Tips vs Overhaul:
Difficulty Score: 🟢Favorable🟢
Tokoyami can easily keep Overhaul in check through his lockdown, but Overhaul has decent tools to keep Tokoyami off.
Tips vs Overhaul (Blighted Precipice):

Here you can see the latest changes made to the guide. Guides try to update regularly or semi-regularly to be kept relevant. For maximum accuracy feel free to join the guide's discord server at https://discord.gg/z5JqqtfuDK
Finalized guide sections
Updated Toga Match-up Added S18 character drafts