Guide developed and supervised by: Fibiko (Steam)
Contributed by: Soni-Himi (Steam), Pneulysta (Steam), no_life456780 (PS), TheVipGamer (Steam), BrinySpy (Steam)
Last Update Date: March 13th 2026
Last Update Content: Updated Nagant's damage and damage tags in her combo section.
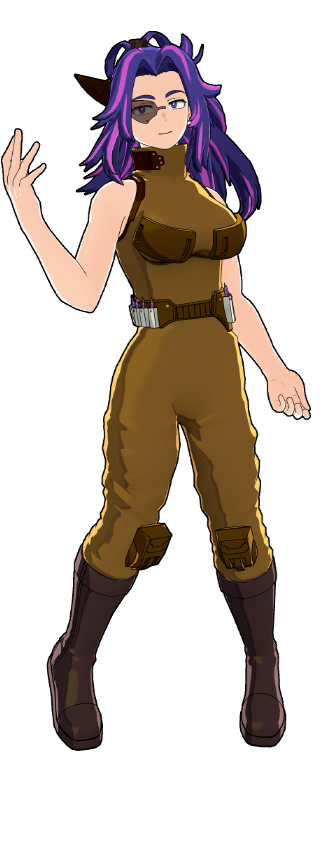
Lady Nagant is the first ever sniper character introduced to My Hero Ultra Rumble, but unlike sniper characters from other games, she combines extraordinary fire range and high DPS with very good mobility and combo potential. Utilize her scoped shots to catch your enemies off guard and deal them devastating headshot damage or risk your life to go for deadly melee combos.
Best Map: USJ / UA Island


Alpha Skill - Hollow Point Shot
Lady Nagant’s alpha may look like a basic beaming ability at first glance, but in fact, it’s actually very deceiving as this skill possesses several key features that sets it apart from other similar abilities.
- The Range: Projectile range of Lady Nagant’s alpha is truly astonishing. It covers slightly more than your actual render distance, so no matter how far away the enemy is, if you can see them you can land your shot. Moreover, if you don’t see an enemy, there’s still a couple of meters beyond render distance where your shot will still connect.
- Internal Explosion: Landing your alpha will create a small internal explosion in your enemy. This explosion deals True Damage directly to your opponent’s HP, ignoring GP, which may be useful against enemies in the Poison Mist or enemies who used PU. This effect is not guaranteed and may be cancelled by any source of invincibility frames like Critical Permeation, roll dodge or stacking 500 DP on your enemy. This means that the fifth consecutive shot in a row will always miss the internal explosion. This effect deals damage in a tiny area, which makes it possible to hit multiple targets if they stand close enough to each other. The damage may be increased with Tuning, Strike Ability Cards or any other damage multiplier.
- Projectile Speed: Since Lady Nagant is a sniper character and will usually have to deal with opponents on long range, the developers decided to make her alpha skill move faster than usual. Sadly, this bonus is not free; projectile speed receives a significant increase at level 4 and level 9, which means it may feel awkward to use it on different levels, and there are three different patterns you want to learn. Reaching these levels also gives you one extra ammo each.
On the other hand, projectile size is slightly smaller than average. The visuals may be misleading and you might think it’s really tiny, but in fact, it’s slightly bigger than Strike Shoto’s fireball. Another useful fact is that Lady Nagant's alpha skill has bigger destriction power than her melees and even air melees, so if you neeed to break something fast, shoot it. Two shots is enough to break most destructable objects.
Beta Skill - High Angle Fire
Lady Nagant’s Beta skill is an AoE ability. It has a long stun window which makes it an excellent combo starter.
If placed correctly, High Angle Fire will ignore rooftops and obstacles. It deals damage in a tall cylindric area allowing it to hit flying opponents if they are not too high up. Reaching level 4 and level 9 of your beta ability increases its damage area. It also visibly affects the height of the area indicator when you aim it, but it has no real effect once you actually use your ability.
Other than that, your beta skill is also a good tool for stopping melee aggression. By using it directly beneath or slightly in front of yourself, you create a zone that your enemy can’t safely enter. If they attempt to get closer, they will be stunned and left vulnerable to your combos.
In a lot of situations it can be used to force your opponents out of their cover. This will make them open up for your alpha and Special Action snipes. But be careful; if the cover they are hiding behind is big enough, the beta will choose its top as an endpoint and will not go all the way down, giving them much needed safe space. This happens a lot with Strike Todoroki’s beta Ice Wall.
Keep in mind that the endpoint of your beta is exactly the same surface that you aimed at, so shooting a rooftop doesn’t make the charge go through it and hit the people inside the building, but if you are inside and shooting the floor or the ceiling of the building you're in, people above will be affected. It is crucial to remeber that aiming at the floor and at the ceiling provides identical effects. Somitimes it's more beneficial to aim at the ceilings to reach spots and corners you otherwise couldn't.
Another key feature of Nagant's Beta is that it doesn't require a direct surface target. If you aim at the horizon, the ability will automatically deploy at its maximum distance. This allows you to hit enemies behind tall obstacles, even without a direct line of sight.
Finally, your Beta skill can also serve as a decent wake-up or air-recovery catch. The attack's visual marker makes it a little too obvious, so experienced players can easily avoid it. However, its cooldown is relatively short, making it worth attempting. In many situations, it's even worthwhile to use both Beta charges on a single wake-up catch, as the potential payoff can be massive.
Gamma Skill - Kickback Shot
Lady Nagant's Gamma skill is her primary movement ability. If used midair, it provides a powerful impulse in the opposite direction, sending you flying at high speed. This makes it very useful for escaping or repositioning, as well as setting up your alpha and special action shots. In addition to this mobility, the aerial Gamma also deals damage in a short range and knocks back opponents. This ability can be "charged", but doing so won't change the skill's effect, so it's mostly useless, though a certain tech makes it useful (more information in the techs section).
If used while standing on the ground, the skill performs a different attack that deals twice as much damage as the aerial version, and knocks the opponent down. This high damage and guaranteed knockdown make it an excellent option for catching opponents on wake-up or shutting down melee aggression. While this grounded version is effective for close range battles, you must be careful to manage your charges to ensure you have this tool available for mobility when you need to escape or reposition.
Both versions of the skill have 500 DP, guaranteeing a knockback even against armored enemies. An important note is that Lady Nagant's Gamma charges only begin to reload when she touches the ground or starts climbing a wall.
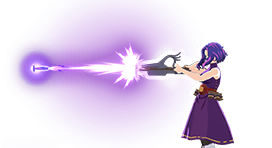
Special Action #1 - Scope Mode
Pressing the special action button activates your scoped mode. It features two zoom levels: x3 and x7. You can switch between them using your aim button. Be cautious, the game remembers your last selected magnifier setting and will apply it the next time you enter the scope. This carries a risk of accidentally using the x7 zoom in close-quarters fight, which severely restricts your field of view. It is important to note that the zoom level does not affect the damage of your shots.
During aiming, you can press your alpha ability button to fire a different kind of projectile. Its power does not scale with your alpha ability level, so upgrading that skill will not make this shot stronger. This projectile can pierce through opponents and deal high damage, but can be blocked by shields and obstacles. It usually knocks down unarmored enemies, but enemies with super armor will not flinch.
Shots fired in Scoped Mode do not consume your alpha charges, but will instantly expend your special action charge. Normally, your sniper shot is placed on a 12-second cooldown, which can be reduced with Tech cards and various tuning effects.
Scoped mode is very useful to finish off downed opponents fast. Any downed character has 400 HP and your headshot oneshots them if you play in triple strike team. Even if you don't, Special Action headshot + one alpha is usually enough to kill them for good.
Always make sure to male a brief pause between activating the special action and actually taking the shot. After the Season 15 maintenance, Nagant has a slight delay before she can fire accurately after entering scoped mode. This means that firing before Nagant has properly positioned and steadied her rifle will typically result in a close miss, or even a shot in a complete opposite direction. Pay close attention to your laser sight. Once it appears on your screen, you can shoot accurately.
Important notice for players on controller: aim assist is disabled for scoped mode.
Scope Mode features a notorious headshot mechanic. Hitting an enemy's head deals devastating damage, and by mastering this character, you can learn to land headshots reliably even mid-air or as part of your combo game. The actual headshot is a bit taller than the character's head, knowing this can be important when it comes to aiming.
In scoped mode, you can see a laser sight leading to the center of your screen. Keep in mind that this laser sight is visible to your enemies. If you waste too much time aiming, you will warn your enemies of your presence and they will try to evade.
Keep close attention on your laser sight. It shows you a real trajectory of your bullet’s flight and may warn you that your bullet will hit an obstacle.
Jumping or using air walk during Scoped Mode does not cancel it, but using any other quirk skill or roll dodge does. Remember that scoped mode saves your magnifier settings. If you use a x7 magnifier, the next time you enter scoped mode, it will stay on x7. A general advice is pressing the aim button right after you shoot to reset your magnifier back to x3.
The Scope Mode can be used even when your special action has been used, but you won't be able to shoot or display the laser, which can be useful to see stuff happening very far away.
Nagant’s special action can wallbang most surfaces in the game. This effect is inconsistent, and we’re not sure if it works as intended, but it appears the shot can also curve while traveling inside obstacles; this is especially noticeable when shooting through thick walls. Nagant can penetrate walls up to about 3-4 meters thick, but the shot will only reliably connect if the enemy is standing directly in front of the surface. The allowable distance between the enemy and the wall becomes more forgiving as the wall gets thinner.
Unfortunately, the bullet is invisible once it enters the wall, which makes studying this effect especially hard. During tests, we managed to shoot through a 7 meter long car, but it could not be replicated anywhere else. Shooting thick obctacles is very random, but thinner walls are usually a guaranteed hit, provided the enemy is standng close enough to it.
Special Action #2 - Air Walk
Airwalk is a double-jump passive ability that does not consume special action gauge. It significantly increases your aerial mobility and survivability, while also helping to stabilize your crosshair for more consistent airshots. Another useful feature of Airwalk is its ability to completely reverse your movement direction. Even when moving at high speed, you can input the opposite direction to fly straight backward or to instantly cancel the momentum from your Gamma ability.
You can reset Airwalk by jumping off a wall, touching the ground, or using your Gamma ability. It also automatically resets when you begin climbing a wall, which allows it to work very efficiently with basic wall-running techniques.
Basic Attacks
Ground Melee
Lady Nagant’s melees is a three-hit chain that ends with a high precision projectile rifle shot. It has a long range and deals 70 damage.
The bullet direction from the last attack of the melee chain can be adjusted to a certain degree up and down. Another interesting interaction is the fact that this last shot can activate all melee-based Special Tuning skills like Acceleration and Trance Blow from a fairly long range.
Air Melee
Her Air melee propels you in the direction you're looking at. This property is extremely sensitive to downward movement, but it can also give you a small impulse up or straight forward if you place your camera right. Downward impulse may be extra useful to get back on the ground faster and evade attacks. This air melee is extremely fast which enables the bunnyhop tech and comboing air melee into itself, which is not common for this game.
Air Melee can also be aimed upwards for a small upwards momentum boost or decrease falling speed slightly for a second. Some players will also spam Air Melee to move fast around the map or chase players in buildings to quickly stun them.

Leveling Paths
Balanced Path


In this path, you will rush to get a second gamma charge first, increasing your mobility and sniping capabilities. After that, you will level up other abilities one by one. In Fact, Lady Nagant does not have a strict levelling path. The only rule advised is to always go for gamma level 4. The second charge on her gamma is crucial for your gameplay. After hitting that level, you can go for any other key levels. It depends on your playstyle and the situations you find yourself in.
Alpha is good for beaming, beta is good for setting up combos and area control, gamma is good for mobility. Rushing any of them after hitting 4-4-4 is not a bad choice. Just make sure you prioritize reaching level 9 on any of those skills ASAP.
Beaming Path
Beaming path is suitable more confident players who don’t feel like they need extra beta radius to help and kick start their combos. Lady Nagant's alpha is undeniably one of the best beaming abilities on the game and you'll never be wrong to prioritize it if your aim is good enough.
Techs
Noscopes
Pressing your zoom button twice and alpha skill afterwards fast enough will allow you to shoot a sniper shot outside of the zooming screen. It’s faster than waiting for the laser to emerge which is especially good in combos since it allows you to use special action quickly enough to not let your opponent recover.

Bunnyhop
After sprinting or walking forward proceed to press your jumping and air melee controls to speed up your grounded movement significantly.
Gamma Mid-Air Reload
You gamma partially saves movement you momentum. Jumping and pressing your gamma in the last moment before Lady Nagant touches the ground allows you to wait until she descends completely. If you release your button after that, your reload will start mid-air, which greatly enhances your mobility and escape potential. This is the only real use of "charging" air gamma.
This tech is FPS dependent and may not work if you play this game at higher than 120 FPS.
Super Hop
Looking straight up after the jump and using air melee allows your air walk to give you unnatural jump height.
Airwalk Endlag Cancel
This tech removes endlag from beta and gamma and can be followed up with any quirk skill, special action or air melee. To perfom it, you can press jump/air walk right after performing beta or gamma skill. After you do that, you will significantly reduce the endlag of said skills allowing to chain your attacks much faster.
Combos
The different ways you can combine and chain various skills for higher damage within 500 DP (Downpower). The downpower of Lady Nagant's abilities are as follows:
Alpha Skill: 100 DP
Beta Skill: 100 DP (Each Hit) 300 DP (Total)
Gamma Skill: 500 DP
Ground Melee: 50 DP (Melee 1, Melee 2), 200 DP (Melee 3) 300 DP (Chain Total)
Air Melee: 250 DP
The text of the combos below will be colored by how true they are, in this case, we will define as "True" combos that, without 3rd party or tuning interference, can only be escaped/interrupted by Overhaul and/or Mirio, as those are special cases.
White Text means that part of the combo is True on both GP and HP.
Green Text means that part of the combo is True if the target is on HP only or the hit Guardbreaks.
Blue Text means that part of the combo is True if the target is on GP only.
Red Text means that part of the combo is Untrue, and therefore the enemy can escape it.
The DMG of the following combos at max level and accounting for the character's strike role is classified under the following tags:
Basic DMG (100-149 DMG), Basic+ DMG (150-199)
Light DMG (200-249 DMG), Light+ DMG (250-299)
Medium DMG (300-349 DMG), Medium+ DMG (350-399)
High DMG (400-449 DMG), High+ DMG (450-499)
Heavy DMG (500-549 DMG), Heavy+ DMG (550-599)
Deadly DMG (600-649 DMG), Deadly+ DMG (650-699)
All damage numbers were counted taking 5% damage boost that Lady Nagant guaranteely rrecieves from her strike role into account. All quirk skills upgraded till level 9
Air Melee → Air Melee = 105 damage
Although this combo is far from being optimal damage-wise, it is a really fast way to deal free 500 DP, which may be useful if you need to knock down your opponent fast

Air Melee → Alpha = 131 damage
Another low damage combo which is only useful if you don't have your sniper shot ready. You can proceed to beam your opponent after the first hit, but your enemies will try to evade or fight back since only the first alpha of possible three is guaranteed.
Air Melee → Melee 1 → Melee 2 → Alpha = 184 damage (only possible on HP or Guarbreak)
This combo is only guaranteed on even surfaces or in cases when you push your enemy down from high ground and requires you to be very quick. In this combo, enemies receive i-frames before the bullet does the second instance of damage. In a situation when they touch the ground later, the second instance of damage occurs and enhances this combo by 12 more damage.

Beta → Beta = 185 damage
This combo is the easiest to execute, but at the same time, it wastes too much of your resources while dealing pretty mid damage. It’s good against multiple targets or in case you don’t have a direct Line of Sight with your enemies.
This combo is essentially the same as the previous but should only be used if you don’t have your scoped shot ready or want to push your opponent as far away as possible.

Air Melee → Bodyshot (Special Action, Noscope) = 211 damage
A weaker version of the Air Melee → Headshot combo which you will mainly get if you miss the aforementioned combo, and what most of the time you'll see if you attempt the combo on a character without GP.

Beta (3 hits) → Grounded Gamma = 279 damage
Quite easy, but not the most useful combo. Could be helpful to lauch your opponent away or push them into the poison mist. Air gamma version is also possible, if you need to break distance even quicker.

Beta (3 hits) → Alpha → Alpha = 267 damage
This is the most consistent combo in her kit. Beta completely locks your opponent in place making it much easier to deal with and shoot them with your alpha.
Beta (2 hits) → Alpha → Alpha → Alpha = 308 damage
If your enemy tries to leave Beta area, but still got hit by two of its ticks, you have enough time to shoot them three times while they are stunned. This combo deals more damage but is far less consistent since you can’t control your opponent’s movement. While this combo is not true, it’s still useful to know because it still works on certain characters if you catch them mid-air.

Air Melee → Headshot (Special Action, Noscope) = 368 Damage
This combo is basic yet very powerful. It's quite consistent on GP, where you simply land a melee shot and quickscope the enemy right after (you might need to aim a bit upwards or downwards depending on the enemy character's height). On HP it's way less consistent due to characters hit lowering their head for a moment. Make sure to wait a tiny delay in order not to miss your shot.

Beta (3 Hits) → Headshot (Special Action) = 426 damage
Locking your enemy in place makes them a significantly easier target for your scoped shot. Landing a headshot may be still challenging due to the visual noise from your beta, but even landing a bodyshot makes this combo deal 310 damage.


Beta (3 Hits) → Alpha → Headshot (Special Action, Noscope) = 504 damage
A devastating combination that ToDs targets with up to 250 HP. It is not too hard to execute, especially if you practice it in training mode. Tuning and Strike characters in your team will make this even more deadly.


Air Shots
Lady Nagant has a lot of ways to prolong her air time and landing air shots is quite easy, if you get used to it.
Air shot heavily depends on your aerial movement speed and direction, so it is crucial to maintain control over it. If possible, try to save your air walk to adjust your movement right before the shot.
Aimed Mode Sensitivity
Standard aimed mode sensitivity is not nearly enough for Lady Nagant’s scoped mode. It feels too slow and unresponsive. Unfortunately, the game does not have dedicated settings for Scoped Mode, but you can slightly increase your aim mode sensitivity to make scoped mode a little more comfortable. Keep in mind that changing this setting will affect all characters, but you can find a middle ground and set it around 120 for PC.
If you find aimed mode sensitivity change confusing, consider putting your overall sensitivity to higher numbers, it must help.
Optimizing your Gamma Reload
Your gamma is your primary mobility skill so make sure you don’t waste both of your charges unless you really need it. The cooldown only starts off after you touch the ground or stick to a wall. Intentionally landing on a high ground, jumping off a wall or using you melee to land faster helps you reload it.
Another key feature is that your gamma only loses a charge after you make the shot. A start-up animation does not consume you gamma charge which mean you can be knocked out of it and keep the charge, or delay your gamma until the second charge replenishes
Air Stalling
As a sniper with great mobility and airtime, do not doubt the fact that people down there hate your guts and will jump you the second your feet touch the ground. So it’s better to delay that “touching grass” moment as long as possible. Wisely utilize your airwalk, betas, gammas and gamma delays to stay in the air for maximum amount of time.
Camping
Your headshots deal devastating damage and you want to hit them as frequently as possible. And what's the easiest target to land a headshot on? Surely a target that does not move. Unfortunately for you, MHUR is a chaotic and fast paced game, so your enemies usually don’t stand on one spot, but sometimes they do, such as when they are opening a box, saving a civilian, or saving Kota. You can always sit half-way across the map in front of those points of interest and wait for them to foolishly consider it’s safe to lock themselves in a long interacting animation and capitalize on it.
Early Game Aggression
Scoped mode shots do not scale off your alpha quirk level, so it is already at the peak of its power in the very beginning of the game. Landing a headshot in the early game will make your underlevelled enemies vulnerable, easy to chase and finish off. Even if they get resurrected by their allies, they would waste too much time of the looting stage which will have a severe consequence on their later gameplay. It also gives you two free level up cards.
Hiding your Laser Sight
Sometimes you want to hold a long angle using your scope, but the laser sight makes it too obvious and gives out your position. You can intentionally aim at something closer to you, while keeping said angle in your Line of Sight. This will help you stay unnoticed and catch your enemies off guard with a flickshot.
Alternatively, you can aim with your alpha at the enemy's head and do a quickscope with your special action, which if you have the aim for it will be a better option.

Recommended Normal & Special Tunes
Normal Tunes
Strike Slots: HP DMG = Alpha DMG > GP DMG > Beta DMG > Gamma DMG > Else
Assault Slots: GP DMG > HP Defense > Alpha Defense > Else
Rapid Slots: Gamma Reload > Alpha Reload > Jump Height > Else
Support Slots: Gamma DMG > Max HP > Max GP > Else
Technical Slots: Alpha DMG > Gamma Reload > Special action Reload > Max HP > Else
Special Tunes
| The list of recommended special tunes (not ordered): |
|
|
 |
Quirk Factor Release
This Special Tuning skill enhances all of Lady Nagant’s cooldowns, which also affects your Special Action. Scoped shots reload and faster gamma cooldown provided by this tuning brings you insane value. |
 |
Special Action Reload Boost
This tuning significantly speeds up the reload speed of your Special Action. It allows you to fire your sniper shots very fast and rely on your Scoped Mode more. Keep in mind that this tuning enables a unique playstyle which may not suit everyone. If you are unsure, it's best to stick with QFR. |
 |
Space Hop
Space Hop will help you to save your gammas and gain altitude without having to waste any resources. Space hope does not cancel your scoped mode, which makes it useful to set up air shots, but right now there is no possible Costume that allows you to run it with QFR or SpA Reload Boost. This fact makes you more alpha reliant. Air Walk does not trigger Space Hop for the second time. |
 |
Card Duplication
This tuning significantly favors early game aggression and makes your early kills more rewarding. |
 |
Willpower
A tuning that saves you from certain death is universally good, but we still decided to add it since a lot of Nagant’s costumes have strike slots for it. Willpower is one of the best choices for situations like this. |
 |
Embrittlement
This tuning makes air melee into headshot combo even deadlier. It loses to QFR in general, but could be good if you want to center your gameplay around this combo. |
 |
Acceleration
Acceleration is another melee-based tuning that significantly speeds up your animations. It’s good for easier combo execution and faster fire rate. It also unlocks melee looping. |
 |
Divine Protection
We don’t specifically recommend going for this tuning, but since both of her base PURs have a green slot option, Divine Protection (or Revenge Support) are good if you don’t have any souls to buy a different color version. |
 |
Perception
Perception is a powerful tuning that allows Nagant to track her enemies much easier and make her wallbangs shots even more deadly. |
Recommended Builds and Costumes
Hospital Gown (Dangerous)
This costume features Quirk Factor Release on a level 11 slot and a big variety of Strike Special tuning that could be
Willpower, Revenge Strike, Kota Finder or Ability Manifest, depending on your playstyle. Moreover, it
features very good Normal Tuning slots that significantly enhance her damage.
Hero Style (Heat)
Heat color scheme is the only one from the Hero Costume line that allows equipping Quirk Factor Release. Sadly, the second slot
being locked as villain strike does not allow much variety, but at least Normal Tuning Slots are pretty
solid and you can experiment with Space Hop.
Hospital Gown (Fancy)
This outfit allows Quirk Factor Release alongside with Card Duplication or GP Sucker, which makes her early game looting
much easier. Lower slots are exceptionally good and you can also experiment with Space Hop.
Hero Costume (Combat)
This costume allows Special Action Reload Boost with the same variety of Strike Slots as some of the previous costumes.
It also allows an unconventional, but interesting combination of Hyper Regeneration and Revenge Strike.
Hospital Gown (Hero Style)
This color scheme of Hospital Gown essentially fits the same description as Hero Costume (Combat). The
only difference is that this costume allows experimenting with Spiraling Leap. The Normal Slots are still
mid.
Villain Costume (Dangerous)
If you don’t have any PUR outfits, you can use this as your temporary choice. This costume can be
bought with gold, which makes it widely accessible. You can run Quirk Factor Release and GP Sucker, but a low level cap
wouldn't limit you. At least the normal slots are decent. Another option is putting Embrittlement, since
you can make full use out of it for air melee into headshot combo.

DISCLAIMER
Lady Nagant is capable of winning nearly every match-up, provided the pilot's aiming skills are exceptionally good. In this guide, we don't take 100% accuracy into account and evaluate match-ups based on how easy of a target other characters are and what threats they possess against a general Nagant player.
Izuku Midoriya (Default) 
Difficulty Score: 🟢Favorable🟢
A battle against the original Deku is primarily a test of your aim. But even if they aim better than you, you still have your beta combos, longer alpha range and superior mobility. Even though your kit is objectively better, a skilled Izuku could still be a rather deadly, if he caughts you off guard.
Izuku Midoriya (Full Bullet) 
Difficulty Score: 🟢Favorable🟢
The Full Bullet matchup is very similar to the one against the original Deku, but he is much easier to punish due to his complete lack of horizontal mobility. Use your beta on top of his structures to prevent him from jumping up and shut down his only mobility source.
Izuku Midoriya OFA 
Difficulty Score: 🟡Even🟡
OFA Deku is a complicated and dangerous matchup, since his Beta can easily track your Gamma mobility and air walk. His mobility makes him a hard target for your snipes and Alpha beaming, but you can still come out on top if you catch him in your deadly Beta combo or with a well-timed grounded Gamma. A crucial part of winning this matchup is striking first and successfully landing a snipe, forcing him to try and escape. Nagant can keep up the chase and shoot him reliably since his Gamma is easily telegraphed. Focusing him is usually a good idea because he poses a serious threat if he gets the chance to strike first.
Katsuki Bakugo (Default) 
Difficulty Score: 🟢Favorable🟢
A battle with Strike Bakugo is somewhat similar to Assault Deku, but his Alpha is significantly less consistent. You can keep them at long range and melt them down without serious problems. Maintain highground to avoid his beta and gamma. If possible, punish his gamma with a well-timed snipe or grounded gamma.
Katsuki Bakugo (Machine Gun) 
Difficulty Score: 🟢Favorable🟢
Just like OFA Deku, Rapid Bakugo's mobility is unpredictable. He can create a lot of visual noise disrupting your aim and chase you quite hard. But again, he is very vulnerable to your beta combos, especially mid-air. Another useful tip is using your air walk to jump over his gamma and punish it with a Beta combo. Try matching his flight height with your gamma and airwalk, it will make him an easier target.
Ochaco Uraraka (Default) 
Difficulty Score: 🟢Favorable🟢
Uraraka is very stationary when she throws cars and casts her gamma. Take advantage of this moment of vulnerability to snipe or beam. Use your air walk to evade cars; being hit by one mid-air is not a pleasurable experience.
Ochaco Uraraka (Zero Satellites) 
Difficulty Score: 🟢🟢Very Favorable🟢🟢
Assault Ochako has very limited and predictable mobility, making it easy to land your alphas and sniper shots. She’s also stationary while attacking with her own Alpha. A common tactic that Assault Ochako uses is creating levitating islands to collect themselves and heal. Nagant can easily jump over them and snipe Uraraka.
Tenya Iida 
Difficulty Score: 🟢Favorable🟢
Iida is a melee-heavy character with a comparatively small HP pool which makes him very vulnerable to your attacks and the true damage your alpha deals. Usually Iida wouldn't be able to close the distance with you. But if he does, you should utilize your deadly beta combos and grounded gamma to make them back off. If you have to escape, make sure to hit them with air gamma - it significantly stalls his advance.
Shoto Todoroki (Default) 
Difficulty Score: 🟢Favorable🟢
Shoto Todoroki is a grounded character which is already a big advantage for you. Your beta ability can hit him behind his walls and he has a hard time shooting back. Use your airwalk to jump over his gamma if he catches you on the ground. If Shoto blocks himself inside the building to heal, try sticking your beta to the ceiling above him to potentially hit him or at least delay the healing.
Shoto Todoroki (Ice Fang Wind Flame) 
Difficulty Score: 🟢🟢Very Favorable🟢🟢
Technical Todoroki is usually focused on area control. As Lady Nagant, you usually don't feel the need to stay in one particular area, so you don't feel pressured by his betas. Focus him if you see him in the open. Agressive plays are also possible since his ranged damage is pretty mediocre and he can't chase you. Just don't fight him inside a building.
Tsuyu Asui 
Difficulty Score: 🟢Favorable🟢
Tsuyu's invisibility makes her much less predictable, but her 250 HP pool makes your combos extremely impactful against her. She's on a small list of characters who can sustain a chase against you. And she can be pretty scary if she finds you in a vulnerable state. Nevertheless, landing a couple of good shots is devastating for her. Try and focus Tsuyu every time you see her, her revives may significantly harden a game for you.
Eijiro Kirishima (Default) 
Difficulty Score: 🟢🟢Very Favorable🟢🟢
Kirishima is a melee fighter who severely lacks speed against you. He's easy to snipe or beam, and even if he uses his hardening, you can still knock them off using your gamma.
Eijiro Kirishima (Red Drive) 
Difficulty Score: 🟡Even🟡
Strike Kirishima is a dangerous opponent. His shield blocks your damage and he possesses a dangerous burst combo paired with enough mobility to effectively chase you down while covering themselves with a shield mid-air. You can still deal severe damage to him from long range, but getting closer is risky, especially since hardening ignores your beta stun.
Denki Kaminari (Default) 
Difficulty Score: 🟢Favorable🟢
Denki is a mid-ranged fighter. You can still harass them from afar, and his lack of mobility won't let them escape from you quickly enough. Just make sure they don't catch you off guard with their gamma.
Denki Kaminari (Lightning) 
Difficulty Score: 🟢Favorable🟢
Tech Denki has a start-up animation on his gamma and casting beta locks him in place. You can easily abuse those moments and punish him. His alphas may be annoying at long range, but since he has to be in aimed mode during lock-on, you can easily snipe him back.
Momo Yaoyorozu 
Difficulty Score: 🟢🟢Very Favorable🟢🟢
Momo Yaoyorozu is another grounded character who has a hard time escaping your alpha and snipes. You can hit her behind her shield once it is placed on the ground with your beta. Your scoped mode also allows you to pierce her shield once it's placed on the ground.
Neito Monoma 
Difficulty Score: 🟡Even🟡
Monoma has a very annoying gamma that protects him from your shots. The match-up could go both ways depending on what skills he copied.
Itsuka Kendo (Default) 
Difficulty Score: 🟡Even🟡
Kendo's shield can completely block all your damaging options. She wouldn't be a problem until the final circles, where her lack of mobility will be compensated by the small size of the circle. But once it gets to this point, your options in a 1v1 are trying to spam and break her shield or evading her gammas for skillful quickscopes or melee combos. In a lot of situations, this match up is an endless standoff.
Itsuka Kendo (Twin Palm Strike) 
Difficulty Score: 🟢Favorable🟢
Strike Kendo usually can't reach you. She's easy to hit when using her gamma. The match-up is winning unless you charge her beta and end up being too close.
Ibara Shiozaki 
Difficulty Score: 🟢Favorable🟢
Ibara is a grounded character with no mobility which makes her an easier target for your snipes. You are easily winning by keeping out of her alpha range or up in the sky, where she can't see you.
Mirio Togata (Default) 
Difficulty Score: 🟢Favorable🟢
Rapid Mirio is the squishiest character in the game; he's extremely vulnerable to headshots and combos. Abuse his vulnerable frames to shut him down completely. That being said, his long alpha combos stunlock you for a very long time. You should try and avoid it if possible.
Mirio Togata (Sheer Counter) 
Difficulty Score: 🟡Even🟡
Technical Mirio is an extremely dangerous threat. The main reason why is the fact that all your attacks are counterable. Make sure you punish his every defenseless frame and make sure not to accidentally hit his counter. Baiting him by intentionally missing your shots is also a good strategy. Avoid using your beta agaianst Tech Mirio players; they will most likely parry it.
Tamaki Amajiki 
Difficulty Score: 🟢Favorable🟢
Amajiki is a mid-ranged fighter with limited mobility. Keep away from his grabs and melt him down with your alphas. Make sure to punish him for using his cannon every time it is possible.
Nejire Hado 
Difficulty Score: 🟢Favorable🟢
Hado has a long air time, but she is also very slow in her flight, which makes her an easy target for you to hit.
Hitoshi Shinso 
Difficulty Score: 🟢Favorable🟢
Shinso may be dangerous if he catches you, but you can easily punish him for grabbing someone with his alpha by landing an easy headshot. Just try to generally keep out of his range.
All Might (Default) 
Difficulty Score: 🟢🟢Very Favorable🟢🟢
All Might has a huge hitbox and the range of his alpha is much shorter than yours. His start-up and end lags are easily punished, and your beta hits through his gamma.
All Might (Gatling) 
Difficulty Score: 🟡Even🟡
Even though All Might's hitbox is still huge, he can now compensate for it with high-speed mobility. It allows him to fly up closer to you, grab you with his gamma and slam you down. This match-up heavily depends on how consistently you can hit his beta flight. Also, if you see him standing on the ground and spamming alphas, don't be shy and land a headshot. If you see an allmight in vulnerable state, commit to a chase. He might be a problem later.
Armored All Might 
Difficulty Score: 🟡Even🟡
Armored All Might has one of the best mobility kits in the game. He can sustain the chase and catch you with his beta stun, which can be deadly. His alphas can pressure you a lot, especially since they deal high burn damage. Your win condition here is good aim and beta combos.
Shota Aizawa 
Difficulty Score: 🟢Favorable🟢
Aizawa's erasure may be quite annoying, but it allows you an easy scoped shot. Attack him from afar and try to protect yourself with beta combos and grounded gamma if he finds you on the ground.
Present Mic 
Difficulty Score: 🟢Favorable🟢
Mic has high beaming potential, but he can't really get too close to you unless you let him. Even at close range, you should be winning by using your beta combos.
Cementoss 
Difficulty Score: 🟢Favorable🟢
Cementoss usually tries to keep on top of his pillars. Jump over them to land an easy headshot and beta combos. Your scoped mode allows you to shoot through his beta walls.
Endeavor (Default) 
Difficulty Score: 🟢🟢Very Favorable🟢🟢
Huge hitbox and predictable mobility make him an easy target. If you see him trying to cast his gamma, it's also an easy headshot. You have enough time even if he aims it directly at you. Skillful Endeavors will land their spears on you, but it is not fatal.
Endeavor (Inferno Fist) 
Difficulty Score: 🟢🟢Very Favorable🟢🟢
A match-up very similar to base Endeavor. Keep away from the range of his alphas and it will be enough to win. Both his beta and gamma abilities are not threatening to you.
Hawks (Default) 
Difficulty Score: 🟢🟢Very Favorable🟢🟢
Hawks' movement is predictable and his hitbox is rather big. He lacks the tools to get closer to you safely and deal significant damage. Hawks' gamma is also easily punishable.
Hawks (Slicing Wind) 
Difficulty Score: 🟢Favorable🟢
Strike Hawks shares a lot of his default version's vulnerability, but he has much higher damage potential and a slightly larger HP pool. You are fine as long as you keep out of the range of his combos. Hawk's Beta also has a punishing endlag.
Mt Lady 
Difficulty Score (Small Form): 🟢🟢Very Favorable🟢🟢
Difficulty Score (Giant Form): 🟢🟢Very Favorable🟢🟢
Mt. Lady in her small form has no means of getting close enough, and you outdamage her easily even if she closes the distance.
In big form, she becomes a huge punching bag. Landing a headshot will usually detransform her.
Tomura Shigaraki (Default) 
Difficulty Score: 🟢🟢Very Favorable🟢🟢
You can't be realistically hit by any of his abilities apart from melee and Special Action because of your airwalk. He is usually easy prey. Even if he rushes you with his armored gamma, you can still knock them back with grounded gamma.
Tomura Shigaraki (Catastrophe) 
Difficulty Score: 🟢Favorable🟢
Most of Catastrophe's power lies in his combos. Keeping away from it shuts down his damage potential against you.
Tomura Shigaraki (Thousand-Hand Break) 
Difficulty Score: 🟢Favorable🟢
Both his alpha and beta may be rather annoying, but he will have a hard time landing them if you keep him at long distance. His gamma locks him in the animation, so you can easily headshot him. The real problem is chasing and finishing him off because his tuning builds make him very sustainable, but winning the fight and forcing him to run is usually not hard. If you see him in a vulnerable state, make sure you finish the kill before he fully recovers.
All For One (Default) 
Difficulty Score: 🟢Favorable🟢
AFO has a huge hitbox and low mobility; he is an easy target at long range, but he can still punish you severely indoors, so he shouldn't be disrespected. Another layer opens up if he copies a good set of quirks, but the match-up is still generally winning. If you catch an AFO using his gamma, it may be an easy headshot. On the other hand, you are quite vulnerable to his gamma considering how much time you spend in air and unable to roll. Remember his position and be extra cautious around this place.
All For One -Youth Age- 
Difficulty Score: 🟢🟢Very Favorable🟢🟢
Young AFO has very predictable mobility, which makes him an easy target. Make sure to punish him every time you see him using his Gamma, but be aware that he can stunlock you quite effectively if he catches you with it. If Young AFO attacks you with his Gamma, don’t panic—use your mobility. Simply bunny hop to evade his projectiles and maneuver around the obstacles between you.
Dabi (Default) 
Difficulty Score: 🟢🟢Very Favorable🟢🟢
Dabi's alpha is not enough to put enough pressure on you. Your beta ignores his gamma shield, so it is not hard to kill him unless you trap yourself inside a building with him. Use headshots into alpha to quickly finish a Dabi player before he could use his special action.
Dabi (Crazy Torch) 
Difficulty Score: 🟢🟢Very Favorable🟢🟢
You are easily winning if you keep out of his beta range. If he catches anyone in his beta, it opens an opportunity for a headshot for you. Utilize your iframes visely and do not allow a double grab.
Himiko Toga (Default) 
Difficulty Score: 🟡Even🟡
Tech Toga is generally a winning match-up, but it heavily depends on her copied quirks. She can counter you if she has decent blood in stock.
Himiko Toga (Sting Dance) 
Difficulty Score: 🟡Even🟡
Even though her movement is rather predictable, she has quite a damaging combo that steals your blood. If she manages to land it first, she turns this fight into a mirror match-up.
Twice 
Difficulty Score: 🟢🟢Very Favorable🟢🟢
Poor man has no damage at long distance. And you still outdamage him in closed quarters. His movement is also predictable and easy to punish. To be fair, his clones are very annoying and quite good at tracking your moves though.
Mr. Compress 
Difficulty Score: 🟢Favorable🟢
Compress is hard to hit, but since you have long air time, he can't reliably hurt you either. Melt him down slowly and catch him with a well-timed beta or air melee combo. Be careful with using your alphas and snipes since Compress will try and reflect it back into you.
Kurogiri 
Difficulty Score: 🟢Favorable🟢
Kurogiri may be annoying, but you generally out-DPS him with your alphas. He's very vulnerable to your headshots if you catch him using his gamma.
Lady Nagant 
Difficulty Score: 🟡Even🟡
A mirror match-up: the player with better aim wins. If you see another Lady Nagant using their scoped mode while standing in one place, you can easily land a headshot.
Overhaul 
Difficulty Score: 🟢🟢Very Favorable🟢🟢
Overhaul is a grounded character with little to none ranged damage aside from his gamma. Keeping high ground allows you to almost nullify the danger coming from them. If they catch you grounded, use airwalk to jump over their gamma.