

Shota Aizawa Guide
Guide developed and supervised by: ExploitingSteve (PS), Lastmenson (Xbox), mattreds2001 (Xbox), Nugget (PS), Divine (Switch)Last Update: -
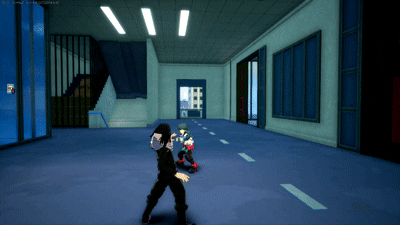
Aizawa is an agile and adaptable character that excels in one-on-one combat, dealing huge amounts of damage, but also struggles when there's a group of opponents. He can support his allies defensively and offensively through locking the enemy's skills to escape or get the upper hand in a fight, and as a grab character, he can shut down most escape attempts with enough aim.
Best Map: UA Island


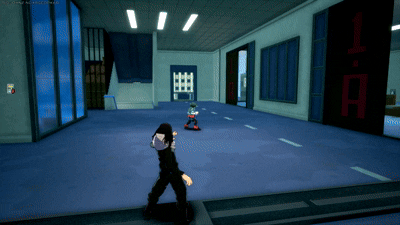
Alpha Skill - Binding Cloth: Capture
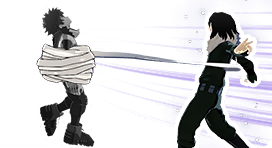
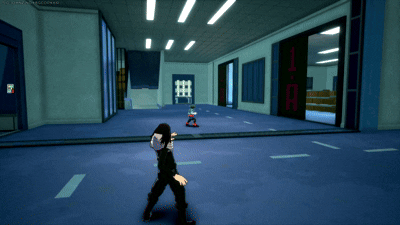
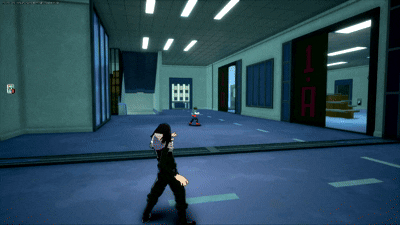
This is Aizawa's core ability, you'll use this as your movement, starting attack, punish, damage/combo follow up, or separator. The range is quite finite though, about the length of Chaos City's gas station. This ability has two variations: Ground Version and Air Version.
Ground Version
This ability allows you to shoot a binding cloth which can bind the enemy, making them stun locked. This move can be used with and without an input, if you press again you will pull your enemy faster. Most people don't use it, but it saves time, unless you wish to bind them for a longer period, in which case don't press any buttons after the move lands. Each has its own uses, for example, the fast pull is a good way to quickly act against the enemy without remaining vulnerable for too long, while the delayed pull makes it easier for your team to combo the enemy, however, a teammate can also break your own combos for less value if they use a skill with lower damage and high downpower. This ability's grab works on superarmor targets too, allowing you to get the upper hand or prevent escape.
Grounded Alpha is, overall, the core of Aizawa's moves, and learning how to use this will seal about 64-72% of his gameplay. It has the smallest alpha hitbox of any character, so accuracy is about 100% of the gameplay.
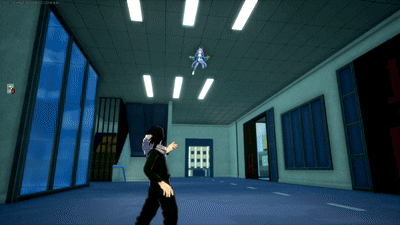
Air Version
Triggered by hitting an opponent or a solid surface while mid-air. Another version of the move used for both mobility and offense. This variation allows Aizawa to propel himself towards the target with a kick while stun-locking them, dealing damage. If the cloth hits a grounded opponent, one using wallrun, or if the binding cloth hits a solid surface, then the kick will impact the surface and he will bounce off, creating a shockwave that does additional damage.

Hitting a slope in the right angle, an enemy, or a ceiling will cause Aizawa to be pulled in that direction without bouncing off and keeping his momentum, useful for escaping or chasing, however he will not deal shockwave damage, this is why this move deals the most damage on ground opponents. Depending on where your grab had hit the body, your kick has a chance of not landing. Try to remain in the center of the body (in air) to increase chances of landing the kick, if possible. After landing this ability, you can either catch the enemy's wake-up or run.
When bouncing, it is possible to follow up with an alpha for some damage or, depending on your positioning, a gamma for even more damage. Instead, you can follow up with another alpha, as bouncing around can make you more agile and harder to hit by the opponent's teammates or any third parties. Additionally, you choose the direction you will bounce off to by simply pressing a direction input. Against wall, inputting forward will make you bounce closer to the wall, while inputting backwards will make you bounce farther from the wall.
An attribute of Alpha's shockwave or Air Alpha is that if you only hit the person with the shockwave or the kick itself on HP, the downpower value is zero, so if you're accurate and fast enough, you gain a LOT of extra damage by a full Alpha shockwave or kick, with in addition, it being a true combo.
Beta Skill - Powerhouse Barrage Kick
A simple rapid kick dash. This ability is slow and often struggles to connect all hits, for this reason, it's the lowest priority when it comes to leveling your skills. The effort to maximize offensive capabilities with this skill either fall into hitting the center mass after a combo or fall into tunings. This ability's offensive value can also be found against corners, especially if you catch them mid-air, since the skill's low downpower allows you to go for two betas in a row. Aizawa's Beta has the ability to drop if used inaccurately, due to being one of the few moves that don't have any sort of tracking, like strong tracking (I.E. Strike Dabi Beta, Hawks Beta, or Iida Beta), or even one direction miscamera tracking (I.E. Assault Deku Beta, Mt. Lady Gamma), so using it as a movement option is better nine times out of ten.
Beta's main use is as a tool to achieve the height advantage, or as a mobility tool, because even though it's slow and does not take you as far as alpha, it requires no solid surfaces and helps with getting on top of buildings, since alpha alone can't take you on top of a building most of the time, due to the fact alpha pulls you towards the location you hit rather than above it, but with the help of beta, this isn't an issue.
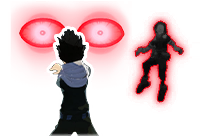
Gamma Skill - Binding Cloth: Serpent
Gamma is Aizawa's most damaging move. An ability with a huge widespread forward fan shape with an overly generous back hitbox that has both ground and air use, used for punishing players and start vicious combos that can lead to ToDs. This skill is often used as a follow-up to ground alpha, and it has the upside of blocking projectiles it comes in contact with, meaning you can damage an opponent and block projectiles coming at you, as well as skills such as Strike Shigaraki's alpha and beta. This ability however keeps him locked in place, and the projectile blocking property only applies to those that come from the front, he's vulnerable from behind.
The ground use of gamma is technically always the worse version to use by very small margins, as you technically cover less area of damage due to the bottom bit going underground, and your start-up frames into moving into another move are slower than using Air Gamma. However Ground gamma has an attribute that its air counterpart lacks, that being the fact that you step forward automatically when using it. This doesn't do much, but it does catch players who wake up (wasting their i-frames) and are caught by the very end of the gamma, knocking them down slightly and allowing you another chance to punish the player.
Air Gamma starts up faster than its grounded counterpart, which means you can use your alpha to follow up faster without compromising your combo at all. It has uses as a combo ending or combo starting move. As a combo ending, it will always start with an alpha grab and end with a gamma. However, as a combo starter, whether you spend all of your gamma or not does matter. Spending all of it normally results in players entering an i-frame stage, ruining the combo. Spending all of it but one charge (for example, until 13% at level one, where it's considered to be one charge) will normally provide more cinsistent results of alpha grab follow up by lowering the risk of knockdown. Additionally, Air Gamma allows you to float while casting the skill.
Gamma is also a useful tool to trap opponents very decently if used well in tight spaces, buildings, corners and such, it's especially useful if they waste their i-frames after getting up. Careful not to land the move prematurely or they will escape. Additionally, since this move keeps enemies stunned in place, it's useful for quick team combos.
Using gamma for raw damage is fine, especially for the early game, but in higher experiences, Aizawa is a character that needs to keep moving in late game.

The interactions between projectiles and Aizawa's gamma are as follows:
✅ Means "Negates"
🟡 Means "Skills that will be cancelled by Aizawa's Gamma"
❌ Means "Not Applicable or Ignores"
* Denotes skills that can require angle or height requirements to negate
** Denotes skills that are negated, but still show visuals
| Battle Style | Alpha | Beta | Gamma | Special Action | Melee |
|---|---|---|---|---|---|
 Izuku Midoriya
|
✅ Regular ✅ Crouch |
🟡 | ✅ | 🟡 | ❌ |
 Izuku Midoriya - Full Bullet
|
✅ Regular ✅ Aimed |
🟡 Heel ❌ Shockwave |
🟡 | 🟡 | ❌ |
 Izuku Midoriya (OFA)
|
✅ Ground ✅ Air |
🟡 Normal 🟡 Overdrive |
🟡 Normal 🟡 Overdrive |
🟡 Smoke 🟡 Fa Jin |
❌ |
 Katsuki Bakugo
|
✅ | ✅ | 🟡 Cartwheel ❌ Explosion |
🟡 | ❌ |
 Katsuki Bakugo - Machine Gun
|
✅ | ✅* | 🟡 | 🟡 | ❌ |
 Ochaco Uraraka
|
✅ | 🟡 Spin ✅ Throw |
❌ ✅ Debris* |
🟡 | ❌ |
 Ochaco Uraraka - Zero Satellites
|
✅ Throw 🟡 Swing |
🟡 | ❌ Tap ❌ Held |
🟡 | ❌ |
 Tenya Iida
|
🟡 | ❌ | 🟡 | 🟡 Wallrun | ❌ |
 Shoto Todoroki
|
✅ | ❌ | ❌ Ice Trail 🟡 Dash |
✅ | ❌ |
 Shoto Todoroki - Ice Fang Wind Flame
|
✅ Fire ❌ Ice |
❌ Ice ❌ Explosion |
✅ | ✅ | ❌ |
 Tsuyu Asui
|
✅ | 🟡 | 🟡 | ❌ | ❌ |
 Eijiro Kirishima
|
❌ | ❌ | ❌ | ❌ | ❌ |
 Eijiro Kirishima - Red Drive
|
🟡 | 🟡 | ✅ | ❌ | ❌ |
 Momo Yaoyorozu
|
✅ | ❌ Shield Run | ✅ Cannonball ✅ Explosion |
❌ | ❌ Melee 1, 2 ✅ Melee 3 (Hammer) |
 Fumikage Tokoyami
|
✅ | ✅ | ➖ | ✅ Black Ankh Ground Projectile ✅ Black Ankh Air Projectile |
➖ |
 Fumikage Tokoyami
|
✅ | ✅ Projectile ❌ AoE |
❌ | 🟡 Black Ankh 🟡 Flight |
❌ Melee ✅ Black Ankh Melee Projectile |
 Denki Kaminari
|
✅ Bullet ✅ Connection |
🟡 | 🟡 | 🟡 | ❌ |
 Denki Kaminari - Lightning
|
✅ Normal ✅ Lock-On |
✅ | 🟡 | 🟡 | ❌ |
 Neito Monoma
|
✅ | 🟡 | 🟡 | 🟡 Skill Switch 🟡 Scanners |
❌ |
 Itsuka Kendo
|
✅ | ❌ | ❌ | 🟡 Carry | ❌ |
 Itsuka Kendo - Twin Palm Strike
|
✅ Normal ✅ Charged |
❌ Palm Strike ❌ Shield |
🟡 | 🟡 Carry | ❌ |
 Ibara Shiozaki
|
❌ | ❌ | ❌ | ❌ | ❌ |
 Mirio Togata
|
🟡 Uncharged ❌ Charged |
❌ | ❌ | ❌ | ❌ |
 Mirio Togata - Sheer Counter
|
✅ | ❌ Underground 🟡 Slam |
❌ | ❌ | ❌ |
 Tamaki Amajiki
|
✅ Swordfish ✅ Tentacle |
🟡 | ❌ | 🟡 | ❌ |
 Nejire Hado
|
✅ | ✅ | ❌ | 🟡 | ❌ |
 Nejire Hado - Fairy
|
✅ | ✅ | ✅ | 🟡 | ➖ |
 Hitoshi Shinso
|
✅ | 🟡 Tap ❌ Held Grounded ❌ Held Air |
❌ | ✅ | ❌ |
 All Might
|
✅ Bullet ✅ Shockwave |
❌ Dash ❌ Tornado Slam |
❌ | 🟡 Carry 🟡 Jump |
❌ |
 All Might - Gatling
|
✅ Bullet | ✅ Projectile 🟡 Dash |
🟡 | 🟡 Carry 🟡 Jump |
❌ |
 Armored All Might
|
✅ Ice ✅ Fire |
✅ Grounded ✅ Mid-air |
✅ | 🟡 Vertical Flight 🟡 Dash |
❌ |
 Shota Aizawa
|
✅ Cloth ❌ Air-Dash |
🟡 | 🟡 | ❌ | ❌ |
 Present Mic
|
✅ | ❌ Tap ❌ Hold |
🟡 | ❌ Boombox Throw ✅ Boombox Alpha ❌ Boombox Beta |
❌ |
 Cementoss
|
✅ Ball ❌ Creation |
❌ | ✅ Ball ❌ Creation |
❌ | ❌ |
 Endeavor
|
✅ | ✅ Arrow ❌ Pillar |
❌ | 🟡 Flight 🟡 Jump |
❌ |
 Endeavor - Inferno Fist
|
✅ Projectile ❌ Fire Ground |
❌ Initial Hits ❌ Pull |
✅ Ball ❌ Explosion |
🟡 Flight 🟡 Jump |
❌ |
 Hawks
Hawks
|
✅ | 🟡 | ✅ | 🟡 Flight 🟡 Transport |
❌ |
 Hawks - Slicing Wind
|
✅ | ❌ Dash ❌ Follow-through |
🟡 | 🟡 Flight 🟡 Transport |
❌ |
 Mt. Lady
|
✅ Regular ✅ Giant ✅ Giant Explosion |
❌ Regular ❌ Giant |
🟡 Regular ❌ Giant |
❌ | ❌ |
 Tomura Shigaraki
|
✅** | ✅** | ❌ | 🟡 | ❌ |
 Tomura Shigaraki - Catastrophe
|
✅ Debris ❌ Cracks |
✅ Debris ❌ Pulses |
🟡 Dash ❌ Shockwave |
🟡 | ❌ |
 Tomura Shigaraki - Thousand-Hand Break
|
❌ Initial Hit ❌ Extended Arm 🟡 Search |
🟡 | 🟡 | 🟡 | ❌ |
 All For One
|
✅ Regular ✅ Charged |
❌ | ❌ Tap 🟡 Held |
❌ | ❌ |
 All For One (Youth Age)
|
✅ Regular ❌ Explosion |
✅ Line* ❌ Expansion |
✅ Orbs ❌ Expansion |
❌ Strike 🟡 Flight |
❌ |
 Dabi
Dabi
|
✅ | ✅ | 🟡 | ❌ | ❌ |
 Dabi - Crazy Torch
|
✅ | 🟡 | ❌ Pulse ❌ Expansion |
❌ | ❌ |
 Himiko Toga
|
✅ | 🟡 | ✅ | 🟡 Blood Suck 🟡 Transform |
❌ |
 Himiko Toga - Sting Dance
|
✅ | 🟡 | ✅ | 🟡 | ❌ |
 Twice
Twice
|
✅ | 🟡 | 🟡 | 🟡 | ❌ |
 Mr. Compress
|
✅ | 🟡 | 🟡 Start-up ❌ Marble |
❌ | ❌ |
 Overhaul
|
✅ | 🟡 | ✅ | ❌ Restoration 🟡 Disassembly |
❌ |
 Overhaul - Blighted Precipice
|
✅ | ❌ | ✅ | ❌ Restoration 🟡 Disassembly |
❌ |
 Kurogiri
|
✅ Projectile ✅ Linger |
✅ Portal Projectile 🟡 Portal |
✅ Alpha ✅ Alpha Linger ✅ Beta |
❌ | ❌ |
 Nagant
|
✅ Projectile | ✅ | ✅ Grounded ✅ Aerial |
✅ Sniper Shot 🟡 Air Walk |
❌ Melee 1, 2 ✅ Melee 3 (Bullet) |
Special Action - Erasure
Aizawa's Special Action allows him to lock the skills of enemies he's looking at, making them unable to use them. This can be used to give yourself of your team a window to stop their offense and initiate yours, as they will be vulnerable, especially to ground attacks like Strike Shigaraki's alpha and Strike Shoto's gamma. This ability does not "erase" special actions or basic attacks, only quirk skills alpha, beta and gamma, meaning that some characters can still be dangerous even under the influence of this ability, such as Shinso and Iida. Furthermore, this ability only works on enemies in your field of view, so enemies behind you won't get affected by it, this also means that the effect can be temporarily broken by hiding behind an obstacle. Additionally, even though you can use this move to cut off enemy attacks, the effect does not trigger immediately, so it might not protect you from an attack if you use it too late.
It's recommended to not waste this ability's duration and just use it as a quick confusion tool to get the upper hand with an alpha or other ally attacks, this way you will be able to use it again soon. If the enemy starts rolling, do not waste alphas, just wait for the right moment.
This ability can also be used to shut down shields, making it useful to deal with characters such as Assault Kendo and Strike Kirishima, or stall the duration of powerful stances such as a Giant Mt Lady. It can also interrupt a character using their skills to run away, however keep in mind that some mobility options carry a lot of momentum, so your erasure might instead yeet them away at high speeds, which can be annoying when the zone is big, but can be useful if it's small, as they could end up inside the Poison Mist.
You can use this move up close, in which case you should be ready to use basic melee attacks, as that's what the opponent will try to do.
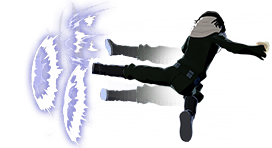
Basic Attacks
Ground Melee
A 3-string combo chain. You can use this to stagger the opponent by repeating the first melee hit until they're knocked down to give yourself more time, though its most common usage is as a tool to activate special tunings that require basic attacks, as his alpha makes it easier for him to trigger these effects. Melee 1 is the only really useful ground melee, as Melee 2 is only used for ToD complex combos. Melee 3 does too little damage and too much downpower to even consider using it unless you have absolutely no choice to use Melee 3 to initiate knockback.
Melee 1 does enough stun on HP/GUARD BREAK to start up Aizawa's main combos that will get you the most damage. On GP/SHIELD however, Aizawa's Melee 1 allows about 3 start up frames, which grants the chance of being punished or roll dodged whether you aim for Alpha's shockwave or Gamma.
Air Melee
Aizawa’s air melee is a useful mobility tool that can be used in combos with an air alpha into kick, and as Aizawa bounces off the surface he makes contact with, you can use your melee to change your direction for more unpredictable movements to gain an advantage against your opponent. Air Melee also has a few other uses, the first being it's Momentum Extension tech, allowing him to move a bit further after using Air Melee after an air alpha bounce. Another use is canceling your Special Action (if you must use it mid-air) by spamming air melee, since this the most efficient way to not only stop your Erasure, but also get a move out during the small time frame where Erasure is active. Air Melee can, although rarely under circumstances, to end a combo with and achieve the highest damage, since a beta will initiate knockdown, and slapping them with an alpha will deal little damage.

Leveling Paths
Alpha Path: Gamma Course
One of the most optimal paths at high level play to keep you in the move. You always opt to max alpha, whether for movement or combos, keeping it at Level 4 even with constant maintenance will leave you dry due to recent nerfs. High level players will always use Alpha as their combo endings, their combo midgates, or their starters if Gamma isn't a safer or faster option. Gamma is, along with alpha, your main combo tool, you want to max it next over beta. With some luck, you might be able to reach beta level 4 through Ability Cards only, from there, you can either go for beta level 9 or give the cards to your teammates.
![]()
![]()
![]()
![]()
![]()
Alpha Path: Beta Course
The other most optimal path at high level play. This path is mostly the same as the previous, but giving priority to beta level 4 over gamma level 9 due to the slow and horrible cooldown of beta level 1 (unless you mastered precise aim to air kick with momentum or don't run Space Hop).
![]()
![]()
![]()
![]()
![]()
![]()
![]()
![]()
![]()
Balanced Path
A balanced path that keeps alpha and gamma around the same level.
![]()
![]()
![]()
![]()
![]()
![]()
![]()
![]()
![]()
Hybrid Serpent Path
A path to strengthen your gamma to get the most of it's damage while avoiding alpha neglecting.
![]()
![]()
![]()
![]()
![]()
![]()
![]()
Techs
Momentum Extension
Aizawa is able to keep his bounce momentum by using air melee after inputting a direction for the alpha's bounce. This allows him to move a little further in the direction chosen, whether it be to move greater lengths forward, backwards, or sideways.
Combos
The different ways you can combine and chain various skills for higher damage within 500 DP (Downpower). The downpower of Aizawa's abilities are as follows:
Alpha Skill: 250 DP (Grab), 0 DP (Kick), 0 DP (Shockwave)
Beta Skill: 0 DP (Initial Hits), 200 DP (Final Hit)
Gamma Skill: 10 DP (Individual Hit), 100 DP (Whole Gauge)
Ground Melee 1-2-3: 100 DP (Individually), 300 DP (Whole Chain)
Air Melee: 250 DP
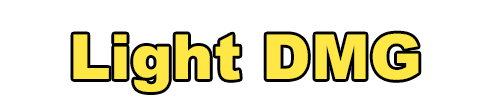
The DMG of the following combos is classified under the tags "Basic DMG", "Light DMG", "Medium DMG", "High DMG", "Heavy DMG" and "Deadly DMG", given to combos that at max level do damage in the 100s, 200s, 300s, 400s, 500s and 600s respectively.
Alpha (Grab) -> Melee 1 -> Melee 2 -> Melee 3
A basic combo that makes use of the grab mechanic to easily go for a full melee chain, nothing too special, and not something any high level Aizawa player would ever do.


Alpha (Grab) -> Gamma (Whole Gauge)
Aizawa's unpolished signature combo, normally the first you learn, but not what you want to go for as a skilled Aizawa player.
Alpha (Grab) -> Gamma (Whole Gauge) -> Alpha
An extension of the previous combo for 30 extra DMG. Once you get used to this extension, you will never use the previous combo unless you need to save ammo. This extension is made easier by walking a bit forward after pulling the enemy.
Alpha (Grab) -> Melee 1 -> Gamma (Whole Gauge) -> (Alpha)
A variation that includes a basic melee attack to trigger a melee tuning. Just like the non-melee version, you have the possibility of using an alpha at the end. This combo is not "true" on GP.
Alpha (Grab) -> Beta
A combo you can use if you have nothing better, but overall, nothing you should be actively going for.
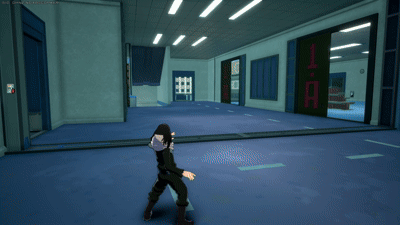
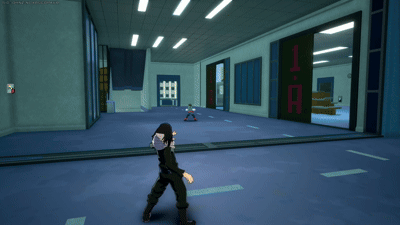
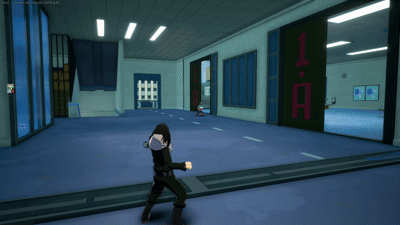
Alpha (Grab) -> Alpha (Shockwave)
A quick way of dealing high damage from the ground without spending gamma gauge or leaving yourself vulnerable.
Melee 1 -> Melee 2 -> Gamma (Whole Gauge) -> Alpha
This combo is not "true" on GP.
Gamma (90%~ Gauge) -> Alpha (Grab) -> Melee 1 -> Alpha (Shockwave)
One of Aizawa's strongest combos, able to quickly deal high amounts of damage while triggering melee special tunings and stunning the enemy for long enough to allow your teammates to shred the enemy with low downpower abilities.


Recommended Normal & Special Tunes
Normal Tunes
Strike Slots:
Assault Slots:
Rapid Slots:
Support Slots:
Technical Slots:
Special Tunes
The list of recommended special tunes (not ordered):

Izuku Midoriya (Default)
Difficulty Score: ➖ Need more Data ➖
Coming soon...
Izuku Midoriya (Full Bullet)
Difficulty Score: ➖ Need more Data ➖
Coming soon...
Izuku Midoriya OFA
Difficulty Score: ➖ Need more Data ➖
Coming soon...
Katsuki Bakugo (Default)
Difficulty Score: ➖ Need more Data ➖
Coming soon...
Katsugi Bakugo (Machine Gun)
Difficulty Score: ➖ Need more Data ➖
Coming soon...
Ochaco Uraraka (Default)
Difficulty Score: ➖ Need more Data ➖
Coming soon...
Ochaco Uraraka (Zero Satellites)
Difficulty Score: ➖ Need more Data ➖
Coming soon...
Tenya Iida
Difficulty Score: ➖ Need more Data ➖
Coming soon...
Shoto Todoroki (Default)
Difficulty Score: ➖ Need more Data ➖
Coming soon...
Shoto Todoroki (Ice Fang Wind Flame)
Difficulty Score: ➖ Need more Data ➖
Coming soon...
Tsuyu Asui
Difficulty Score: ➖ Need more Data ➖
Coming soon...
Eijiro Kirishima (Default)
Difficulty Score: ➖ Need more Data ➖
Coming soon...
Eijiro Kirishima (Red Drive)
Difficulty Score: ➖ Need more Data ➖
Coming soon...
Denki Kaminari (Default)
Difficulty Score: ➖ Need more Data ➖
Coming soon...
Denki Kaminari (Lightning)
Difficulty Score: ➖ Need more Data ➖
Coming soon...
Momo Yaoyorozu
Difficulty Score: ➖ Need more Data ➖
Coming soon...
Neito Monoma
Difficulty Score: 🟣Unknown🟣
Coming soon...
Itsuka Kendo (Default)
Difficulty Score: ➖ Need more Data ➖
Coming soon...
Itsuka Kendo (Twin Palm Strike)
Difficulty Score: ➖ Need more Data ➖
Coming soon...
Ibara Shiozaki
Difficulty Score: ➖ Need more Data ➖
Coming soon...
Mirio Togata (Default)
Difficulty Score: ➖ Need more Data ➖
Coming soon...
Mirio Togata (Sheer Counter)
Difficulty Score: ➖ Need more Data ➖
Coming soon...
Tamaki Amajiki
Difficulty Score: ➖ Need more Data ➖
Coming soon...
Nejire Hado
Difficulty Score: ➖ Need more Data ➖
Coming soon...
Nejire Hado (Fairy)
Difficulty Score: ➖ Need more Data ➖
Coming soon...
Hitoshi Shinso
Difficulty Score: ➖ Need more Data ➖
Coming soon...
All Might (Default)
Difficulty Score: ➖ Need more Data ➖
Coming soon...
All Might (Gatling)
Difficulty Score: ➖ Need more Data ➖
Coming soon...
Armored All Might
Difficulty Score: ➖ Need more Data ➖
Coming soon...
Shota Aizawa
Difficulty Score: ➖ Need more Data ➖
Coming soon...
Present Mic
Difficulty Score: ➖ Need more Data ➖
Coming soon...
Cementoss
Difficulty Score: ➖ Need more Data ➖
Coming soon...
Endeavor (Default)
Difficulty Score: ➖ Need more Data ➖
Coming soon...
Endeavor (Inferno Fist)
Difficulty Score: ➖ Need more Data ➖
Coming soon...
Hawks (Default)
Difficulty Score: ➖ Need more Data ➖
Coming soon...
Hawks (Slicing Wind)
Difficulty Score: ➖ Need more Data ➖
Coming soon...
Mt Lady
Difficulty Score: ➖ Need more Data ➖
Coming soon...
Tomura Shigaraki (Default)
Difficulty Score: ➖ Need more Data ➖
Coming soon...
Tomura Shigaraki (Catastrophe)
Difficulty Score: ➖ Need more Data ➖
Catastrophe is another character utilizing stuns like Compress. While you can reflect both his Coming soon...
All For One (Default)
Difficulty Score: ➖ Need more Data ➖
Coming soon...
All For One -Youth Age-
Difficulty Score: ➖ Need more Data ➖
Coming soon...
Dabi (Default)
Difficulty Score: ➖ Need more Data ➖
Coming soon...
Dabi (Crazy Torch)
Difficulty Score: ➖ Need more Data ➖
Coming soon...
Himiko Toga (Default)
Difficulty Score: ➖ Need more Data ➖
Coming soon...
Himiko Toga (Sting Dance)
Difficulty Score: ➖ Need more Data ➖
Coming soon...
Twice
Difficulty Score: ➖ Need more Data ➖
Coming soon...
Mr. Compress
Difficulty Score: ➖ Need more Data ➖
Coming soon...
Kurogiri
Difficulty Score: ➖ Need more Data ➖
Coming soon...
Lady Nagant
Difficulty Score: ➖ Need more Data ➖
Coming soon...
Overhaul
Difficulty Score: ➖ Need more Data ➖
Coming soon...
Overhaul (Blighted Precipice)
Difficulty Score: ➖ Need more Data ➖
Coming soon...