Izuku Midoriya OFA is a high mobility rush-down character with a variety of tools that let him fulfill other roles. He excels at getting in your face and chasing down his opponents in any environment. His unique gimmick, Gearshift, allows him to unlock extra moves after landing melee attacks. A solid pick if you prefer an array of versatile tools that can turn the tide of any battle instead of a high precision shooter.
Best Map: UA Island
Alpha Skill - Delaware Smash Airblast
A highly adaptable air wave that is best utilized during scramble situations. It comes in two forms which fulfill different use cases. One can be utilized while standing on the ground, and the other while in mid-air.
Aerial Blast
It’s a typical projectile with low startup. It’s best utilized while attacking before a fight, attacking while chasing, or just dishing out damage while trying not to be hit.
It can usually never be used mid-combo. You can hit it before you start one, though.
Ground Blast
This is the real killer. This move boasts 500 downpower and has incredibly quick startup while Gamma is active. The projectile size is massive, the move is armored, and it deals hefty damage. This move alone turns Izuku Midoriya OFA from a rush-down character like Iida into a constant battlefield threat that demands attention. This projectile will instantly knock over most enemies when they are hit (exceptions for certain armored moves).
This move is best utilized to control multiple people, or manage enemy positions. You can force enemies to stay in the Poison Mist, control high traffic loot piles, and also chase enemies that like to mash after being knocked down.
While this move has a very large damage hitbox, it’s worth noting that it actually has a second hitbox at the center of the projectile. This smaller hitbox is only for colliding with terrain. This means that if you shoot next to a tree that an enemy is standing behind, the damage hitbox will go through the tree while the terrain hitbox can straight through it. Shooting into tight hallways or around walls can net good damage and catch enemies who think they’re safe while healing.
The final aspect of grounded Alpha is the fact that it is armored. While fighting other melee attackers who want to get in your face, using this move will guarantee that you keep your turn, provided you are not immediately knocked over or pulled by a binding move. You can even start the grounded alpha to eat a hit and keep your turn before cancelling into beta or gamma.
Beta Skill #1 - Impact 45% Detroit Smash
Deku’s go-to combo ender. It’s a straight punch forward with a melee-range activation hitbox on startup. It’s good at getting you somewhere quick, but it has little momentum preservation after it ends. Using a Gamma dash afterwards can help get some momentum back.
As an attack, it has a few features.
Activation
This is simply referred to as “attack” in the code. It’s the hitbox that surrounds Deku as he’s charging up the Detroit Smash. Its purpose is to ensure your combo stays true as you wind up the move after hitting them. It basically means that if you’re in their face, your Beta will do a little bit of extra damage.
The Strike
It’s a big punch. It’s the lifeblood of this character. Since its downpower is 500, any enemies hit by it will always be knocked over. It is best used to end off your combos, hit midair enemies out of the sky, and as a supplementary air-dash. Deku’s combos usually have some sort of forced ending point, whether the opponent gets too low, the terrain is too uneven, or the enemy’s teammates show up; in these cases you should always abort your combo into Beta as soon as possible. Depending on your level, it may be beneficial to end your combo with a grounded Alpha instead.
If you’re planning team combos, the best way to do that is to have someone else end the combo for you. There are many characters that can hit a lot harder than a move like this in one hit. Examples: Strike Bakugo’s Gamma, Strike Shoto’s Beta, Rapid All Might’s Gamma, Assault Ochaco’s hold Alpha, All For One’s charged Alpha, Assault Kendo’s Gamma, Assault Kirishima’s Gamma, Lady Nagant’s Special Action, Tech Shigaraki’s Beta, and the list goes on. It can be tricky timing, but it’s the best thing you can do to help out a Rapid Deku combo.
Tap Beta Vs Hold Beta
Deku can tap or hold beta, both actions will trigger the same attack, but tapping will do less activation damage and have less travel range in exchange for dashing sooner, while holding the attack will take slightly longer but you will get more activation damage and travel a bit further. In Overdrive state, it might seem like the hold variation is replaced by Detroit Smash Quintuple, but the action of holding can be timed so that it's short enough to not trigger this attack and instead trigger the normal hold beta.
Beta Skill #2 - Detroit Smash Quintuple
This move is pretty handy. It becomes available to you after landing three uppercuts while in 2nd Transmission and entering Overdrive.
Its uses are as follows:
Rising
This move flings you extremely high into the air, super quickly. You’re also able to steer the move while you rise, meaning that you don’t have to land in the same spot that you jumped from. Typically, its best movement use is instantly reaching the top of the U.A. building from the ground level. These tall buildings are partially why this is also his best map. There is currently no known way to cancel the attack while you’re at the peak of it unless you’re being hit, so it’s not good for air stalling.
The most important thing about this move is that you do not actually have to hold down the Beta button to have this move come out. If you use Deku’s tap Beta while in overdrive, you can press it again during the ending frames of the punch, and you’ll rise up into the air and perform the quintuple smash after your impact dash for no additional ammo cost.
This part of the move also has no damage hitbox, so you should only focus on hitting enemies that are on the ground.
Smash
The best part of this move is how safe it is. You’re actionable extremely quickly after the smash lands, and you’re still slightly moving, making it harder to punish with moves like Blackwhip. Its best use is just for diving into group fights, hitting as many people as possible, and finishing downed players. If you get a down, finish them with this move, and you’ll also bat away any players who are attempting to get close to your down and revive them. One use of this move does not deal enough damage to finish a downed player in one hit, however. Keep in mind that even though activating this move costs 1 charge, upon landing you will consume the 2nd charge, though this also means that if you're interrupted earlier you get to keep that 2nd charge.
On Downed Players: Beta -> Beta again to perform Quintuple, let go of movement inputs -> air Alpha the body after landing
WEAKNESS: This move is extremely telegraphed and has a very low vertical hitbox. Do not attempt to use it on enemies that are airborne, or enemies that can quickly get above the hitbox. They will jump or dodge out of the way and the move will whiff. This means that it also does not perform well on slanted surfaces, like the roofs of Fire Zone and Flood Zone. If you are fighting against a Deku that has just risen into the air, you should use whatever movement you have to get off the ground, and then try to punish him after he lands. You can punish this move by dashing upwards with Gamma to dodge, and then dashing back down after it whiffs and attacking with an air melee.
Gamma Skill #1 - 2nd Transmission
Deku’s best movement tool. It’s a double airdash that transforms into an attack after hitting 3 uppercuts, unlocking his signature gimmick Overdrive.
Startup
Deku performs a cinematic animation and changes gears. Deku has a unique GUI in the bottom-right corner of his screen that tells you what gear he is currently in. After using this move, Deku will enter 2nd gear. The goal from here is to land 3 melee uppercuts to reach his maximum 5th gear and enter the Overdrive state, which unlocks his two bonus moves. Every time Deku increases by a gear, his movement and attack speed increase. The attack speed increase from being in Overdrive also makes his grounded Alpha’s slow startup incredibly quick, so you should try and spend as much of the match as you can in 5th gear. You can recharge the skill's percentage by landing any uppercut on an opponent, which will reset his ammo count back to 100%.
Don’t do this if you’re not in a safe spot. You should make sure you knock over your opponent with grounded Alpha, turn a corner, or just be outside of any fights before using it. If you just got up from being knocked down, you will lose your invulnerability frames on use. If your Gamma is on cooldown, leave the fight. If you are running low on Gamma percentage, try to land an uppercut as soon as possible, or leave the fight. Don’t worry too much about losing your gears if you’re in 5th as it’s not hard to get back to by any means.
Dash
Usable while Deku has gamma active. This move is incredibly quick, doesn’t take a lot of ammo (only 5%), and can be used omni-directionally. You can use it two times before you have to touch the ground again, so you can supplement using Beta as an airdash if you need more airtime. You should constantly utilize this move for general movement and taking air space. Getting above enemies while they’re waking up can save you from any options they might have out of their invulnerability frames and allow you to re-engage safely.
It’s mostly safe to dash at enemies that are in the air and fish for air melee hits. Air melee will bring any opponent without GP down to the ground and allow you to combo them. If the opponent does have GP, you can instantly confirm into Beta mid-air as a true combo.
Gamma Skill #2 - 5th Gear {Overdrive} Detroit Smash
This move is certainly something. To use it, hold down Gamma. A tracking reticle similar to Technical Denki’s will appear on any opponents within your range, followed by a massive dash towards the opponent and a slam to the ground. This move takes 20% of Deku’s gamma ammo gauge to perform. Make sure you don’t put yourself on Gamma cooldown by using it too much or you’ll slow way down. This move does not need to be charged all the way up, you can spam tap once it locks to perform this attack sooner.
Activation
While holding down the Gamma button, Deku will stop falling and charge up a dash in place. A reticle will appear on any enemies anywhere within his peripheral vision. Additionally, it can lock on to enemies that are invulnerable or knocked over. It can even lock on through walls, Smoke Screens, and other visual inhibitors. This may be subject to change.
Strike
Deku will rapidly approach the enemy you locked onto and deliver a swift punch downwards. This move hits good damage and only has 300 downpower, so you’re allowed to hit additional moves after it.
This move is currently bugged. The attack becomes less consistent the higher your FPS is. At higher frame rates, the enemy will be pushed away from Deku when the attack is supposed to have landed, taking zero damage and leaving you wide open.
Its best use is on opponents that are high in the air. The opponent isn’t actionable and cannot dodge until after they ground bounce. If you look down and fire two aerial Alphas at your opponent, you’ll be hitting for around 315 damage.
Typically you should not use this move on players that are on the ground. If they dodge it, you are incredibly minus and will most likely be heavily punished for it. However, this game has slightly spotty netcode, and the window for when the hit actually registers on the opponent is tied to when Deku changes direction, not when he actually hits the opponent with his fist. This will frequently allow you to get away with it anyways. If you do land a Gamma on a grounded opponent, you are able to hit grounded melee attacks afterwards if they do not dodge fast enough.
While fighting against this character, there are a few ways to avoid being hit by this move.
Hit him with a grounded Alpha (any quick 500 DP move). If you are in a high enough gear and react fast enough, you will swat the opponent out of it 100% of the time.
Evade out of his range. The range for this move’s activation is actually not that far, and you can typically get outside of his range just by dodging away. If you evade his range in time, you’ll see him do a normal Gamma dash forwards. However, if he manages to start his dash before you leave the range, he’ll chase you to the ends of the earth no matter how fast or far away you are, he's coming for you.
Dodge roll. Make sure not to spam roll or you have a high likelihood of being hit. The stun hitbox occurs the moment Deku changes directions while approaching his target, not when he actually arrives there. Don’t dodge roll until after you see him end the charge animation and begin to move. He will always dash forwards for the same amount of time. If you’re looking at him and know the timing well, you can dodge the stun hitbox. If you dodge the stun, he’ll perform the attack on the location where you just were, leaving you free to punish.
Special Action #1 - Fa Jin
This move has two main aspects, the startup and the jump enhancement.
Startup
This move halts your air movement. If you use a smokescreen from your 2nd special action and then quickly start charging Fa Jin, you can charge Fa Jin without anybody taking pot shots at you. You can use it to air stall as well. If you try to deactivate it and reactivate it and stall for too long, the game will apply a gravity modifier and you will fall while charging it.
Enhancement
It’s okay. It doesn’t enhance your damage or your combos and it will put your other special action on cooldown. It grants you two main buffs: Short hop momentum and high jump. If you need to get vertical height and have no other means (which is rare), then you can charge it up and do a vertical jump without holding any movement keys to rise up high. The short hop momentum is the real bonus. You move extremely quickly through the air and become hard to target. This momentum also stacks with gamma's speed boost, adding extra momentum per gear.
Fa Jin is a tool you want to use before you get into fights. While Fa Jin is active, you can shoot 2 air alphas off per jump instead of 1. It allows you to quickly deal mobile burst damage in fights as well as ensuring quick getaways. It also makes it really hard to hit you while you’re attempting to start melee offense which makes jump melee even easier to land.
Special Action #2 - Smoke Screen
Smoke Screen is typically the more useful of the two. Tapping the special action button will create a smoke screen at your feet that you and allies can see through. Here are some of its best use cases.
❌ Hiding Location: Using the smoke screen to hide your location is usually a bad idea. Most players will immediately assume you are in your own smoke screen, and will try to attack you through it. This can give away your location when you’re trying to hide and heal. You can, however, place it on another spot as a decoy, and then hide somewhere else.
✅ Obscuring Actions: The most optimal use for smoke screen. It’s always beneficial to you if the opponent has no idea what you’re up to. Additionally, any opponents that have not seen what is in the smoke are also not driven to action by what might be happening inside of it. A smoked-off downed teammate is a lot less likely to be killed than one out in the open. Typically, you'd smoke off all large boxes, all downed opponents, all downed and healing allies, hallways (more on that), and sometimes just as a landmark to play around during a fight. It lets you have a lot more freedom on what you decide to do next and will let you get away with things that eagle-eyed opponents would otherwise prevent.
✅ Hallways: If you’re fighting in a building, toss the smoke screen up on the doorway. Enemies have no idea what’s going on inside and you’re able to see any attempts to enter. You can also just throw Alphas through the door and nobody will be able to see the startup. This is extremely useful on the U.A. map.
Basic Attacks
Ground Melee
Deku’s melee attacks are the real star of the character. They’re the reason why copy characters like All For One and Monoma just simply can’t do what he does. While managing downpower in Deku’s combos, you should also take note of the height the opponent is at as well. How high or how low they are can determine what you are or are not able to do.
First Hit (Jab)
This is a straight forward jab with a small hitbox that does extremely little damage. It steps forwards much further when it is tracking an opponent. This punch is the one that actually has the downpower, so it’s in your best interest to whiff this attack when possible. You can do this by starting a combo with the air melee tracking instead of the ground melee tracking, and then looking away while starting the ground melee.
One extremely important fact about Deku’s melee tracking is that it does not agree in any way with walls. If you push up against a wall, there is a very high chance that the tracking will not go towards your opponent. Stick to the center of rooms and away from walls or corners.
Typically won’t even see the animation of this move come out. To tell if it landed or didn’t land, use the visual damage values instead. It’s double if the jab landed (10), and not doubled if it didn’t (5). If you’re using non-cumulative damage numbers, you’ll see a larger number (usually 5) among a bunch of smaller numbers (2s or 1s).
Second Hit (Flurry)
This is Deku’s second best melee attack. Its hitbox is gigantic and its down power is comically low. It can clip enemies that are pretty high above you, and you have a lot of options out of it. This move has basically no down power, and acts as a turning point for a lot of options in your combos.
This move is the branching point for changing what you’re going to do in your combo. You can continue to uppercut 3 times and knock down, uppercut twice and then roll, pause for a second and then air melee, or Beta and knock down.
GIF OF DEKU INFINITELY DOING THIS MOVE ON SOMEONE AT THE RIGHT HEIGHT
Third Hit (Uppercut 1)
This is where Deku starts to actually deal damage with his ground melee attacks. Landing this move will increase your gear by 1. This move, for some reason, only has 1 down power. This first uppercut has no other special combo properties and you should always continue to land the second uppercut (Fourth Hit) after you hit the first.
This is the start of where Deku’s melee string becomes armored. If you’re being attacked and you’re already hitting the first uppercut, it’s best to hit all 3 uppercuts to finish off the combo. This also means that if other enemies attempt to jump in your way to hit you out of an uppercut, they’ll get hit as well.
GIF OF DEKU GAINING ARMOR. MAYBE TRY MOMO ALPHA
Fourth Hit (Uppercut 2)
After this move, you can either roll to reset your combo, or you can hit the last melee and knock the opponent over. After hitting this attack and rolling, the opponent will be lower than where they were where you began the string. This means that if you hit an opponent in the air, you can continue to do this m1-m2-m3-m4-roll reset until it looks like they’re too close to the ground. Then, you should do melee 2 into Beta.
GIF OF THE ROLL CANCEL TIMING
Fifth Hit (Uppercut 3)
If you’re hitting this move on an opponent, that typically means you’re now in the fifth gear. However, if you roll too quickly after hitting the last uppercut, you might accidentally stop yourself from getting into fifth gear.
Typically, you should decide whether or not you want to combo your opponent or get to top gear. Go for the entire string if it is convenient or you need to enter 5th gear. Otherwise, you have alternative higher damage options.
If nobody is stopping you and you’re in the right situation, you might be able to continue your combo by avoiding the third uppercut and still enter the fifth gear by landing uppercut 1 again. Watch for these scenarios to continue your strings:
The enemy is doing their air-block animation (if they have gp)
The enemy is elevated (at least above your head)
You are near a ledge (There are ledge cancel options available)
You have a teammate nearby that can apply hitstun while you roll
All Four Attacks, Then Roll (1-2-3-4)
Whiff First Attack (2-3-4)
As you can see, Deku’s melee combo value is extremely high, despite the relatively low damage numbers. This allows him to effectively minimize interactions against strong opponents. In a team game, trying for the most effective combo could also take up an abnormal amount of time, and the combo could serve no functional purpose in the heat of battle. Try to combine Deku’s melees with other high combo value tools from other kits to obliterate healthbars quickly.
Air Melee
This is a weak burst option that can be used for a quick knockdown or set up for simple combos. Not much else to add.
Leveling Paths
Gamma Level 4 is a MUST
Overhaul’s gamma is his most needed tool and level 4 grants him better damage, a far better size, and a second charge. This lets you take on fights and defend you and your team far easier. Being left without gamma level 4 doesn’t ensure a loss as he can still fight to an extent with only his beta and alpha, however gamma gives you so much utility you should never leave it below level 4.
Combat-Oriented Path
This is a level path that gives you the ability to fight well on the ground and still deal damage to airborne targets. Getting beta to level 4 second is to allow you to finish opponents faster along with having a stronger beta in general to help with your grounded damage output. This path is recommended for solo queueing as to stay self sufficient while still allowing you to support your team and backline when it comes to it.
Support-Oriented Path
This path is a more backline oriented path that allows you to cover your team effectively while not setting yourself up to simply fight. This allows you to still defend yourself, your team, and set up team combos through the extra gamma charges, along with giving you faster longer range attacks that still allow you to deal consistent damage. This is more recommended in stacks as you will be farther from the fight and thus will be able to heal your team more.
Techs
Instant Beta/Gamma
When landing you can use your beta or gamma to skip the startup allowing you to instantly attack upon landing (please note jumping and using alpha lines you up to perform this tech far easier). This makes jumping a large part of Overhaul’s gameplan as it allows him to act more mobile and mix up when he attacks.
Instant Reversal
If you use Overhaul’s special action upon landing he can attack immediately after as he is suspended just above the ground which allows him to use his beta or gamma instantly. This works best as a wake up option as he can essentially get both a heal and an attack in one action right after each other. To perform this you need to jump and right as you lift off the ground input your self heal and you will heal just barely suspended off the ground allowing you to instantly attack afterwards. Please note you will still lose your I-frames when you begin holding your heal if you attempt to perform this after getting up.
Beta Sniping
This is a technique that is integral to Overhaul managing his losing matchups and catching escaping opponents. To do this you place your reticle above or over an object/ledge. This allows you to place a beta on another plane giving you better verticality. Please note Overhaul’s beta has the same range as his alpha so you can use it to line up where your beta will go and place accordingly.
Combos
The different ways you can combine and chain various skills for higher damage within 500 DP (Downpower). The downpower of Overhaul's abilities are as follows:
The text of the combos below will be colored by how true they are, in this case, we will define as "True" combos that, without 3rd party or tuning interference, can only be escaped/interrupted by Overhaul and/or Mirio, as those are special cases.
White Text means that part of the combo is True on both GP and HP. Green Text means that part of the combo is True if the target is on HP only or the hit Guardbreaks. Blue Text means that part of the combo is True if the target is on GP only. Red Text means that part of the combo is Untrue, and therefore the enemy can escape it.
Overhaul’s special action can be used in place of your gamma or air melee for 80 damage and in nearly every combo it's true on HP, however this is not recommended so we will not be including it in the combos.
Gamma → Gamma
This is a basic bread and butter combo to hit multiple people at once and confirm an easy 200+ damage.
Gamma → Alpha
This is a weaker but reliable and ammo efficient combo that can be performed with lenient timing.
Gamma → Beta
This is a more ammo efficient combo that provides better damage than the previous combos however it is within a tighter time frame. This can be made more lenient through performing an aerial gamma before the beta.
This is a decently strong and reliable combo when upclose that saves your gamma charges.
Gamma → Beta (2 Spears) → Gamma
This is a combo that is powerful but tight on timing. I recommend you do this if you’re close enough to land the gamma near immediately as gamma travel time poses an issue at range.
This is a strong combo that utilizes melees that you can choose to finish with either an air melee for less damage but to save your gamma or another gamma to secure more damage and possibly a kill. Use this as an option if you are up close. Keep in mind that while gamma is not fully confirmed it is very likely that you will catch the opponent if they try to escape with it’s large size.
This is a solid combo that begins with your melees that you can use if someone is up close if you decide to throw out a melee. Keep in mind that while gamma is not fully confirmed it is very likely that you will catch the opponent if they try to escape with it’s large size.
Same as the previous combo but slightly faster. Keep in mind that while gamma is not fully confirmed it is very likely that you will catch the opponent if they try to escape with it’s large size.
Air Melee → Alpha
This is a worse but incredibly fast combo to use after an air melee, most useful in a larger fight to keep you less vulnerable but add on a little more damage than you usually would or to quickly secure a kill.
Air Melee → Gamma
This is a fast combo you can only perform if you hit the air melee closer to the end of its animation, but you get a solid amount of damage in return. Most useful in a large fight if you just throw out an air melee and don’t wish to commit to a usual combo to remain vulnerable. On HP it's consistent if there's a wall behind the enemy, as Air Melee's knockback might put the enemy out of range otherwise.
This is a hard hitting combo you should never realistically go for as it is difficult specific and long however it has extra style points. Aim beta away to only hit 1 spear.
Smart Positioning
When playing Overhaul you want to try to stay in range of your skills but generally safe whether it be playing around debris or terrain to attack as safely as possible as your gamma will travel over small obstacles and when used properly can be used around corners to just staying farther away to avoid getting ganged up on and expending all your resources, you also really want to be playing around your team as to assist you in taking out threats you will struggle with and helping defend them.
The Poison Mist is Your Friend
You have 350 HP powerful get off me tools and solid range allowing you to marinate comfortably in a poor environment just make sure you have sufficient green healing items, support cards or have/are close to having your heal up to make the most out of storm safely. You will want to use this to escape from some fights or back off to heal you or your team safely. This will not work 100% of the time but it will work often
Speed and Saving Gammas
If you are forced into an up close engagement or wish to brawl try to conserve your gammas and remain mobile. You want to save your gammas to perform more combos whether they be quick or long as you use them to keep people off you, use them to catch wakeups and help do most of your damage. As a replacement you will want to opt for more melees or quirk skills to help keep your damage output consistent and set up into more situations where you can make the most out of your gammas. The only situations in an up close fight where you will want to use both gammas would be to down an opponent or to hit others that are farther away to ensure you get the most value possible from them.
The list of recommended special tunes (not ordered):
Critical Permeation (Currently bugged) This tune allows you to freely escape combos or get a quick heal, all while being invincible upon a guardbreak.
Quirk Factor Release This tune lets you easily get a reload boost which will allow you to keep your gamma up more often and get your special action back faster, allowing you to support and fight more effectively.
Special Action Reload Boost This tune rewards getting downs to bring back your heal incredibly fast, all with an easy requirement with Overhaul’s large AoE and high damage.
Wall Runner This tune gives Overhaul movement, which allows him to escape engagements and make general maneuvering far easier, increasing his survivability substantially.
Willpower This allows Overhaul to use his heal safely at the last possible second, essentially giving him a second life rather than a reset to his HP.
Ability Manifest Overhaul gains a lot of value from Ability Cards whether it be attacking, poison mist marinating, or recovering your special action, so making the cards last longer is always good.
High-Speed Replenishment Healing your shield faster allows you to stall your special action for longer, as you will likely fit in more heals in critical situations, saving your special action for you or your team along with speeding up GP teamheals, further reinforcing Overhaul’s supportive side.
Embrittlement This allows him to consistently gain slightly more damage through his reliable melee combos.
Revenge Tunes Same reasons as ability manifest however they take up other special tuning slots that may be better however they still aren’t bad options.
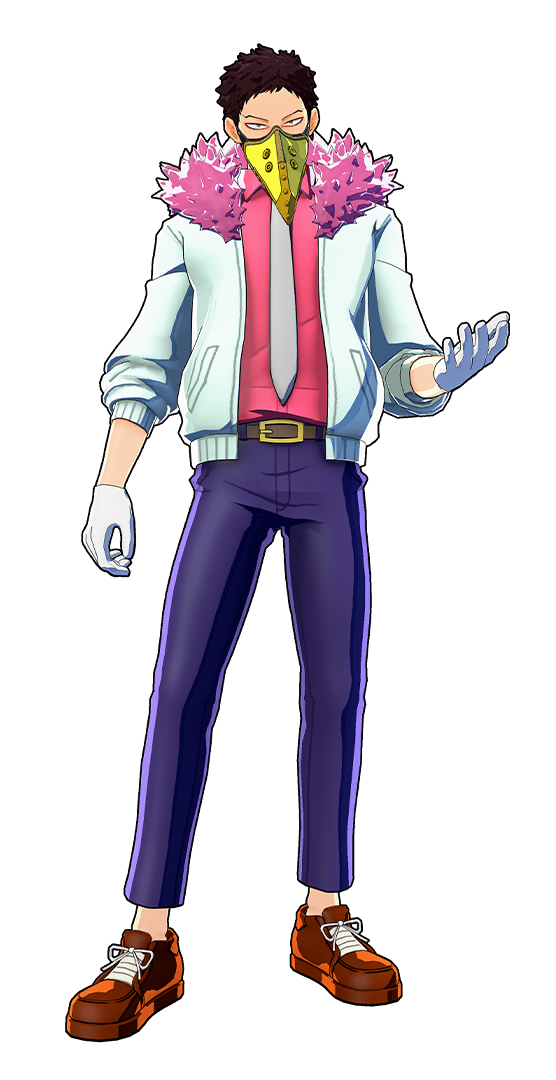
Recommended Builds and Costumes
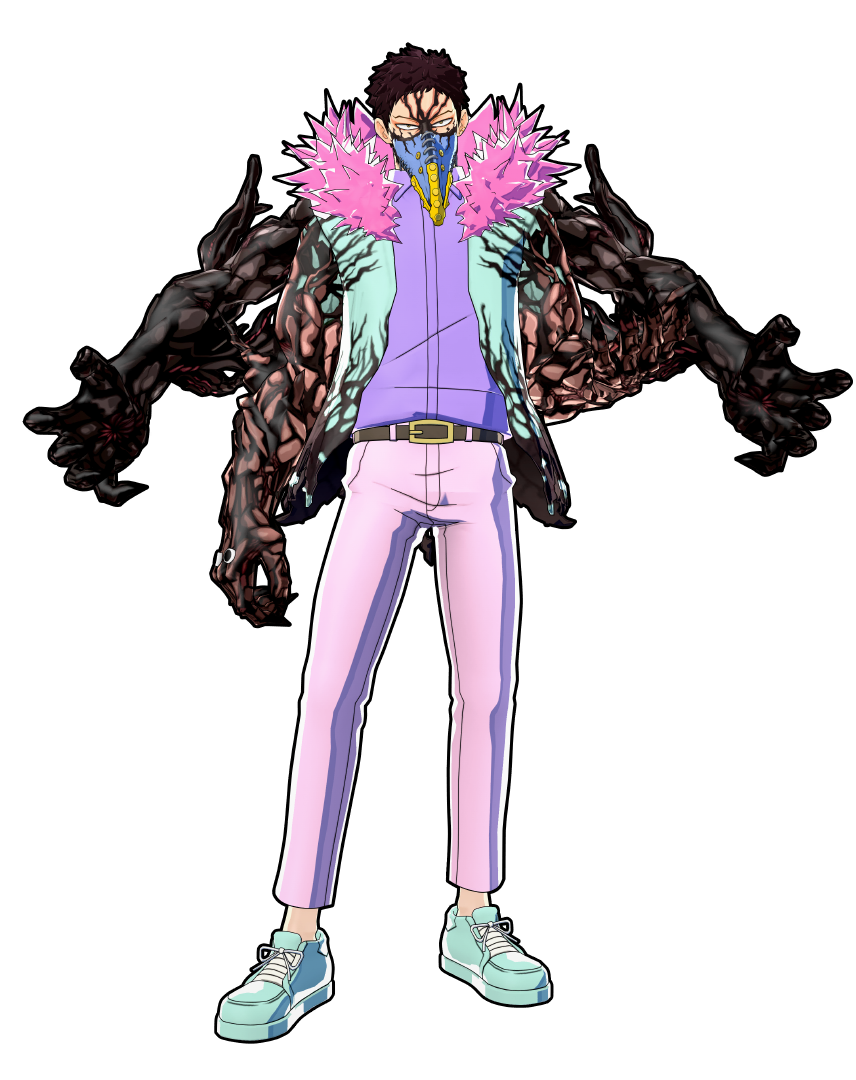
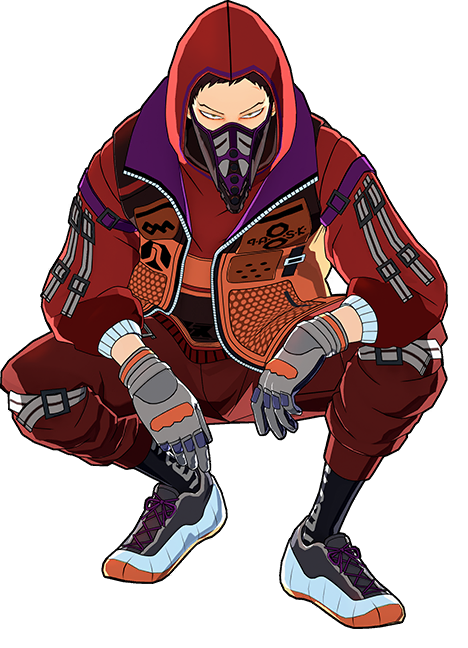
Cyberpunk (Fancy)
This build boasts an amazing combination of a tech slot and villain assault slot allowing you to run a combination of Special Action Reload Boost and Quirk Factor Release, giving you great reloads for guardbreaking opponents which Overhaul already does easily but also making it easier to get downs through having your attacks up more often and activating special reload boost. Easily one of Overhaul’s best costumes through giving him his heal more often when using the right tuning combination.
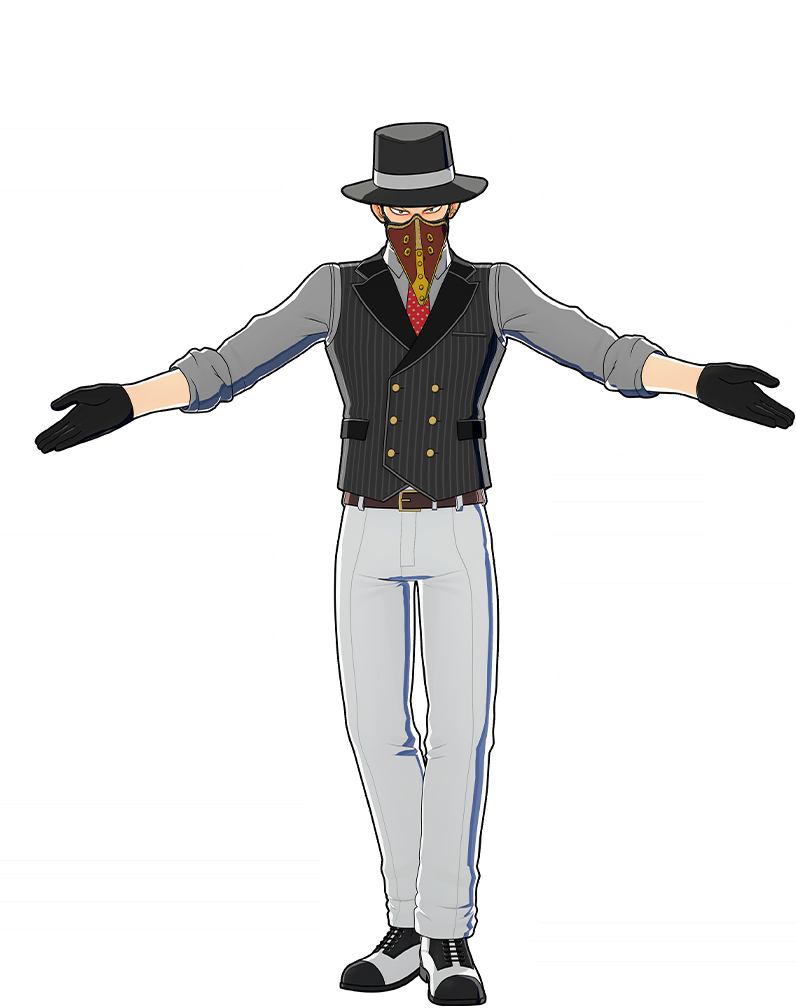
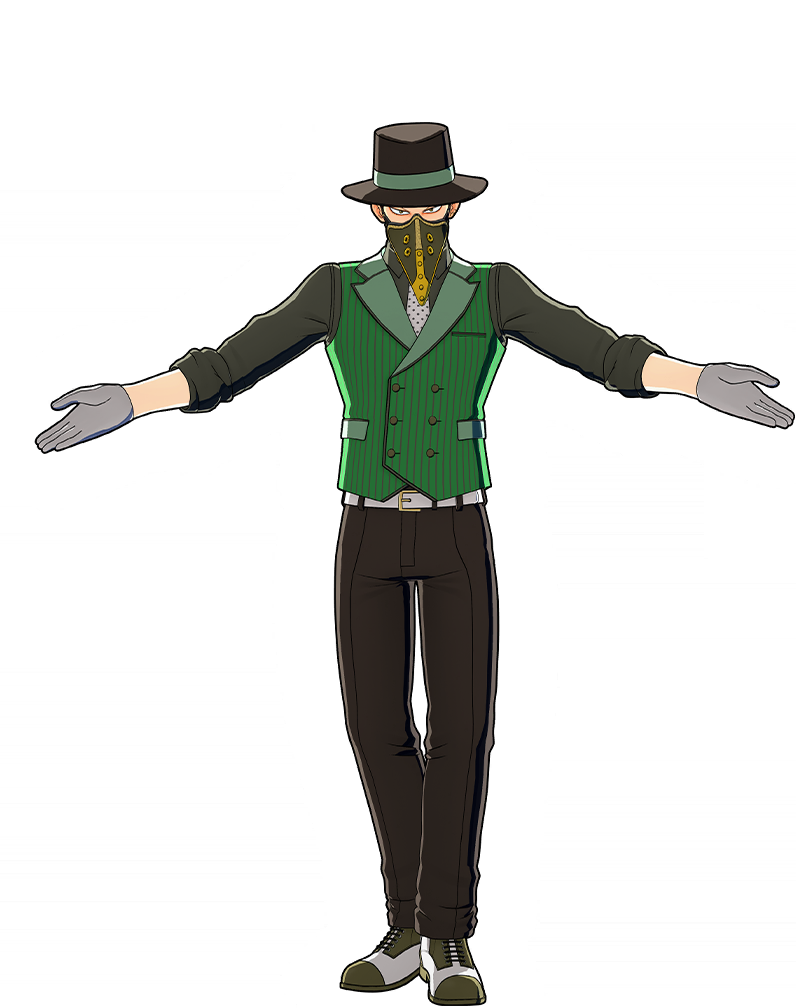
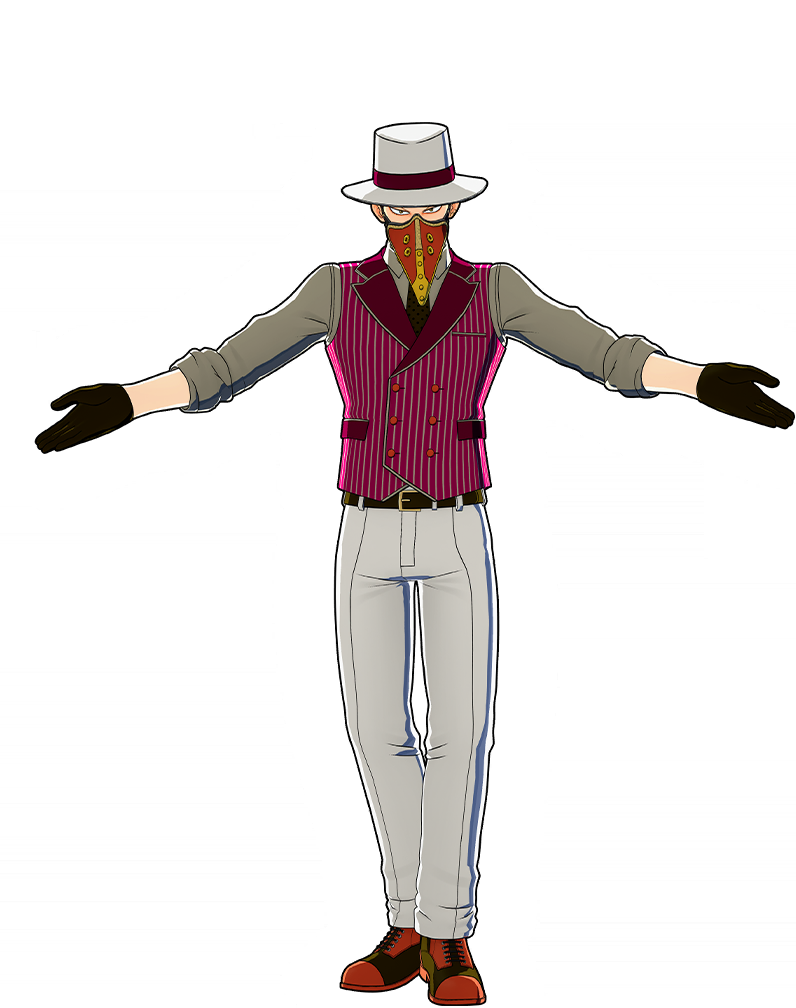
Formal Suit (Default)
This build allows Overhaul to deal a respectable amount of damage and special tunes that allow him to fight aggressively or focus on his survivability with a strike slot and a tech villain slot that allows him to run tunes like Revenge Strike, Ability Manifest, and Willpower with Special Action Reload Boost (it’s also the most stylish costume).
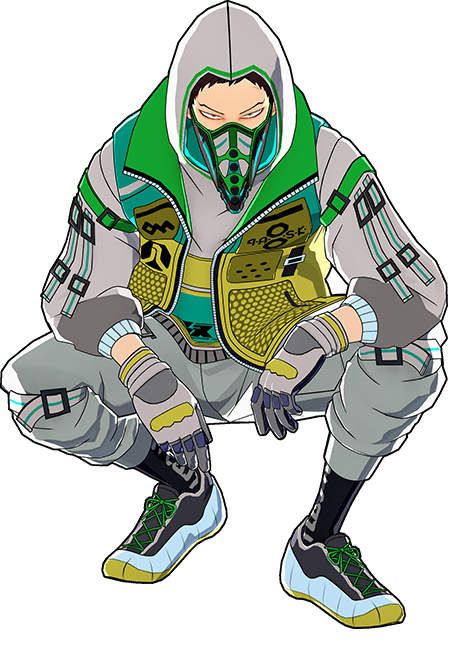
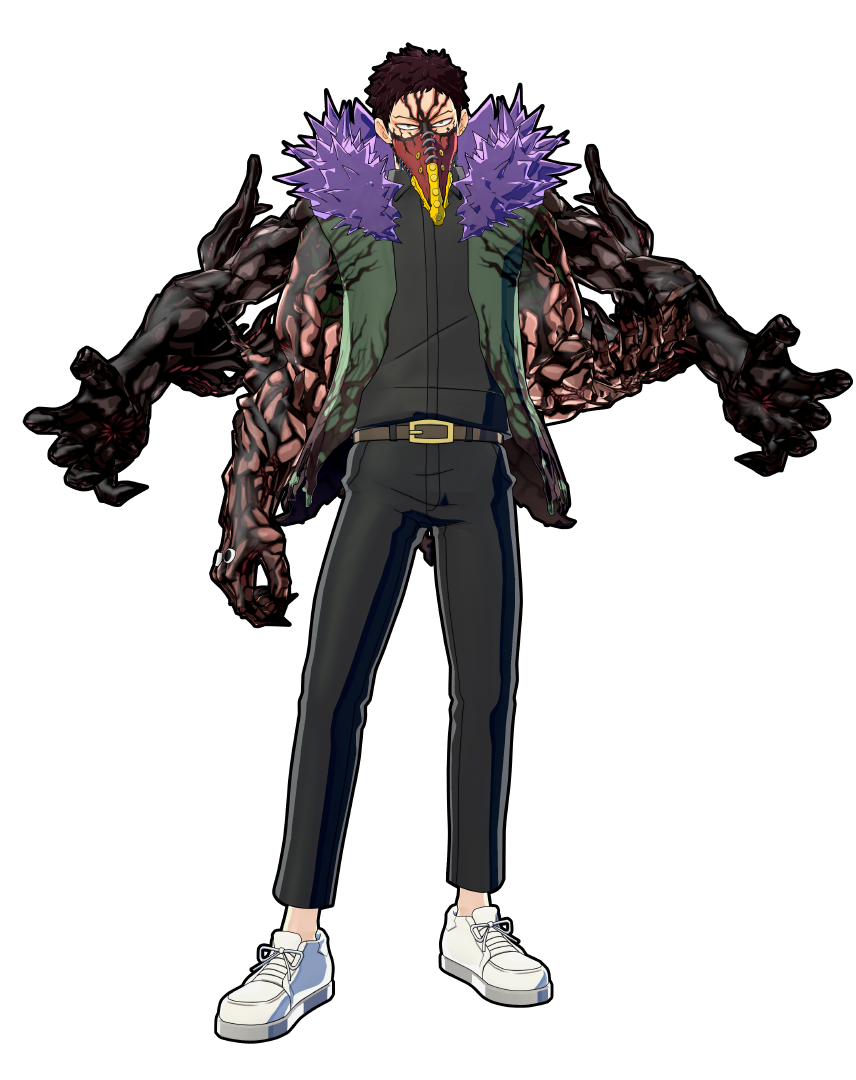
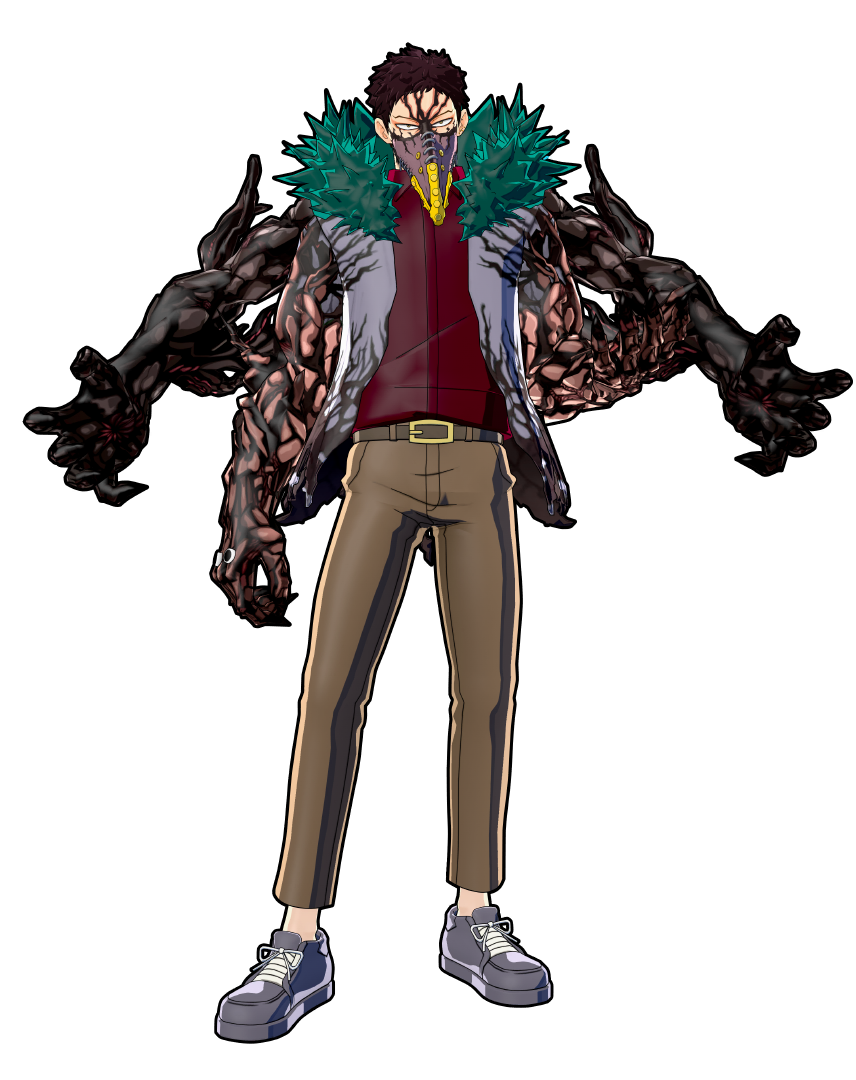
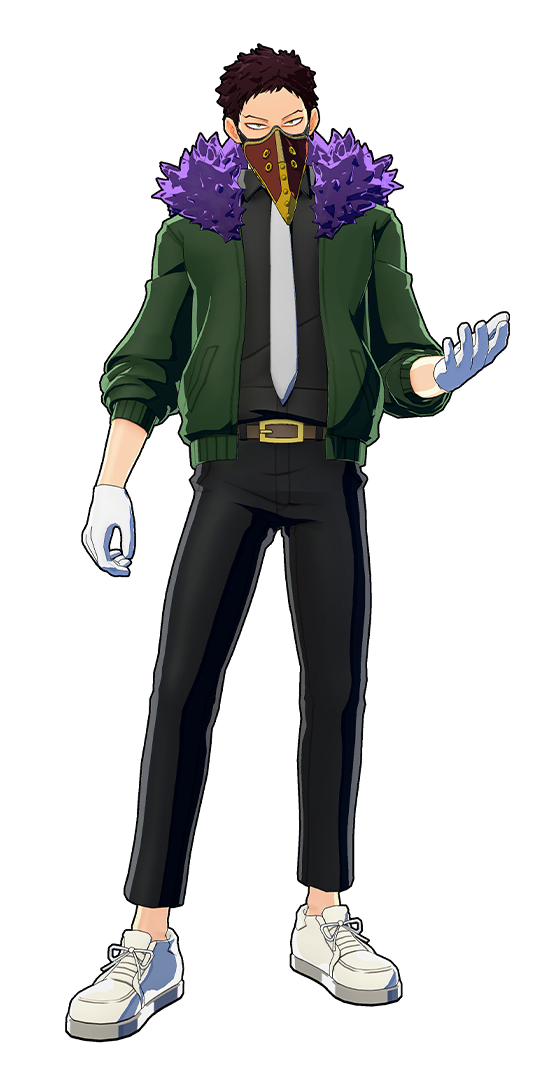
Quirk Fusion ver. (Hero Style)
This build allows Overhaul to pump out easy damage with strike-dominant normal tuning slots, and special tuning slots that allow you to use Special Action Reload Boost and Revenge Strike with it’s technical special slot and it’s strike villain special slot, giving you more damage and heals while enabling you to get downs easier.
Formal Suit (Dangerous)
This build gives Overhaul access to tunes like Wall Runner, Willpower, and Ability Manifest with its rapid special slot and strike hero special slot, giving him mobility and better survivability while also giving him access to tunes that buff him.
Quirk Fusion ver. (Fancy)
Essentially the same as the previous build but on the fusion costume.
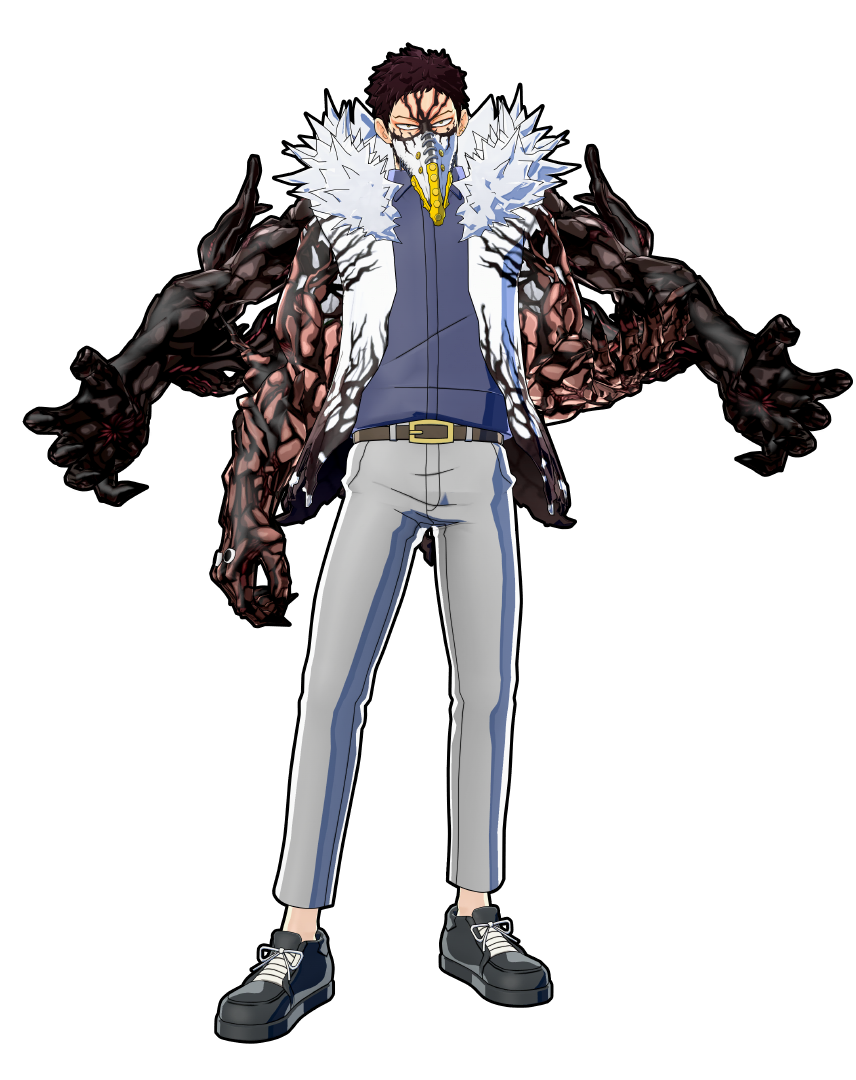
Quirk Fusion ver. (Default)
This build can turn you into a Raid Boss at the cost of damage through it’s normal tuning slots using its two special slots you can run tunes like Willpower, Ability Manifest, Revenge Strike, and for the assault slot you can run Revenge Assault, making you a tanky demon.
Formal Suit (Combat)
This is easily one of Overhaul’s most versatile builds, allowing you to heal faster, reload faster, or be one of Overhaul’s highest damaging builds with two technical special slots, giving him a wide range of tunes he can use.
Quirk Fusion ver. (Dangerous)
This build allows you to become a swift tank with it’s rapid slot and it’s assault hero slot giving you options like Wall Runner and Revenge Assault or Wall Runner and Space Hop if you wish to run a full movement build.
Formal Suit (Heat)
This build makes you a defensive heal demon with its assault special slot and its assault hero slot, allowing you to run Quirk Factor Release, Revenge Assault, Embrittlement, and some Space Hop making this a limited but decent build.
Quirk Fusion ver. (Combat)
This is a build that can constantly sustain you and keep you alive with proper tunes using its assault special slot and support hero special slot. This can run Revenge Support, Revenge Assault, Embrittlement, and Quirk Factor Release, which allows you to sustain yourself really well or maybe do a little more damage.
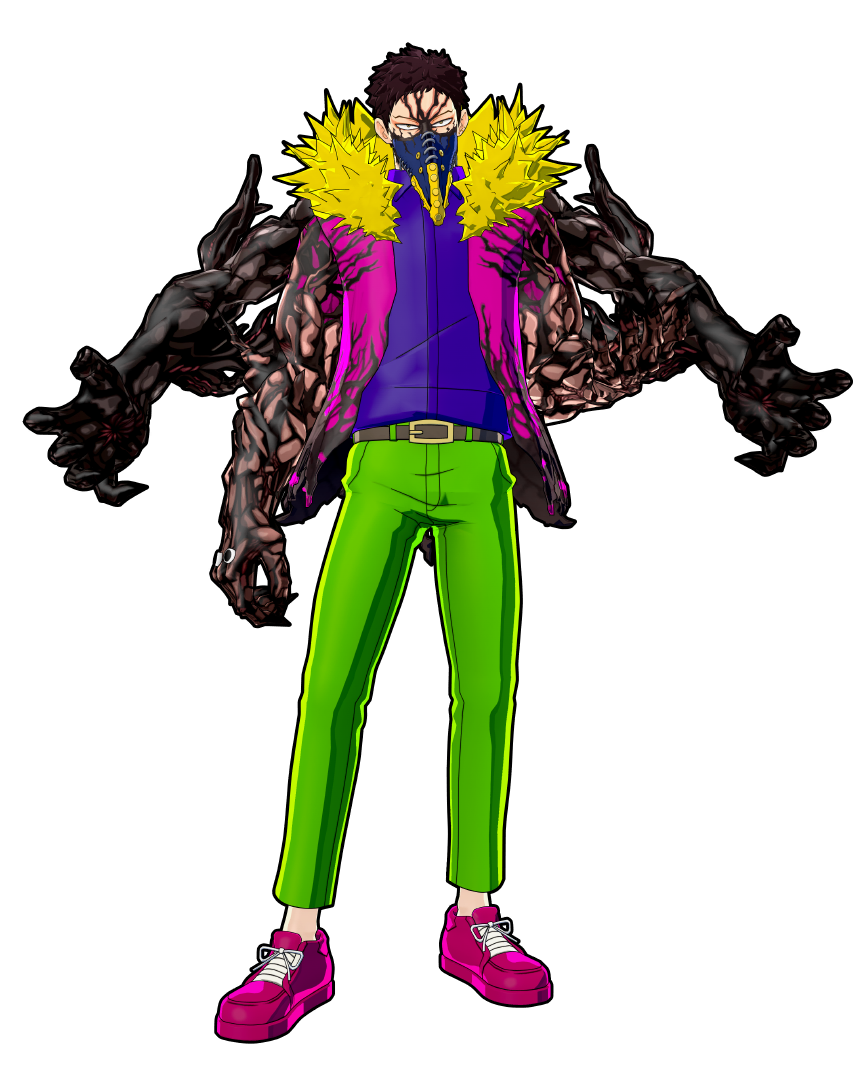
Cyberpunk (Heat)
This is a build that gives you a unique combination of a strike slot and a strike hero slot allowing you to run tunes like Willpower, Ability Manifest, and Crushing PU Charge, giving you an interesting combination of tunes to your disposal. It's not his best costume however it’s a solid costume that lets run some fun tunes without giving you a bad build.
Villain Costume (Dangerous)
This is Overhaul’s highest damaging budget build that keeps you alive just a little longer using its support special slot and its technical villain special slot, letting you run Revenge Support and Revenge Technical or Special Action Reload boost.
Villain Costume (Fancy)
This budget build is another solid budget build, making you a mini raid boss, letting you run Willpower, Ability Manifest, Revenge Strike, and Revenge Assault using its strike special slot and its assault hero special slot, allowing you to live just a little longer.
Villain Costume (Default)
This budget build is one that lets you heal more and escape engagements with its rapid special slot and its technical villain special slot, letting you run Revenge Rapid amd Revenge Technical or Special Action Reload Boost.
Although the match-ups seem grim, this is only considering a 1v1 situation. This does not include larger fights such as team fights in which Overhaul gains a large upper hand, meaning that more often than not you want to be fighting next to your team so they can cover your weaknesses and help you fight as you heal them, help enable them, and control the area around them making it easier to fight.
Izuku Midoriya (Default)
Difficulty Score: 🔴Unfavorable🔴
Assault Deku can fight you while you can struggle to hit him with his fast movement, however he loses most of his damage up close and indoors, as he likes playing more from range and you beat him in damage when he struggles to evade you. We recommend trying to lead him indoors or trying to read his movements along with utilizing beta sniping if he tries to play from an advantageous point, as this will give you a solid chance at winning.
Izuku Midoriya (Full Bullet)
Difficulty Score: 🔴Unfavorable🔴
Strike Deku outdamages you at range, however when using his gamma or beta he is vulnerable, making it easier for you to attack him and trade damage. It's recommended trying to get close as soon as possible and brawl him, as he hits hard from afar allowing him to burst you down, meanwhile you can prevent him from fighting effectively up close through catching his options and stunning him through his attacks as they all lack armor and can be caught. Alternatively, you can try to lead him indoors as while he isn’t bad indoors you are far stronger than him, meaning you can take him out. Please note your gamma can go through Strike Deku’s gamma walls.
Izuku Midoriya OFA
Difficulty Score: 🔴🔴Very Unfavorable🔴🔴
Rapid Deku is one of your worst nightmares, being able to force you to use your options and act very safely. Your only hope is to get indoors or a very tight area to try and kill him through catching his beta endlag, trying to predict an approach and snuff it out or trade with his alpha. Otherwise you want to avoid engaging with him entirely and try to take him out with your team around to assist you.
Katsuki Bakugo (Default)
Difficulty Score: 🔴Unfavorable🔴
Strike Bakugo can remain midair and rain down attacks from above for a fair bit, however you can catch him after he uses his gamma and in some cases you can dismantle him as he is spinning. You want to try baiting him indoors and fighting him inside as you can win interactions easier there. However, he can still attack from outside, meaning that he doesn’t have to play by your rules, although if he wants reliable damage he will need to come indoors and fight you head-on, allowing you to possibly win the fight.
Katsuki Bakugo (Machine Gun)
Difficulty Score: 🔴🔴Very Unfavorable🔴🔴
Rapid Bakugo will never let you hit him, with only one opening to attack him being when he dives for his gamma. Even indoors he can stunlock you and make fighting very difficult. Try to avoid this man and see if you can get your teammates to help. If you need to fight him try fighting him indoors as that will give you the best chance at victory.
Ochaco Uraraka (Default)
Difficulty Score: 🔴🔴Very Unfavorable🔴🔴
Rapid Ochaco can hit you with near one touch kill combos at range, and midair with incredible movement, making simply hitting her a big struggle. You can only fight her indoors where she is weakest, allowing you to kill her, however her speed makes it difficult to secure a down if she decides to escape.
Ochaco Uraraka (Zero Satellites)
Difficulty Score: 🔴Unfavorable🔴
Assault Ochaco hits hard, has some solid movement, and can stay in the sky. However she has very "laggy" movement, meaning Overhaul can fight her somewhat effectively. They trade a lot indoors, as you will struggle to fight each other through constant stuns and hard hitting attacks. She can escape from engagements with you when pressured and can utilize hard hitting combos out of dismantle range. However if she tries to use her gamma platform you can beta snipe on top of it, meaning she cannot heal or revive for free. Please note that the platform must be fully raised before your betas will have any effect on her as they will simply get placed on the platform but not work.
Tenya Iida
Difficulty Score: 🔴Unfavorable🔴
Iida outspeeds you drastically. However, he has to play up close so you can snuff out any approaches with alpha. He's also very weak indoors, making this a very terrain-based match-up as anything other than indoors and you will very likely lose.
Shoto Todoroki (Default)
Difficulty Score: 🔴🔴Very Unfavorable🔴🔴
Strike Shoto can outdamage you, trade with you, and outmaneuver you while also defending himself from all your attacks, and he's just as strong or even arguably stronger than you indoors. You cannot dismantle him when he goes for most of his gamma combos and you will struggle to even fight back. You want to get your team to help you take him out.
Shoto Todoroki (Ice Fang Wind Flame)
Difficulty Score: 🔴🔴Very Unfavorable🔴🔴
Tech Shoto forces you out of your own buildings and can beat you outdoors with his gamma, making two of your attacks irrelevant and preventing you from using your Special Action if he attacks you with a tornado on top of him. He can fight from the outside of buildings making every interaction a large struggle. Just avoid fighting him as while he may have a range advantage you can still dodge his alphas from afar and run away, as Technical Shoto also lacks mobility options. However if you are forced to fight him get as close as possible, abuse your beta, and take every trade possible.
Tsuyu Asui
Difficulty Score: 🔴Unfavorable🔴
Tsuyu will outmaneuver you no matter what, however when she has to attack she is generally telegraphed, making her fairly easy to dodge. However, she's often too fast, making this a nearly unwinnable match-up due to her speed. Meanwhile indoors you will win no matter what as she struggles to move and get outdamaged while getting caught in everything you will throw out.
Eijiro Kirishima (Default)
Difficulty Score: 🟢Favorable🟢
Assault Kirishima has to approach you and he's easy to dodge, meaning you can cover yourself and outdamage him for simply trying to attack you. However every single one of his attacks are armored, meaning that you will struggle to stun him along with being solid indoors, on top of being able to activate hardening, lowering your damage and keeping him armored constantly. You are still stronger than him in every situation with your high Downpower, allowing you to still knock him down through his armor, however simple misplays can shift the fight into Kirishima’s favor.
Eijiro Kirishima (Red Drive)
Difficulty Score: 🔴🔴Very Unfavorable🔴🔴
Strike Kirishima is already very oppressive with his fast mobility, high damage, his shield, and effectiveness indoors, making it very hard to fight back against him already but then he can also activate hardening, making any opening impossible to exploit. You still want to get indoors as it makes maneuvering harder, and blocking your attacks with his shield will be a lot more difficult than it would be outdoors, you want to try and attack him when he goes for a beta slam or moving with alpha, however hardening remains an issue with getting rid of openings you would usually exploit. You want to get really good at rolling in an attempt to stall out hardening in order to even fight back.
Denki Kaminari (Default)
Difficulty Score: 🔴Unfavorable🔴
Strike Denki can force you to take free damage and force you to dismantle with the threat of killing you off of one stun, along with having damage that can force you to heal. On top of that, he's not too weak indoors thanks to his ability to lay down livewires, constantly covering a solid area and hitting through walls with his beta, not to mention he can attack from range with his alpha. You want to try and approach and try to force him to use his gamma, as you can dodge it pretty easily and punish him for it with its long endlag, otherwise as per usual try to lure him indoors as while he isn’t too weak indoors you are still stronger than he is along with his beta being easy to avoid if he tries to use it through a wall.
Denki Kaminari (Lightning)
Difficulty Score: 🔴🔴Very Unfavorable🔴🔴
Technical Denki will always try to stay out of your range and away from you on top of high ground to hit you with his alpha and rain down traps. You can easily destroy his traps, and if you watch Denki you can dodge his alphas when they come out. You want to go indoors and fight him there as he will not win, you outdamage him and you can dismantle any attempt for a melee combo.
Momo Yaoyorozu
Difficulty Score: 🟡Even🟡
Momo matches Overhaul in essentially every way making this an incredibly even fight. Overhaul is stronger outdoors than Momo so killing her outside will be easier than indoors. You want to dismantle Momo when she tries to go for combos and place betas on her feet in front of her to prevent any approach along with avoiding using both of your gamma so you can trade stuns or outdamage Momo.
Fumikage Tokoyami
Difficulty Score: 🟡Even🟡
Tokoyami cannot outdamage you, and Overhaul generally ignores shields, although he can easily outspeed Overhaul and force him to use valuable resources along with being able to glide slowly down from midair and jump away swiftly when in Ankh mode, making this fight a lot more even and ending it in a stalemate.
Neito Monoma
Difficulty Score: 🟣Unknown🟣
Monoma’s base kit is generally alright with the exception of his gamma being really strong, forcing you to avoid attacking him as he gets a lot of value out of your gamma, however fighting him will always be a struggle as he may have quirks that you counter or quirks that counter you.
Itsuka Kendo (Default)
Difficulty Score: 🟡Even🟡
Assault Kendo can output a ton of damage, but you can catch her and stun her while she alphas. You can mostly ignore her shield and punish her trying to punish you with good reads. Keep in mind that she can armor through your gamma, block most of your attacks and keep up a good amount of constant damage matching you but not beating you.
Itsuka Kendo (Twin Palm Strike)
Difficulty Score: 🔴Unfavorable🔴
Strike Kendo is a weird case as she outmaneuvers you outdoors and can nullify most of your damage in return for a large attack, but she relies a lot on her melee game for most of her damage which Overhaul counters heavily, so all she can do is rely on her ranged game which is good but not good enough to counter overhaul completely. She still forces you to waste your resources to protect yourself, making it difficult to win most interactions if you cannot get indoors. You want to be indoors as she will struggle to avoid most of your damage and will be easier to interrupt when trying to go for melee combos along with taking more damage when in beta if you respond with your own beta due to her reduced knockdown while holding it up.
Ibara Shiozaki
Difficulty Score: 🔴Unfavorable🔴
Ibara outdamages you at range and has stronger options up close just barely giving her the edge. This is still winnable both indoors and outdoors however you will struggle when trying to do so.
Mirio Togata (Default)
Difficulty Score: 🟢Favorable🟢
Rapid Mirio is leagues faster than you but he has too much startup lag, making him easy to roll and easy to punish through his endlag and vulnerability on his attacks, along with relying too much on melee combos to fight you at all, meaning you can brush him off you and kill him for a single mistake with his low hp. His great mobility and ability to escape easily is the only thing carrying this matchup and keeping it from being unwinnable for Mirio. Keep in mind your beta ignores Mirio’s gamma shield entirely.
Mirio Togata (Sheer Counter)
Difficulty Score: 🔴🔴Very Unfavorable🔴🔴
Technical Mirio should never be getting hit by your attacks; he can attack from range and up close, he can be completely invincible and then deal 200 damage on reaction with his gamma. Your only hope to kill Mirio is to catch him low and finish him in one combo.
Tamaki Amajiki
Difficulty Score: 🔴Unfavorable🔴
Tamaki can fight you from range and can escape you easily using his special action along with forcing you to use your special action when he goes for combos. You beat him in the melee game as any approach with a beta can be beat out, and any mistake when pulling you in will result in him getting hit and knocked off you. The problem comes in when you look at Tamaki’s gamma as it does a large amount of damage, lasts a long time and goes through walls meaning he doesn’t have to go indoors. Try to get close to him and out brawl him along with avoiding being put mid air by his special action as you will have less options and be left vulnerable to more attacks.
Nejire Hado
Difficulty Score: 🔴Unfavorable🔴
Technical Nejire is a midair brawler which Overhaul already struggles with, however she is left vulnerable to be beamed down with alphas and constantly be knocked down until she is on the ground and vulnerable to you, although she can still get back into the sky and back into a positive scenario. When indoors she has no sky to run to, and you can just DPS her down and kill her, so trying to lure her inside would be your best play, however you can still win outdoors, it’s just more in Nejire’s favor.
Nejire Hado (Fairy)
Difficulty Score: 🔴🔴Very Unfavorable🔴🔴
Support Nejire much like her technical counterpart fights primarily midair, however she is far more threatening through her consistent damage along with her beta and gamma allowing her to fly even longer and faster on top of healing herself, making what was already a struggle to fight against nearly unwinnable. You want to get indoors or fight her with your team as you will likely win the fight that way.
Hitoshi Shinso
Difficulty Score: 🔴🔴Very Unfavorable🔴🔴
Shinso will constantly stun you from range and hit you with high damage repeatedly along with having a confirm allowing him to hit you with his gamma and slowing you down, making you an easy target. All you can do is get indoors, as Shinso struggles to trade with you inside buildings allowing you to fight back significantly easier.
All Might (Default)
Difficulty Score: 🟢Favorable🟢
Assault All Might has movement and can nullify all of Overhaul’s attacks with his gamma; however, he has loads of startup lag and loads of endlag, with damage that isn’t close to threatening, making him easy to kill. The issue lies in that if he tries to escape he will most likely escape with you being unable to do nearly anything.
All Might (Gatling)
Difficulty Score: 🔴🔴Very Unfavorable🔴🔴
Rapid All Might has very fast movement and can rain down attacks that hit hard into a grab for 200 damage, forcing you to use your special action and making the outdoors miserable to fight in. You really want to get indoors in order to fight him, he can armor through your attacks with his alpha, lowering damage taken and decreasing downpower received, leaving him open to more attacks but also allowing him to tank nearly everything you have in order to deal tons of damage fast. However, remaining indoors is your best shot at winning since he cannot fly around and rain attacks from above, he is forced to get close and personal, putting you in an advantageous position.
Armored All Might
Difficulty Score: 🔴🔴Very Unfavorable🔴🔴
Armored All Might never has to touch the ground along with being very mobile in general while constantly hitting you with high damaging attacks with great range and numerous stuns that can lead into a guardbreak. Your only chance at survival is to rush indoors and fight him there, but even then he is still strong and a very difficult match-up to manage. You really want your team to help you in this fight.
Shota Aizawa
Difficulty Score: 🔴🔴Very Unfavorable🔴🔴
Aizawa can attack you with next to no risk of getting dismantled, as his gamma blocks your special action on top of having the ability to take away your quirk skills and have good and hard to track mobility. You cannot fight him outdoors as you will be unable to track him and deal meaningful damage so you want to lure him indoors and abuse the fact he has nowhere to bounce around, meaning you can catch him as he attacks and out stun him. The only issue is that erasure still takes away most of your fighting ability so you will want to be somewhat close as to make it easier to melee him, allowing you to attack him while you have your skills erased.
Present Mic
Difficulty Score: 🔴🔴Very Unfavorable🔴🔴
Present Mic can outrange you and outdamage you indoors and outdoors. You can stun him through his attacks as he has no armor, but that is simply all you can do since he can do the same to you and then also damage you from a safe range. You want to get your team to help you take him out as he poses a huge threat to you.
Cementoss
Difficulty Score: 🔴🔴Very Unfavorable🔴🔴
Overhaul will simply not win this fight unless the Cementoss is sitting idle. Do not fight him.
Endeavor (Default)
Difficulty Score: 🔴🔴Very Unfavorable🔴🔴
Strike Endeavor is good outdoors, being pretty oppressive, however he also beats Overhaul indoors with his large and hard hitting beta that makes fighting a struggle, along with having a wall piercing gamma making baiting him indoors difficult. You can’t even pin down Endeavor as he can fly away. While you can win fights you will still want your team to help you win engagements with him.
Endeavor (Inferno Fist)
Difficulty Score: 🟢Favorable🟢
Assault Endeavor lacks damage outside of his gamma (which is also bugged when used indoors) so even if he has his strengths like controlling indoor spaces well, with his current damage he simply cannot hit hard enough to kill you, however he can still escape engagements with his flight.
Hawks (Default)
Difficulty Score: 🟢Favorable🟢
Rapid Hawks has speed and the ability to fly, however he doesn’t have a reliable way to get damage and can get his beta interrupted easily, removing a large amount of his damage output. He’s even weaker indoors than he is outdoors, making that an easy win condition. He can easily escape fights from you however, so he will almost never get close to killing you, but he can escape freely.
Hawks (Slicing Wind)
Difficulty Score: 🔴🔴Very Unfavorable🔴🔴
Strike Hawks is incredibly fast and will outspeed you and outmaneuver you constantly, meaning you will take damage and be unable to hit him back, but indoors it shifts in your favor as Hawks struggles to fight in a place he cannot fly in. If you get into a fight with him try to get inside or else you will die.
Mt Lady
Difficulty Score: 🟢Favorable🟢
Mt. Lady likes to fight at a melee range to deal damage, making dismantling really easy along with having sub par movement, poor range, and alright damage, taking care of small mode Mt. Lady is an easy task. However if she goes big you have to run, as she will kill you easily outdoors and can pierce walls with her beta, making hiding indoors useless. Otherwise she is not difficult to kill indoors or outdoors.
Tomura Shigaraki (Default)
Difficulty Score: 🟡Even🟡
Strike Shigaraki fights indoors and outdoors very similarly to Overhaul, the main difference being that he fights with DPS and Overhaul fights with burst damage. All you really need to know about this match-up is that Shigaraki prevents you from using your self heal when you are within his decay fields.
Tomura Shigaraki (Catastrophe)
Difficulty Score: 🔴Unfavorable🔴
Assault Shigaraki can shred you with long range combos along with difficult to dismantle touch of death combos. He has a more consistent ranged game and stronger combos, but in return he is not as strong indoors, as his AoE attacks last a shorter amount of time and he can be easily interrupted, allowing you to fight back and maybe kill him as long as you are both indoors. Avoid getting caught outdoors at a poor time and you will do fine.
Tomura Shigaraki (Thousand-Hand Break)
Difficulty Score: 🔴🔴Very Unfavorable🔴🔴
Technical Shigaraki puts out an incredible amount of damage and has good movement, along with constant healing, making dealing with him a nightmare. You cannot fight him indoors as he has large attacks that deal a ton of damage and the ability to hit through walls. You are unable to outdamage his healing in most situations. He will easily kill you through his high and nearly unavoidable damage, you will need your whole team to take care of this raid boss of a character.
All For One (Default)
Difficulty Score: 🟣Unknown🟣
All For One has a powerful yet manageable base kit allowing him to match your damage and strength indoors, along with being able to hit through walls with his beta, as well as with great power outdoors, however he may have a quirk that counters you or a quirk that you counter, making this a difficult match-up to talk about.
All For One -Youth Age-
Difficulty Score: 🔴🔴Very Unfavorable🔴🔴
Young All For One has solid damaging AoE attacks and is almost always flying, making this an already difficult fight, but then he can temporarily disable your special action. You want to try and fight him indoors for the best chance of victory, although you still want to fight him with your team as fighting him solo will likely cause you to lose.
Dabi (Default)
Difficulty Score: 🟡Even🟡
Tech Dabi and Overhaul fight similarly, using AoE attacks and snuffing out approaches using their strong defensive skills. When fighting Dabi you want to interrupt his gamma to make fighting him easier however, abuse your gamma when Dabi does not have his gamma up so you can stun him and deal a good chunk of damage and take out any nearby traps, and then when Dabi has his gamma up you want to stay a little bit away and use your beta through the fire walls as they absorb your alpha, gamma and special action.
Dabi (Crazy Torch)
Difficulty Score: 🟢🟢Very Favorable🟢🟢
Strike Dabi struggles to even attack Overhaul as his ranged option is easy to avoid, his main damage source is completely countered by Overhaul’s defensive capabilities and special action, and he has poor and predictable movement, making this one of the easiest fights for Overhaul.
Himiko Toga (Default)
Difficulty Score: 🔴🔴Very Unfavorable🔴🔴
Technical Toga can steal blood safely from range, making it difficult already for Overhaul as she will be constantly healing as you try to deal damage to her. You want to get really good at rolling her gamma to avoid her stealing your blood and getting free heals. You also want to lure her indoors and fight her then, as you are stronger than her inside, making this a much more manageable match-up.
Himiko Toga (Sting Dance)
Difficulty Score: 🔴🔴Very Unfavorable🔴🔴
Rapid Toga is a near unwinnable match-up with being very difficult to hit and having easier access to your blood. She can steal your blood through trades, as her gamma needle is unavoidable and therefore she will always get blood, and she can fight as you to cover her weakness indoors as blood is easier to get and can be abused. You want to try to get your team to deal with her as she is still squishy, making her easier to kill than others.
Twice
Difficulty Score: 🟢🟢Very Favorable🟢🟢
Twice has an inconsistent DPS and relies on clones and close range damage to help deal with you, all of which you deal with very easily. Very easy to defeat in any situation.
Mr. Compress
Difficulty Score: 🟡Even🟡
Mr. Compress can fight indoors and outdoors slightly worse than you as spam rolling negates a fair bit of his damage along with being easy to catch when on the ground. However he is in the air quite a bit, and can escape easily while Overhaul cannot catch him, making this a generally equal fight.
Kurogiri
Difficulty Score: 🔴Unfavorable🔴
Kurogiri can fight remotely and escape from you in nearly every situation. If you get your hands on him he can lose, however the problem is that he can avoid you getting your hands on him very well as well as fight from a great range, making it essentially impossible to fight back or leave without you being able to follow him.
Lady Nagant
Difficulty Score: 🔴🔴Very Unfavorable🔴🔴
Lady Nagant can maneuver midair swiftly while dealing the highest damage in the game, which can cause you to die without getting a chance to heal, along with being able to fight you and take advantage points out of your range, meaning she can shoot you down easily, as you can do nothing about it.
Overhaul
Difficulty Score: 🟡Even🟡
You can attack Overhaul while he can struggle to hit you through acting evasively and jumping constantly, as you can throw out attacks like gammas or betas and roll faster afterwards when used mid air or when utilizing instant gammas, this allows you to attack and then roll making it easier to evade his attacks and fighting without taking much damage, stretching out your heal and forcing your opponent into situations that can make him use his heal sooner, making it easier to kill him.